
Batch Billing draws every billable file into one screen so you can raise multiple debtor invoices in a single run, save them all as drafts, then approve and send each one. It’s the standard end-of-period workflow for accounts staff — quicker and less error-prone than billing each file individually.
Generate the draft bills
Batch billing is a two-stage process: first you create the invoices as drafts, then you approve them. This section covers the draft stage.
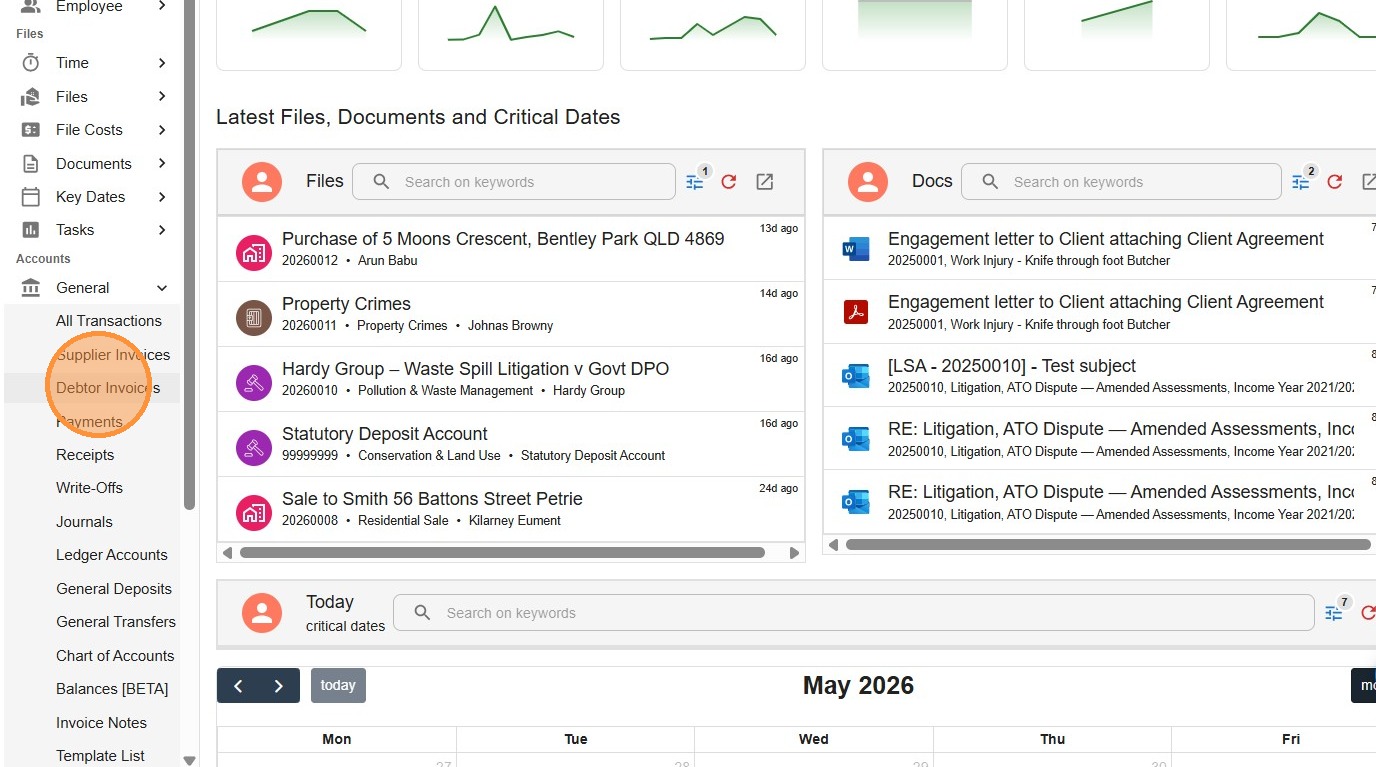
- From the left-hand menu, open Accounts > General > Debtor Invoices.
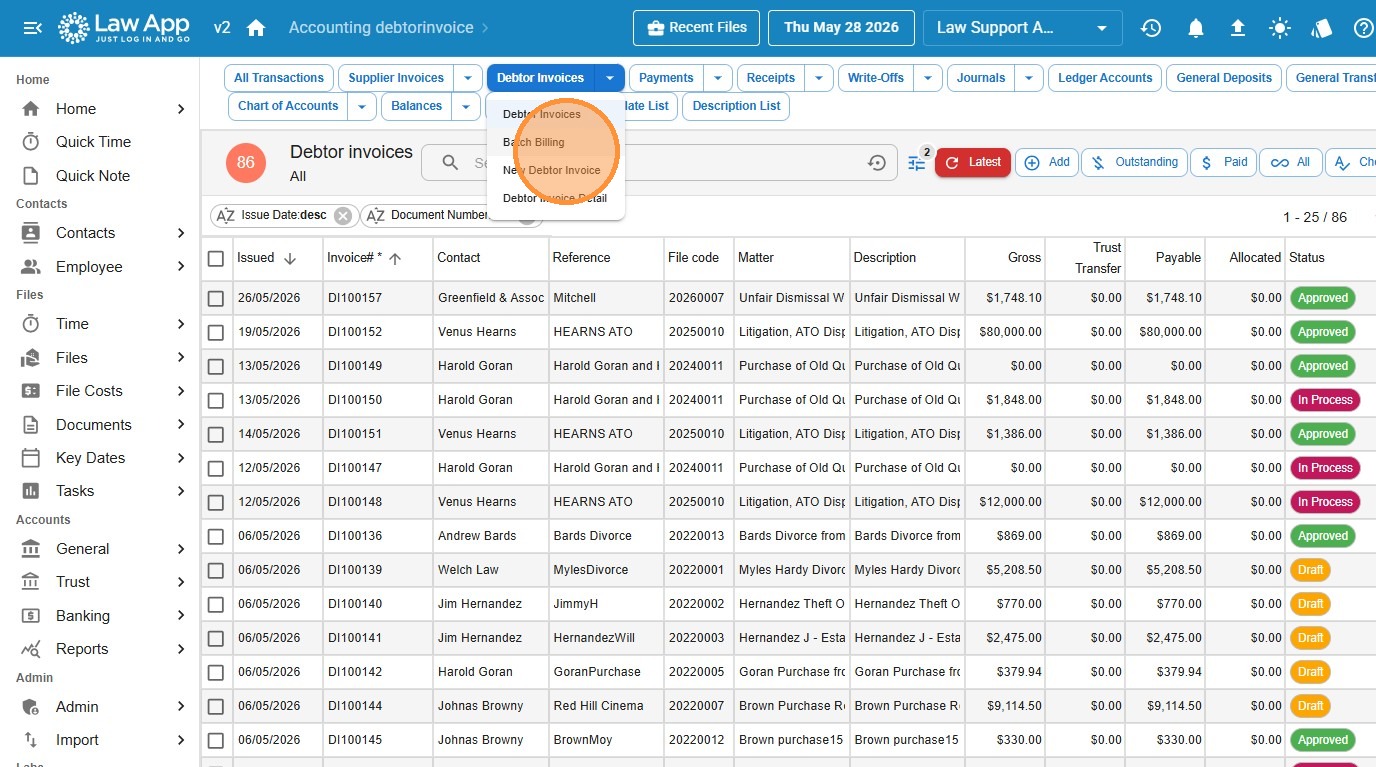
- At the top of the Debtor Invoices screen, click the Debtor Invoices dropdown and choose Batch Billing.
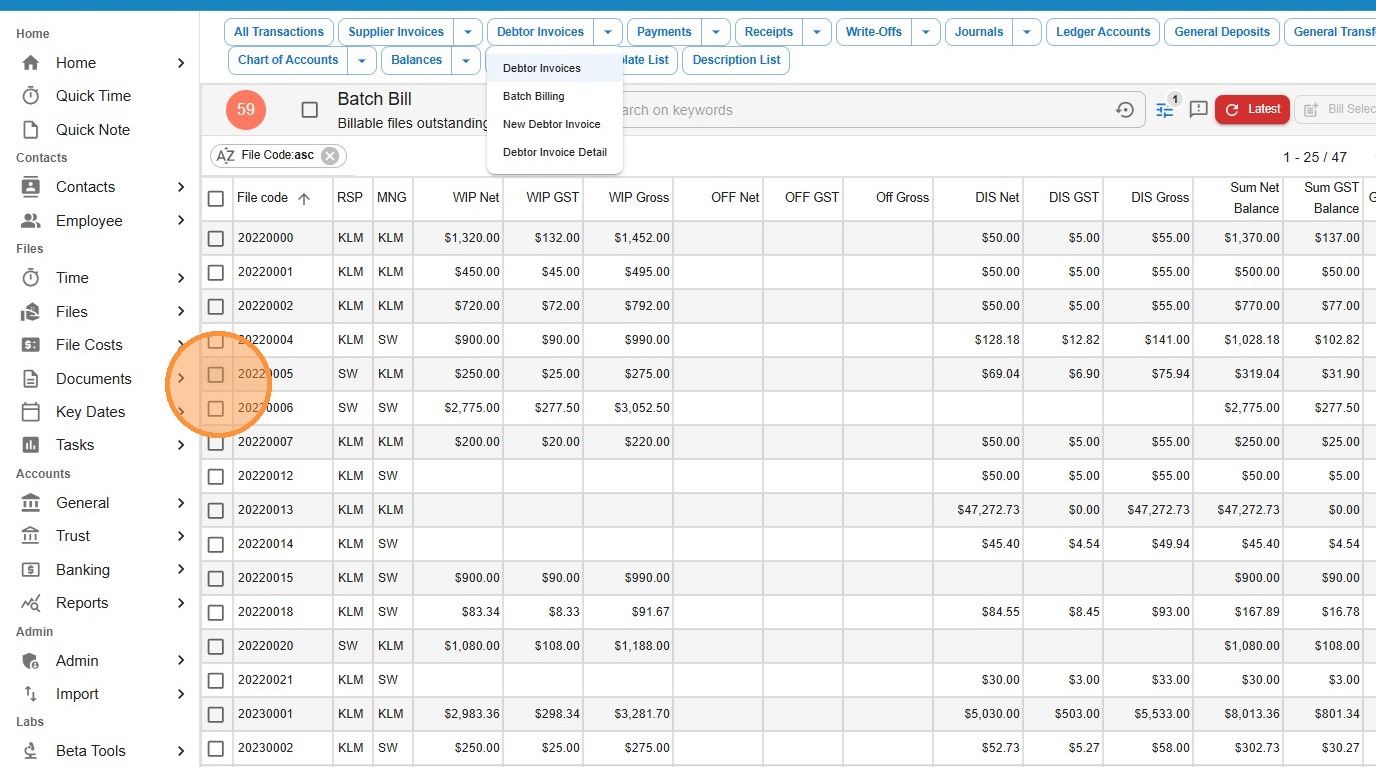
The Batch Bill screen lists every file with billable amounts outstanding — WIP, disbursements, or both. Each row is a file you can bill.
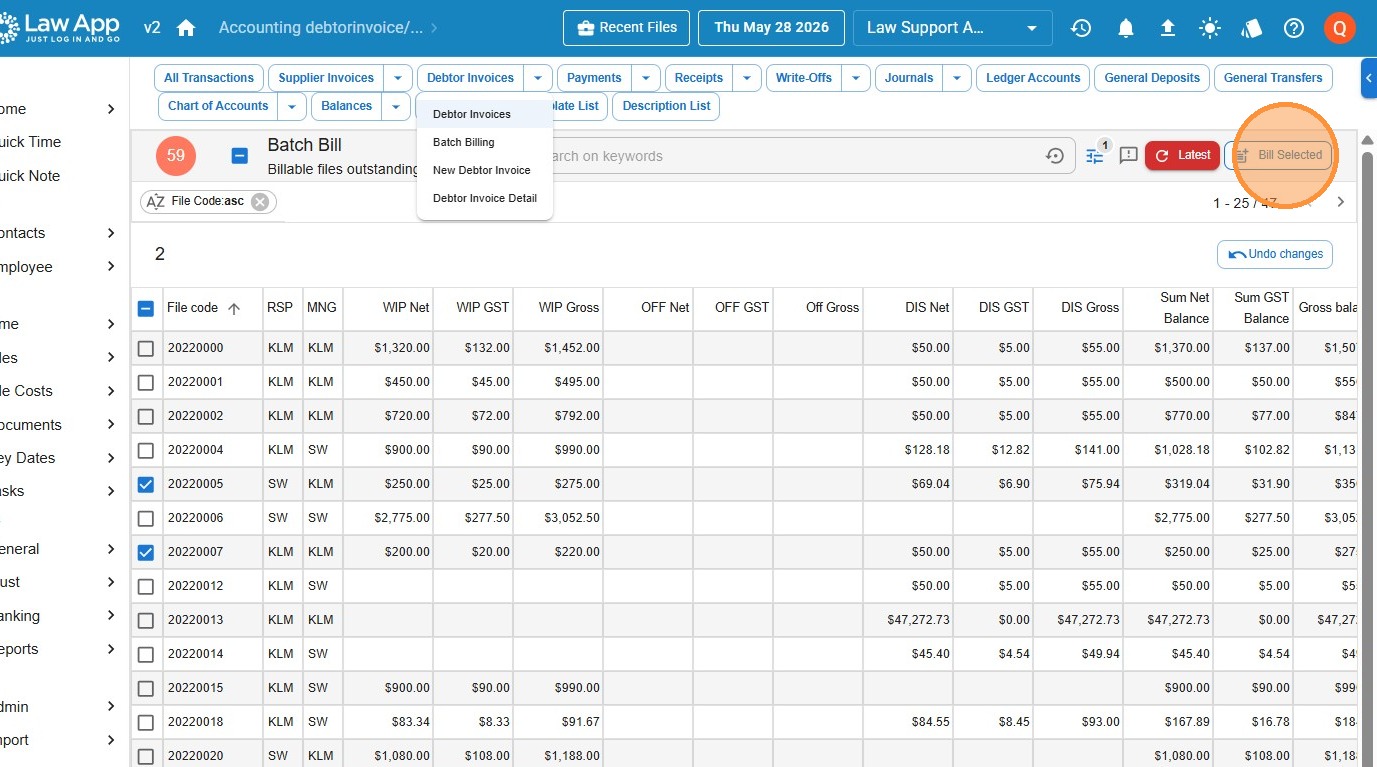
- Tick the checkbox for each file you want to include in this billing run.
- Click Bill Selected at the top right.
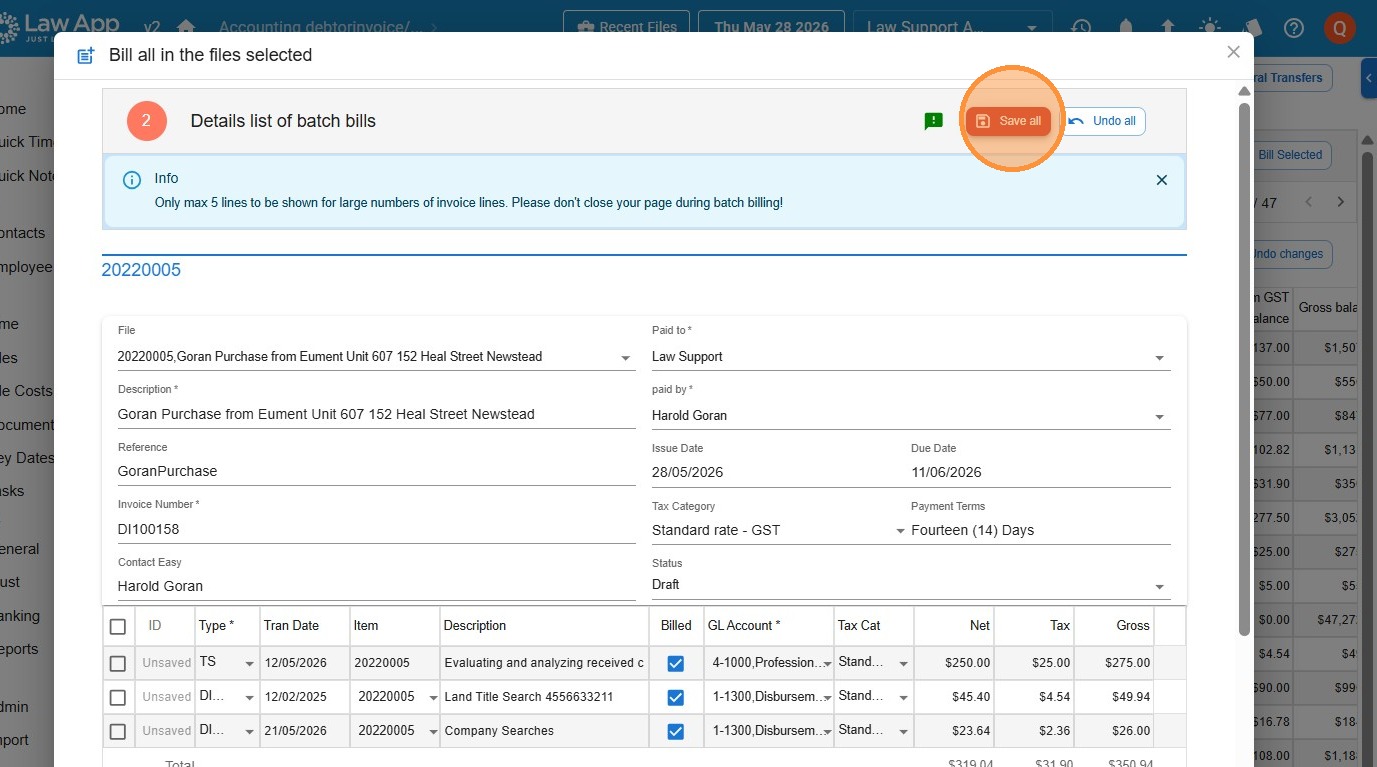
Law App opens a detail dialog showing every draft bill that’s about to be created — invoice number, client, file, line items, totals. This is your chance to review before anything is saved.
- Review each draft. When you’re happy, click Save all.
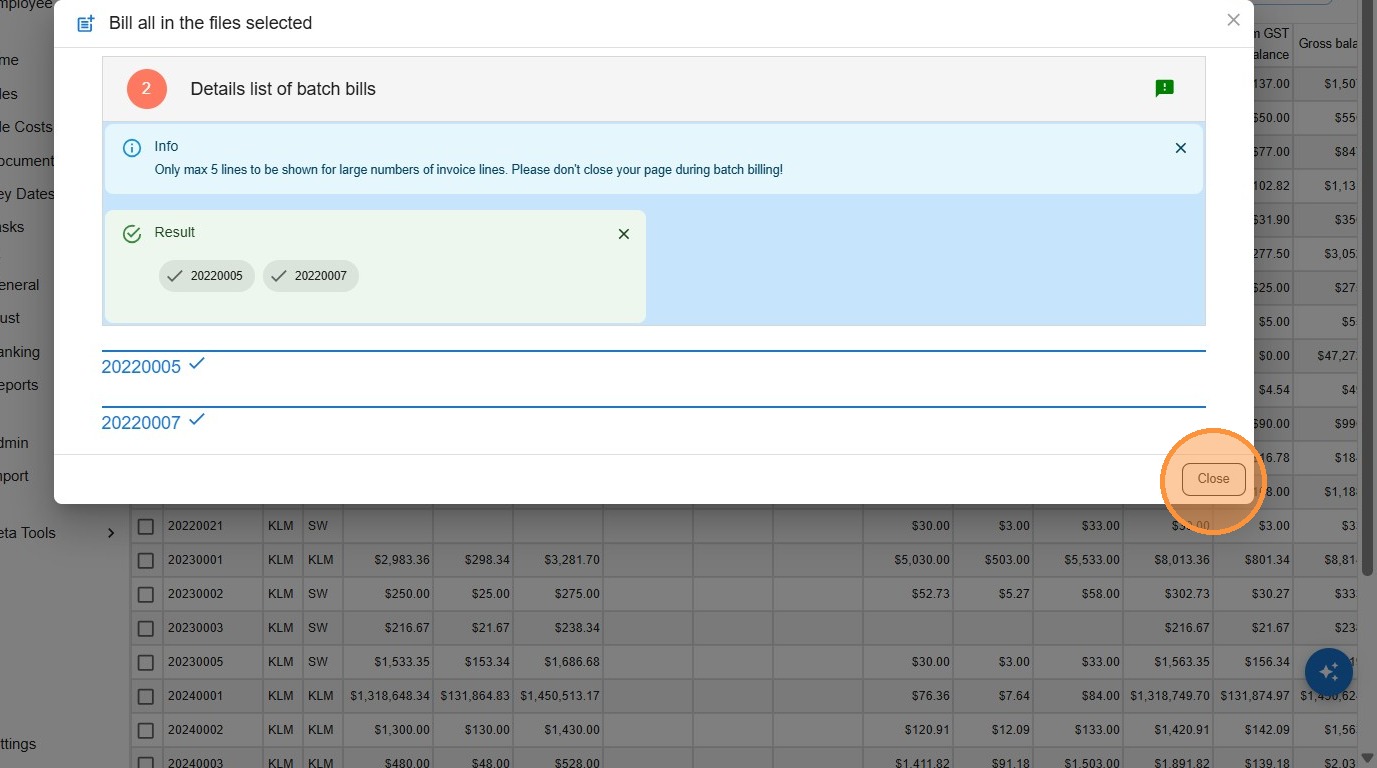
- When the result panel lists the invoice numbers that were created, click Close.
Approve the invoices
Approving an invoice locks it, posts it to the general ledger, and creates the debtor balance the client owes. From this point the invoice is ready to print, email, and have payments applied against it.
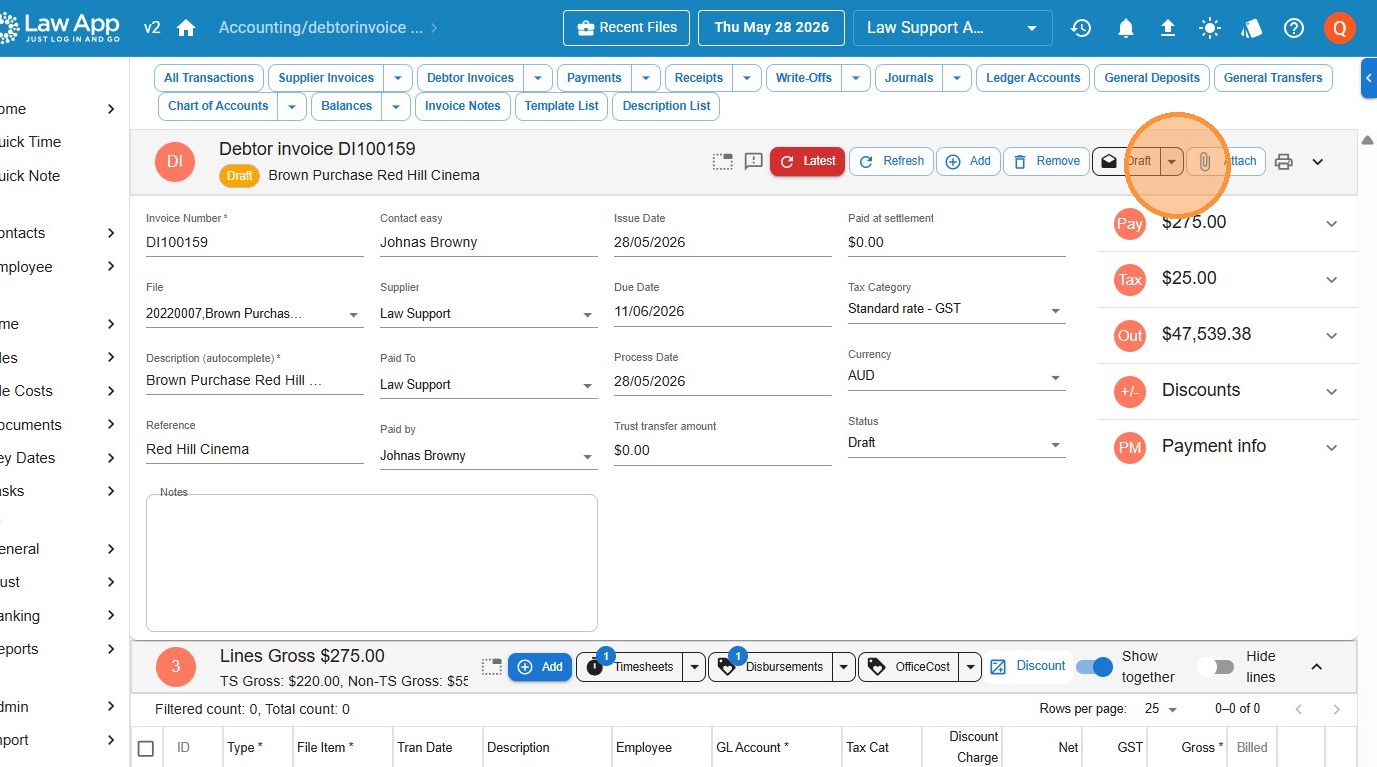
- Go back to the main Debtor Invoices list. The new drafts appear at the top with a Draft status badge.
- Open each draft invoice in turn.
- On the invoice, change the status from Draft to Approved.
Leave a Reply