
Law App gives you three ways to send documents and emails straight from a file: a quick one-off attachment, a firm email template with merge fields already filled in, or a blank email straight to a contact. Which one you reach for depends on whether you need speed, a consistent template, or just to get in touch with someone quickly.
Sending documents by email from the Documents area
Both methods below start in the same place — the Documents area of the file — and let you attach one or more documents to an email without leaving Law App.
Method 1 — Quick Email
Use this when you want to attach documents to a blank email you can address to anyone.
- Go to the Documents area of the file and tick the box next to each document you want to send.
- Click the Quick Email Attachment icon.
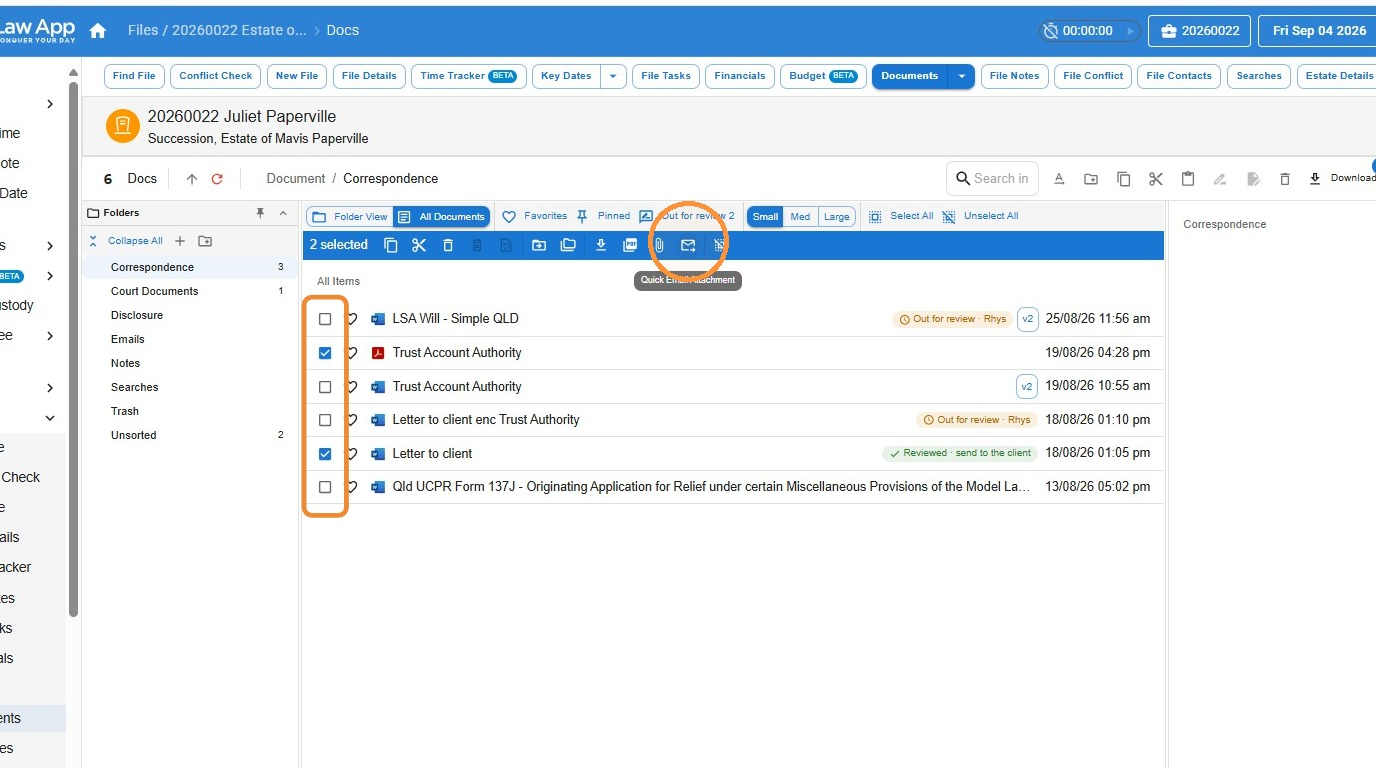
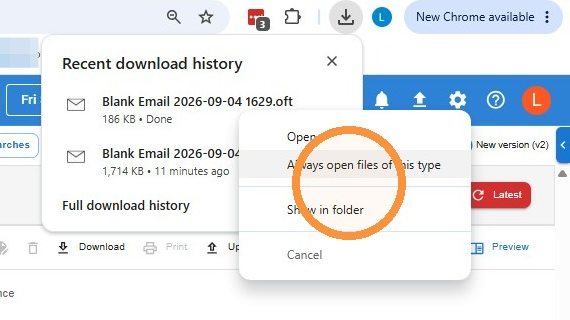
- The email downloads automatically, ready to open and send.
Method 2 — Email template
Use this to attach documents to an email using one of your firm’s email templates — set up to send to a particular party on a file, such as Email to Client. Firms can set up multiple templates, which is handy for emails that are regularly sent on certain types of matters.
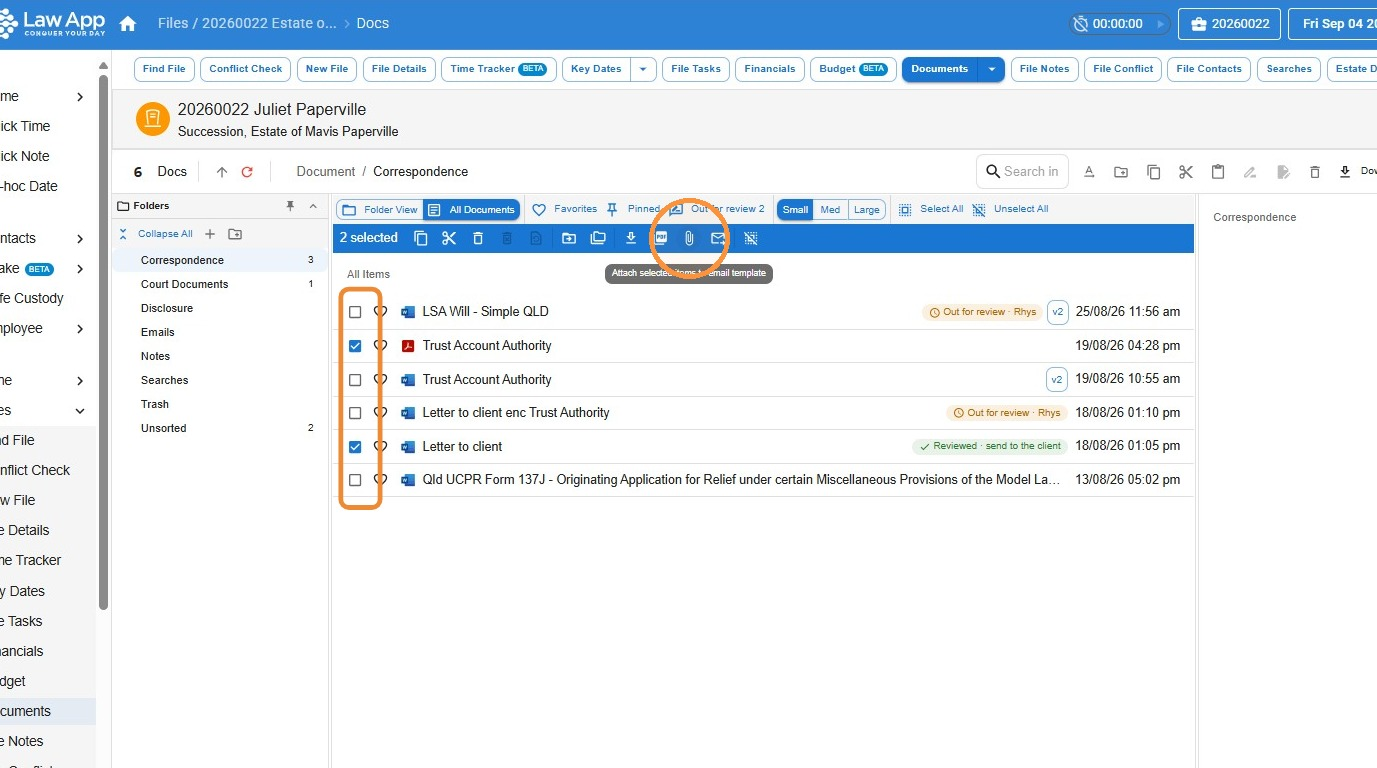
- In the Documents area of the file, tick the documents you want to email.
- Click Attach selected documents to email template.
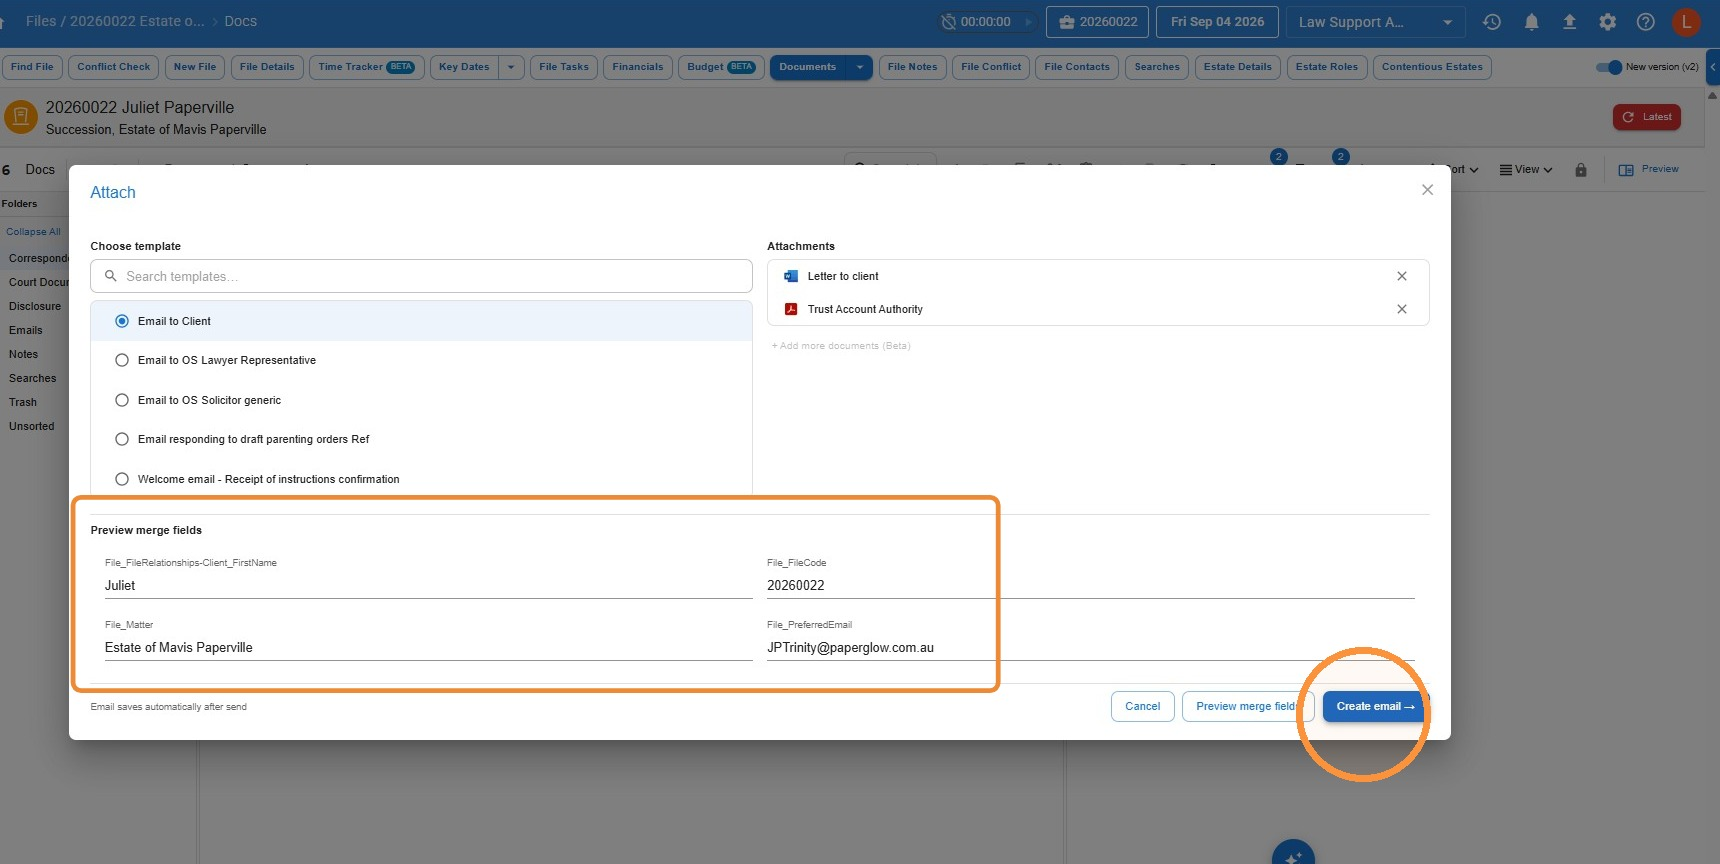
- Choose the template you want to use, then click Preview merge fields.
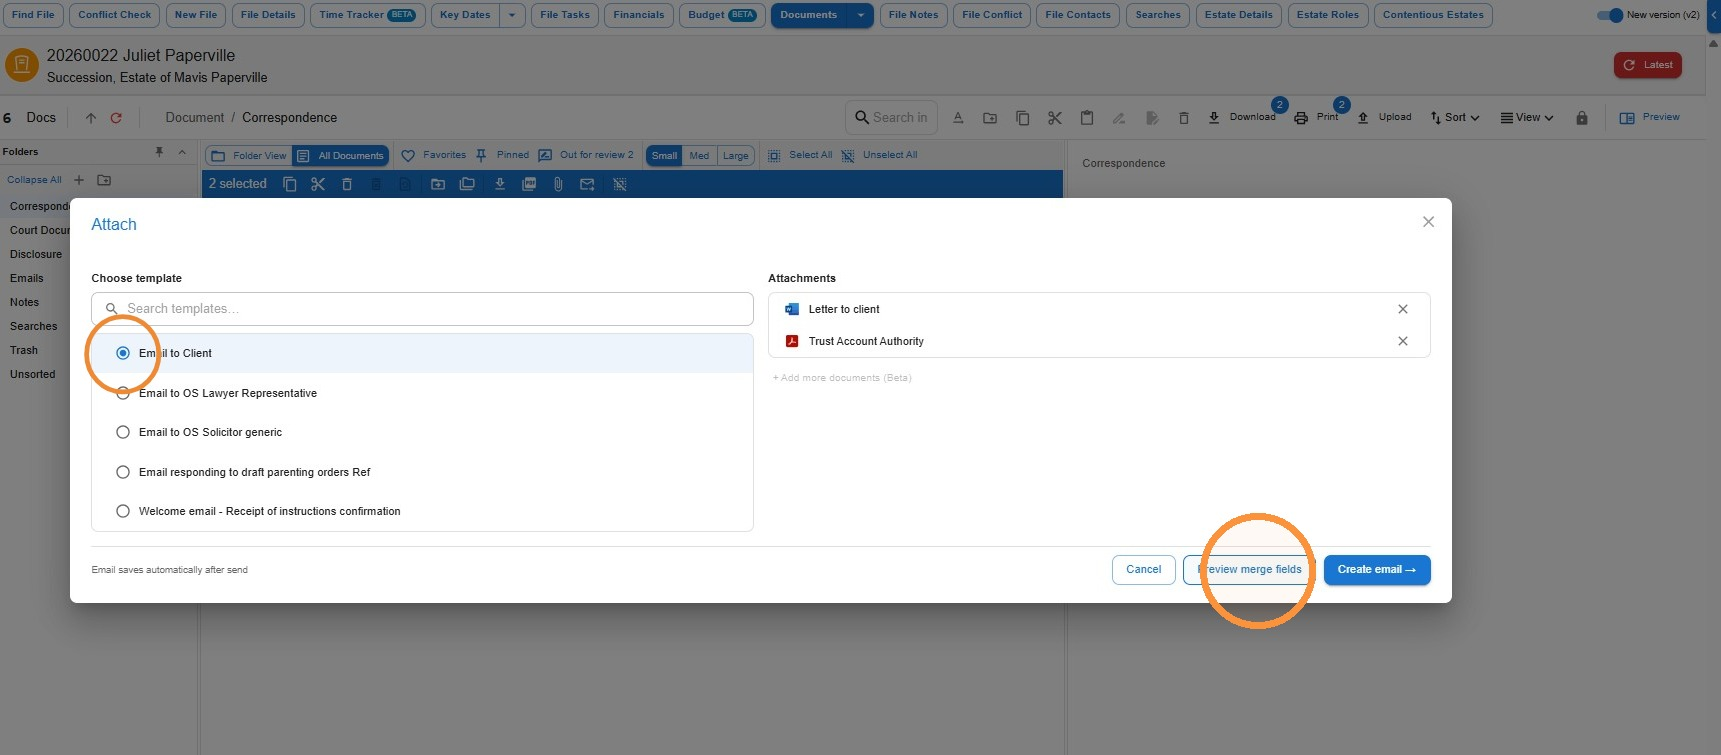
- Check the merge fields shown are complete. A blank field usually means that information hasn’t been entered on the file or the contact — you can type it in here, but it’s best practice to update the file or contact record so it’s there for next time.
- Once everything looks right, click Create email.
Emailing a contact on the file
You can also generate a blank email to any contact on the file — which can be useful when you just need to reach someone quickly, and you can still choose to attach documents to these emails.
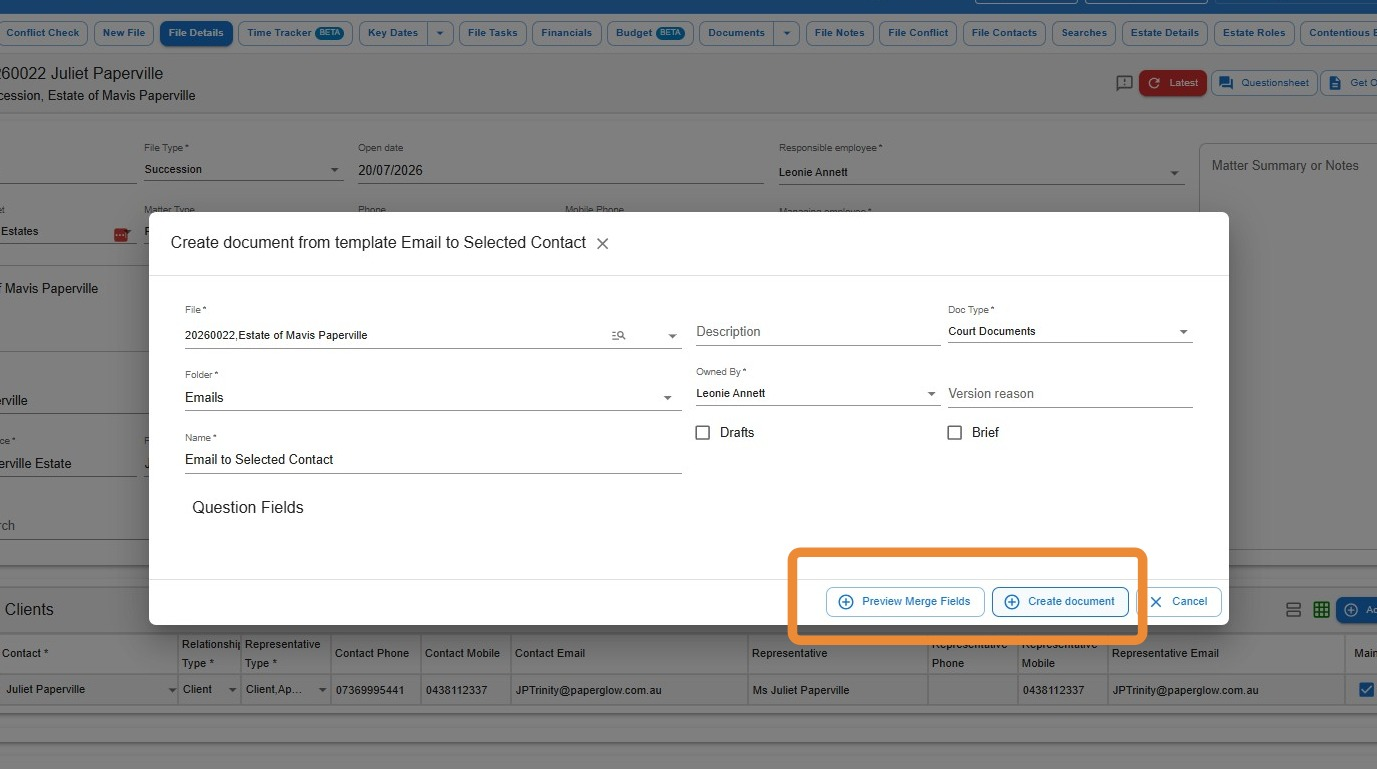
- From either the File Details area or the File Contacts area, click the red mail icon next to the contact.

- This automatically creates the email using the Email to Selected Contact template.
- Click Preview Merge Fields to check the details are correct, then click Create document.
- Once the email opens in Outlook, if you’d like to attach documents, you can use the Attach Documents tool to choose the documents you’d like to attach. Otherwise, just send as usual.
Leave a Reply