
Once you’ve set up your Cost Types, recording the actual expense against a client file takes about ten seconds. The same entry screen handles both office costs and disbursements — the Cost Type you select tells Law App which one it is.
This article covers the central entry method (entering from the File Costs sidebar). It’s the right method when you’ve got a batch of costs to enter across several files. If you’re already working in a specific file, the in-file shortcut is faster.
New to Cost Types? Read How to Add a Cost Type first — you need a Cost Type set up before you can enter a transaction.
Before you start
- Open Law App in your browser (Chrome recommended, Edge also supported).
- Make sure the Cost Type you want to use already exists. If not, set it up via How to Add a Cost Type.
- Have the File Number ready for the file the cost belongs to.
Step 1 — Navigate to the Disbursements tab
The entry screen is shared between office costs and disbursements:
- From the left-hand sidebar, click File Costs.
- Click Office Costs.
- Select the Disbursements tab.
Don’t be thrown by the name — the Disbursements tab handles both types. The Cost Type you choose in the next step is what determines whether the entry becomes an office cost or a disbursement.
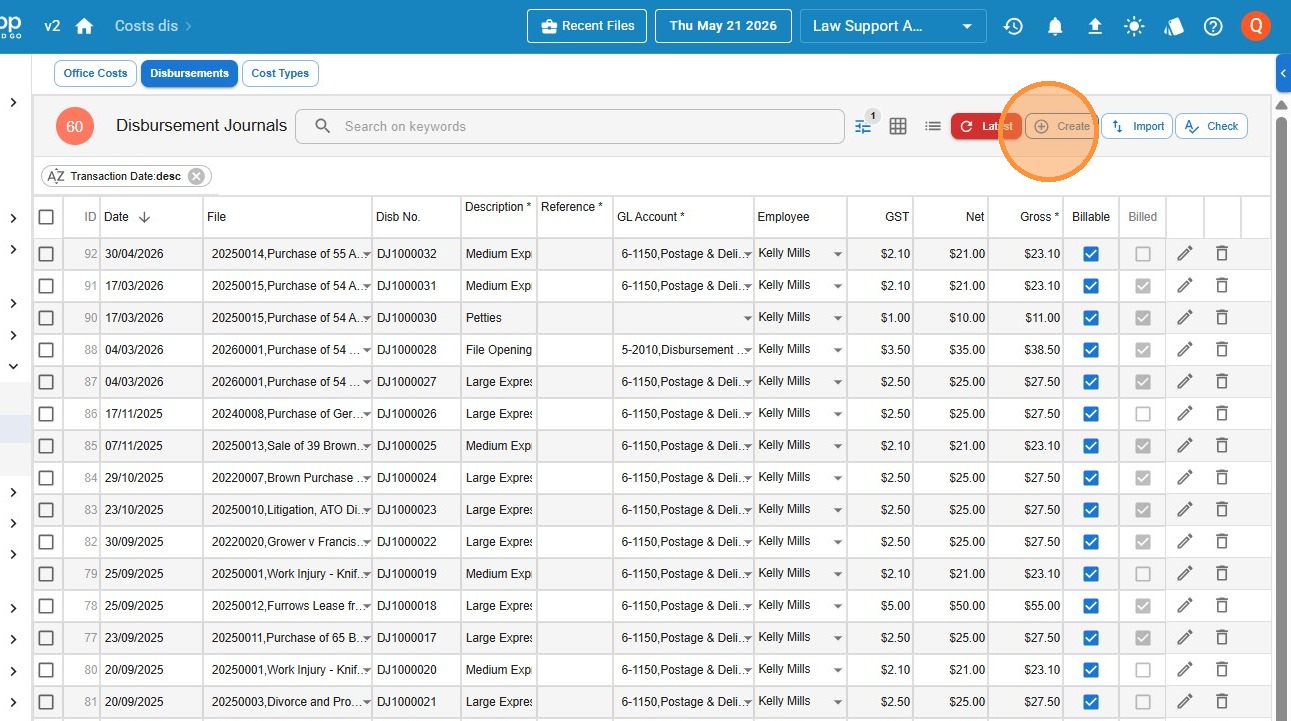
Step 2 — Create a new entry
Click the Create button at the top right. A new blank row appears, ready for you to fill in.
Step 3 — Select the file
Click into the File field and start typing the file number or client name. Law App will search as you type — select the correct file from the dropdown.
Step 4 — Select the Cost Type
Click into the Cost Type field and select the appropriate Cost Type from the dropdown. This is the step that determines what kind of entry this becomes:
- Cost Type with a GL Account → posts as a disbursement (draws from the GL where the supplier expense was originally recorded)
- Cost Type without a GL Account → posts as an office cost (default office cost GL is applied at billing)
The price, description, and GST treatment all flow through from the Cost Type you set up.
Step 5 — Adjust quantity or price if needed
If the Cost Type has a default price (e.g. $8.45 for one Express Post bag), Law App pre-fills it. You can adjust the Quantity if the client used more than one — for example, three Express Post bags = quantity of 3.
You can also override the price for this entry if needed, though the standard practice is to leave the default in place so the price stays consistent across the firm.
Step 6 — Save
Click Save. The entry is now sitting against the client’s file and is ready to be picked up at the next bill run.
What happens behind the scenes
- For a disbursement: Law App posts a journal that moves the cost from the GL Account on the Cost Type onto the client’s file. The original supplier expense is reduced by that amount; the client’s file picks it up as a billable disbursement.
- For an office cost: Law App holds the charge against the client’s file. At billing, the system applies the default Office Cost GL — there’s no draw-down from a supplier expense.
For more on how the two differ, see Office Costs vs Disbursements — Understanding the Difference.
Common questions
Why is the entry screen called “Disbursements” if it handles both?
History — when the journal was first built it only handled disbursements. Office cost handling was added later and kept on the same screen because the workflow is identical. The Cost Type does the heavy lifting.
Can I bulk-enter several costs at once?
Yes. After you click Save on one entry, click Create again and a new row appears. The Disbursements tab can hold a list of pending entries — Save them individually as you go.
What if I picked the wrong file?
You can edit the entry directly in the list. Click into the File field, change it, and Save.
The Cost Type I need isn’t in the dropdown.
It hasn’t been set up. Go to the Cost Types tab and add it, then come back here.
Where to next
- Quicker alternative if you’re already in the file — How to Enter a Cost from Within a File
- Setting up a new Cost Type — How to Add a Cost Type
- Understanding the distinction — Office Costs vs Disbursements
Leave a Reply