
If you’re already working in a client’s file, there’s no need to leave it to record an expense. The Financials tab on every file lets you add an office cost or a disbursement directly against that file — no file lookup required.
This is the quickest method when you’ve just completed a piece of work on a matter and want to record a cost while it’s fresh. For batch entry across multiple files, the central journal screen is still the better choice.
If you’re new to Cost Types and the distinction between office costs and disbursements, start with Office Costs vs Disbursements — Understanding the Difference and How to Add a Cost Type.
Before you start
- Open Law App in your browser (Chrome recommended, Edge also supported).
- The Cost Type you want to use must already exist. See How to Add a Cost Type if you haven’t set one up yet.
Step 1 — Open the file
Find and open the file you want to record the cost against. You can do this from the Find File option in the sidebar, or from any list where the file appears.
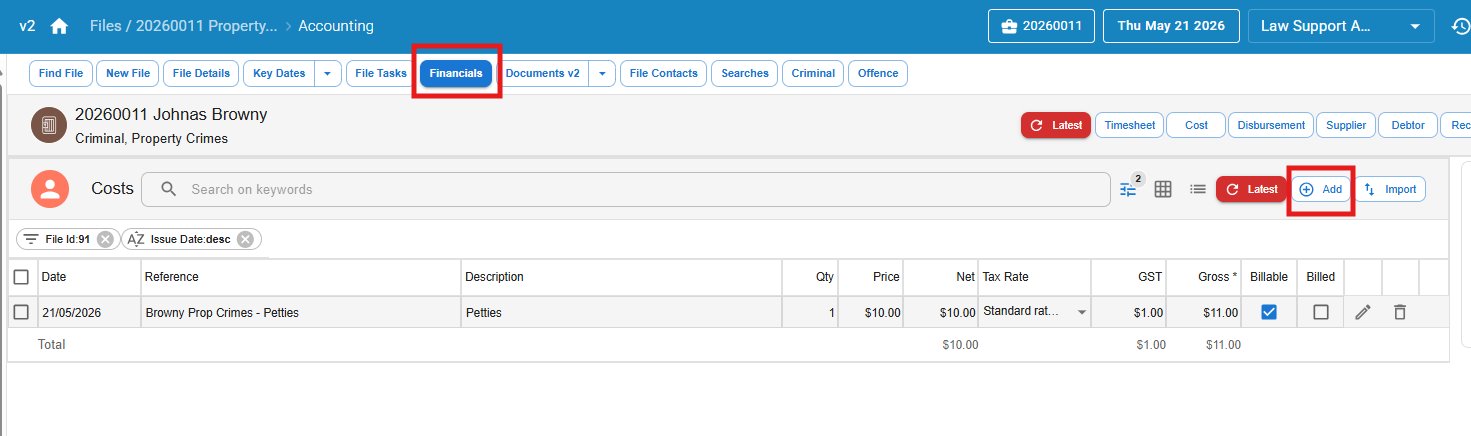
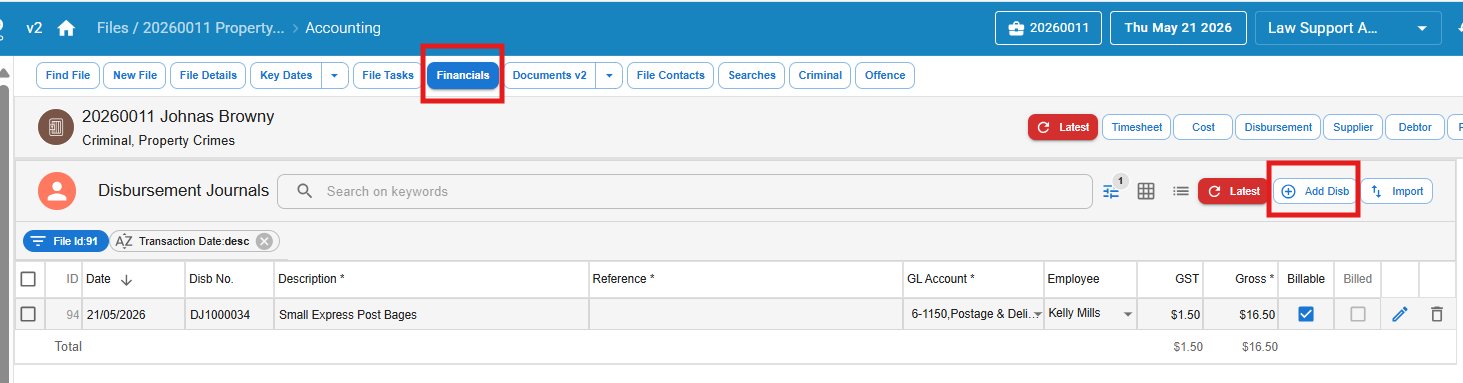
Step 2 — Go to the Financials tab
Across the top of the file, click Financials. The Financials view opens with several sub-sections: Latest, Timesheet, Cost, Disbursement, Supplier, Debtor, and Receipts.
The two sub-sections you’ll use here are Cost and Disbursement.
Step 3 — Pick the right sub-section
This is the only place where the workflow visibly splits between the two cost types:
- For an office cost → click the Cost sub-section.
- For a disbursement → click the Disbursement sub-section.
You’ll see the existing entries for that file (or “No data” if there are none yet).
Why the split? In the central entry screen, both types share one list. From within a file, Law App separates them into two views so you can see at a glance what the file has accumulated — billable office charges in one column, disbursements paid on the client’s behalf in the other.
Step 4 — Click the Plus button
On the Cost sub-section → click Add (the + button in the top right of the Costs list).
On the Disbursement sub-section → click Add Disb (the + button in the top right of the Disbursement Journals list).
A new blank entry row appears, with the current file already filled in.
Step 5 — Select the Cost Type and save
From here the workflow matches the central entry screen:
- Select the Cost Type from the dropdown.
- Adjust the Quantity if needed (default is 1).
- The price flows through from the Cost Type — adjust only if you need to override.
- Click Save.
The entry is now recorded against the file and ready for the next bill run.
What happens behind the scenes
Recording a cost from within the file is identical to recording it from the central screen — Law App writes the same journal in the same way. The only difference is convenience: the File field is pre-filled, so you skip one step.
For the same reasoning on disbursement vs office cost posting, see How to Enter an Office Cost or Disbursement Journal.
Common questions
Can I see all costs and disbursements together for a file?
Yes — click the Latest sub-section at the top of Financials. It shows a combined view of everything recent on the file, regardless of type.
The Add button doesn’t appear.
Check your user permissions. The ability to add costs and disbursements is controlled by role. If you should have access but don’t, speak to your firm’s Law App administrator.
Which method should I use — file-level or central?
It comes down to what you’re doing in the moment:
- You’ve just finished a piece of work and want to record one cost → file-level (you’re already there).
- You’re processing a batch of costs across multiple files (e.g. weekly Express Post recoveries) → central entry, so you don’t have to navigate in and out of each file.
Both methods produce exactly the same result.
Where to next
- Central entry walkthrough — How to Enter an Office Cost or Disbursement Journal
- Setting up Cost Types — How to Add a Cost Type
- Office cost vs disbursement explained — Office Costs vs Disbursements
Leave a Reply