
Auto Time is currently in Beta and will be released to all firms soon. If you’d like access now, contact our support team at support@lawsupport.com.au or call 07 3040 3036.
Auto Time is an automatic time tracker. It quietly records the time you spend on each file while you work, so you don’t have to remember to start and stop a timer.
Nothing Auto Time records is billed on its own. It captures blocks of time, you review them, and you decide which ones become time entries.
Auto Time captures
Blocks of working time are recorded against whichever file you have open, along with the pages you worked on.
You review and convert
Only the blocks you convert become timesheet entries — saved as a draft or finalised, ready to bill.
How Auto Time captures time
- Just work. Sign in and open a file. A timer appears in the header showing what is being recorded — there’s nothing to start.
- Time follows the file you have open. Open a different file and Auto Time closes the current block and starts a new one against the new file.
- Only real working time counts. Time isn’t recorded while the tab is in the background, or after 5 minutes with no typing or clicking. Walking away from your desk won’t inflate the day.
- It remembers what you were doing. Each block records which pages the time went to — for example Documents 11m, File Details 4m, Financials 3m — and that becomes part of the draft description, so you don’t have to retype it.
- It survives a crash. A refresh, a closed tab or a browser crash loses at most a few seconds. Several tabs open at once still record one stream of time, not two.
Reviewing your Auto Time entries
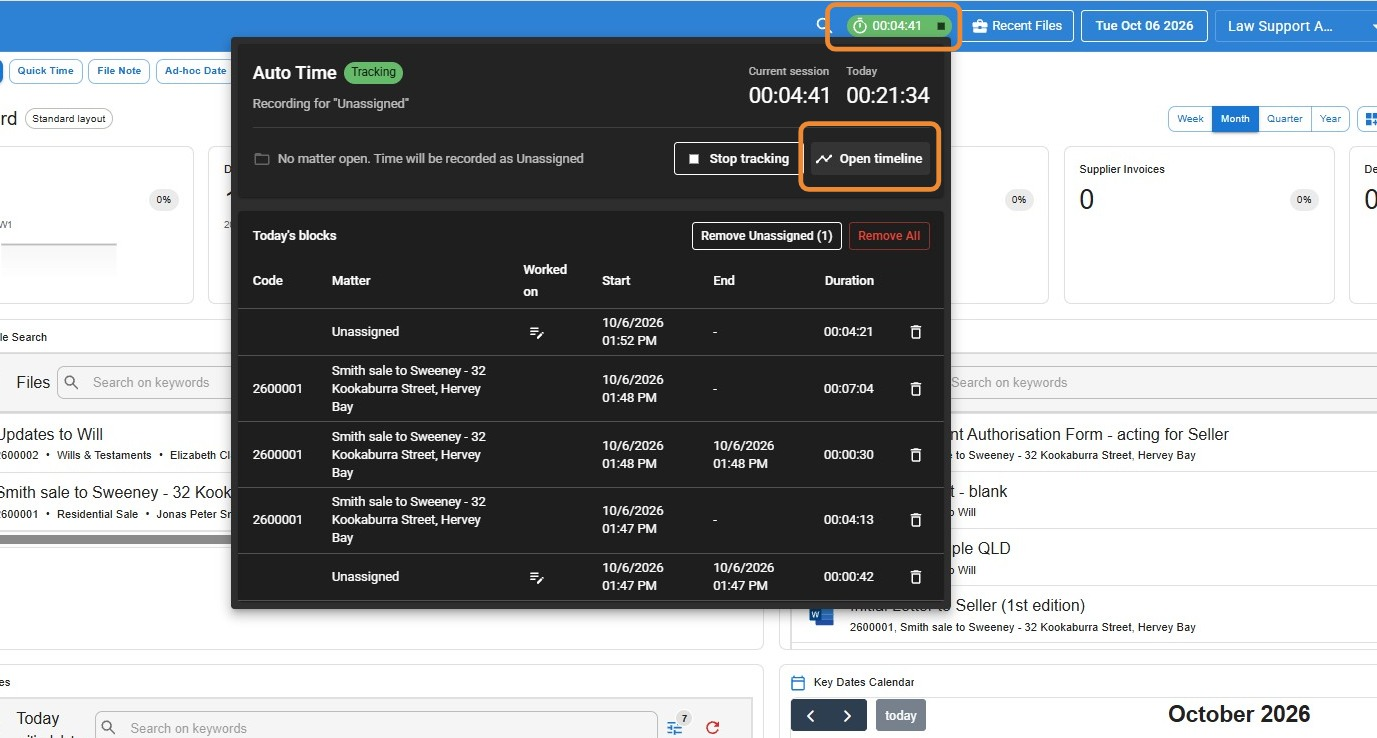
- Click the timer in the header to open the Auto Time panel. You’ll see the current session, today’s total and a summary of today’s blocks.
- To remove a block, click the bin icon on that row. You can also click Remove Unassigned (blocks with no file) or Remove All.
- To see more detail and convert blocks into timesheet entries, click Open timeline. You can also open the timeline from Time > Auto Time in the left-hand menu.
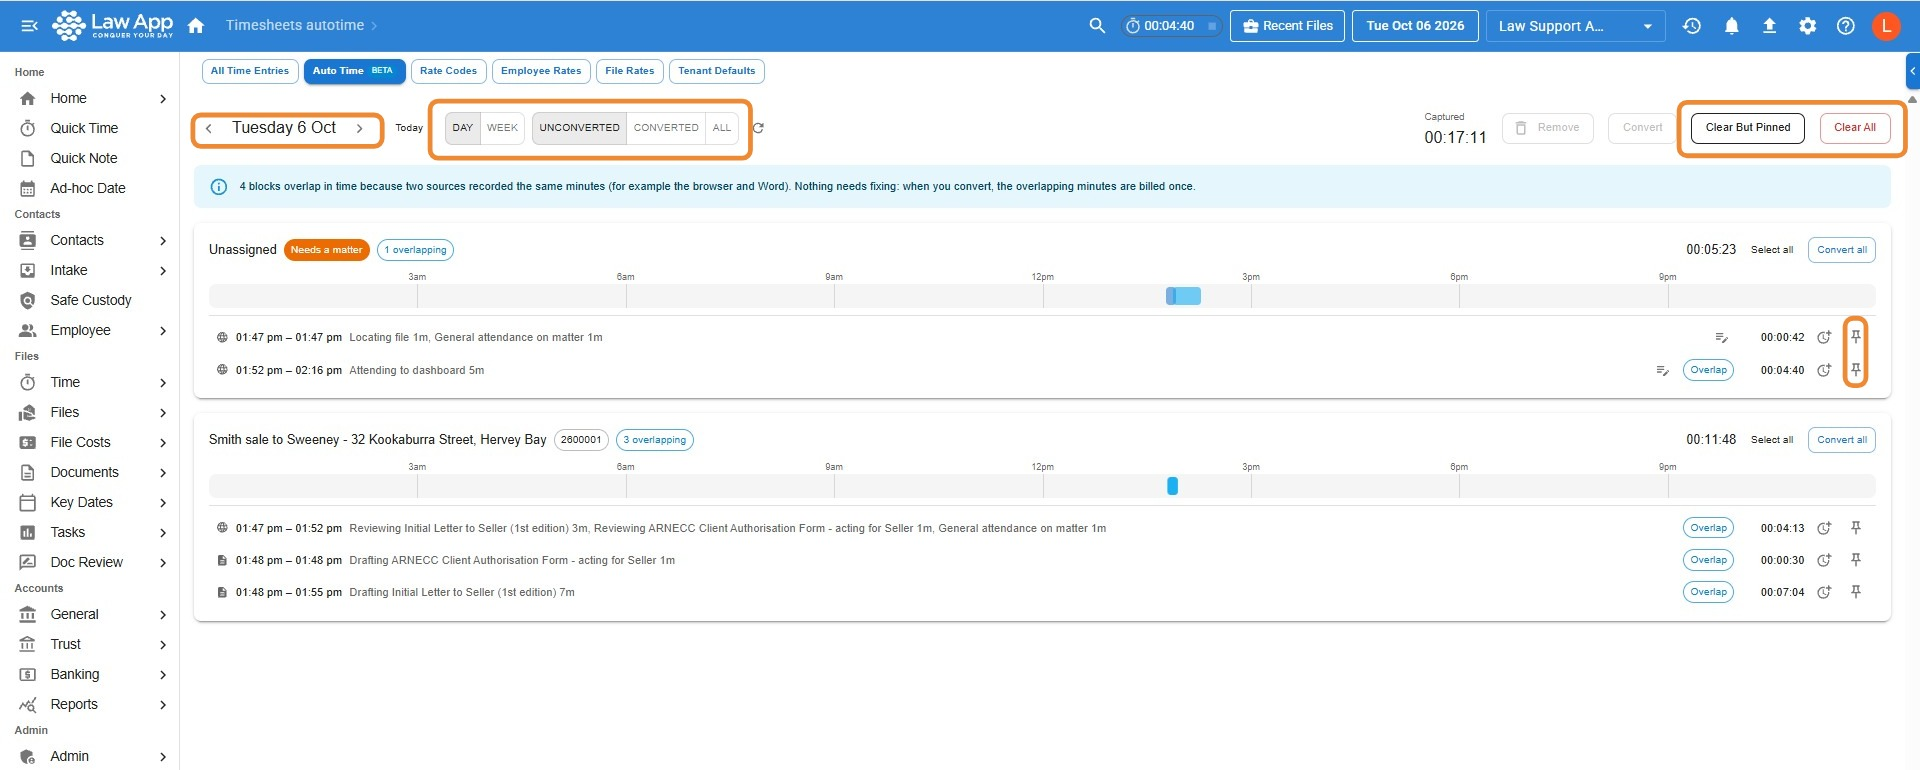
Reviewing captured time on the timeline
The timeline opens on the Auto Time tab of your timesheets, with your captured blocks grouped by file.
- Use the display options to choose what you see:
- Day or Week view
- Unconverted, Converted or All blocks
- the arrows beside the date to move backwards and forwards through time periods
- Tidy up your list as needed:
- click the pin icon on any block you want to keep but aren’t ready to convert yet
- click a block, then click Remove to remove just that block
- click Clear All to remove all blocks, or Clear But Pinned to remove everything except your pinned blocks
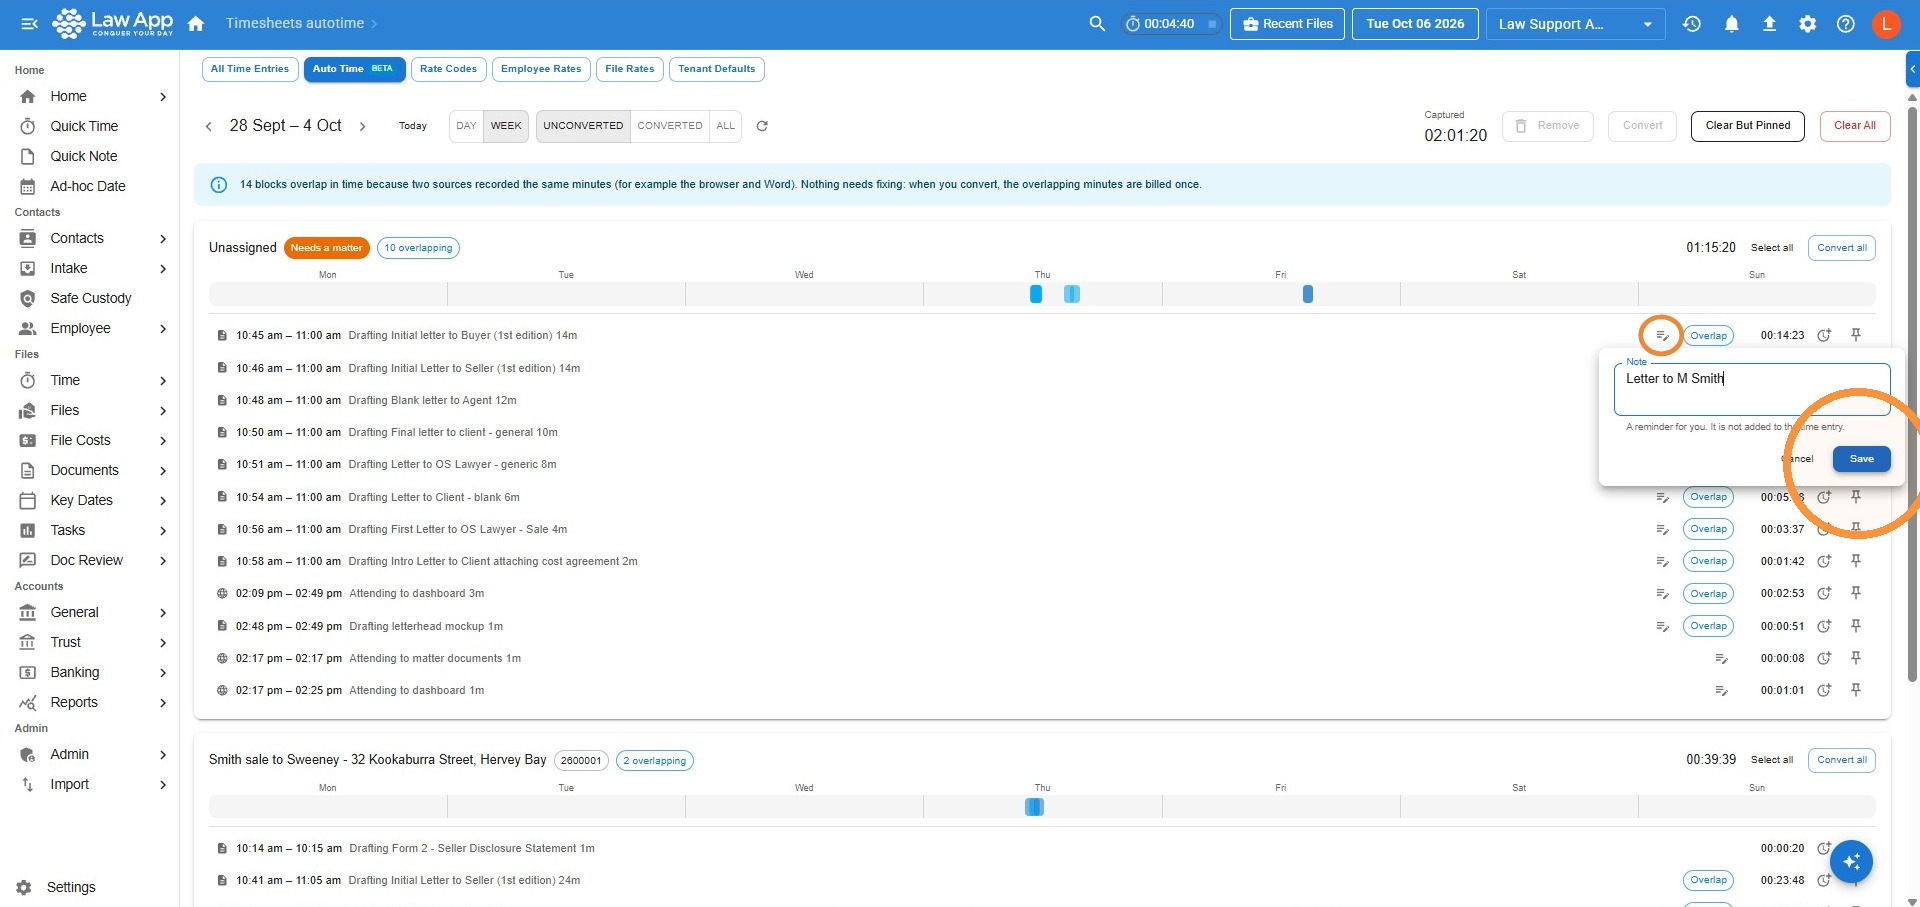
Adding a note to Unassigned time
Unassigned blocks are time recorded when no file was open — for example, while you were working on a new matter before the file was opened. Add a note so you remember which client the time relates to.
- Click the note icon on the Unassigned block, type your note, then click Save.
 Your note then shows on the block, ready for when the file is opened.
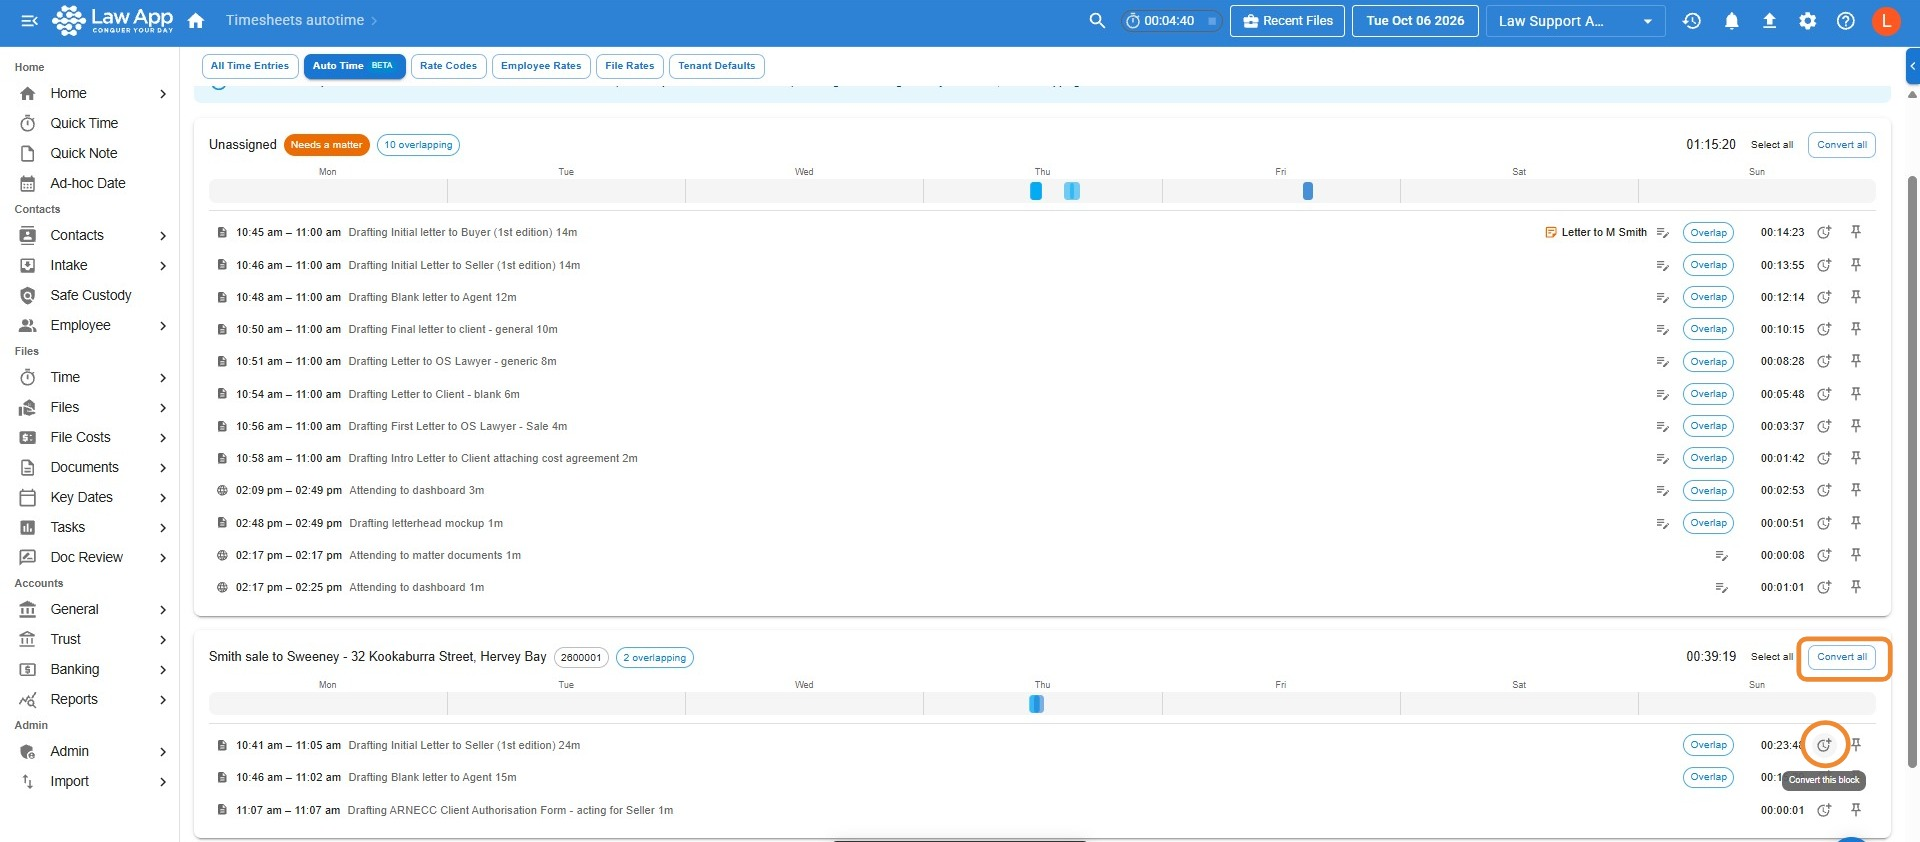
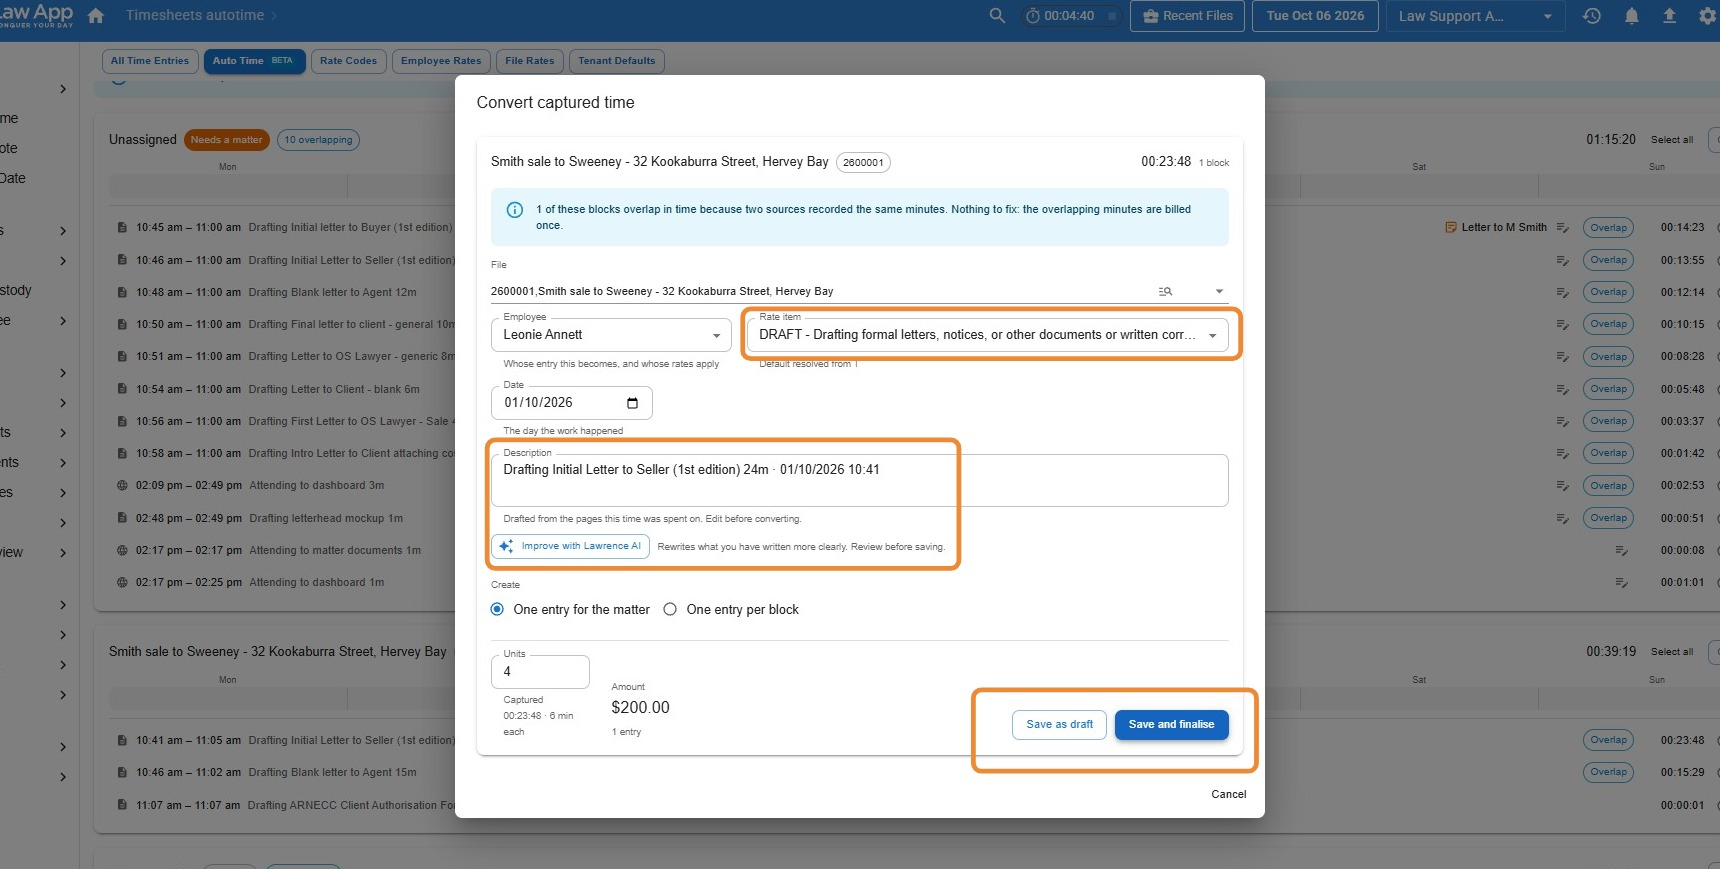
Converting time blocks into time entries
- Click Convert this block to convert a single block into a timesheet entry, or click Convert all to convert every block on that file.
- In the Convert captured time window, check the details:
- select your Rate item
- review the Description and amend it if needed — it’s drafted from the pages the time was spent on. Click Improve with Lawrence AI if you’d like Lawrence to rewrite it more clearly
- change the Employee, Date or Units if needed
- if you’re converting an Unassigned block, select the File
- Click Save as draft to keep the entry in Draft, or Save and finalise to finalise it, ready to bill.
Leave a Reply