
This guide demonstrates how to create, track, and finalise time entries for legal or professional billing purposes. Learn how to update status settings, apply billing rates, and efficiently save records to streamline your administrative workflow.
There are three places you can record time in Law App — All Time Entries, Quick Time, or directly from within a file — and the fields work the same way in each. Pick whichever fits how you’re working.
Recording time in All Time Entries
This option is useful if you like to see a running list of all time entries across all files for the day.
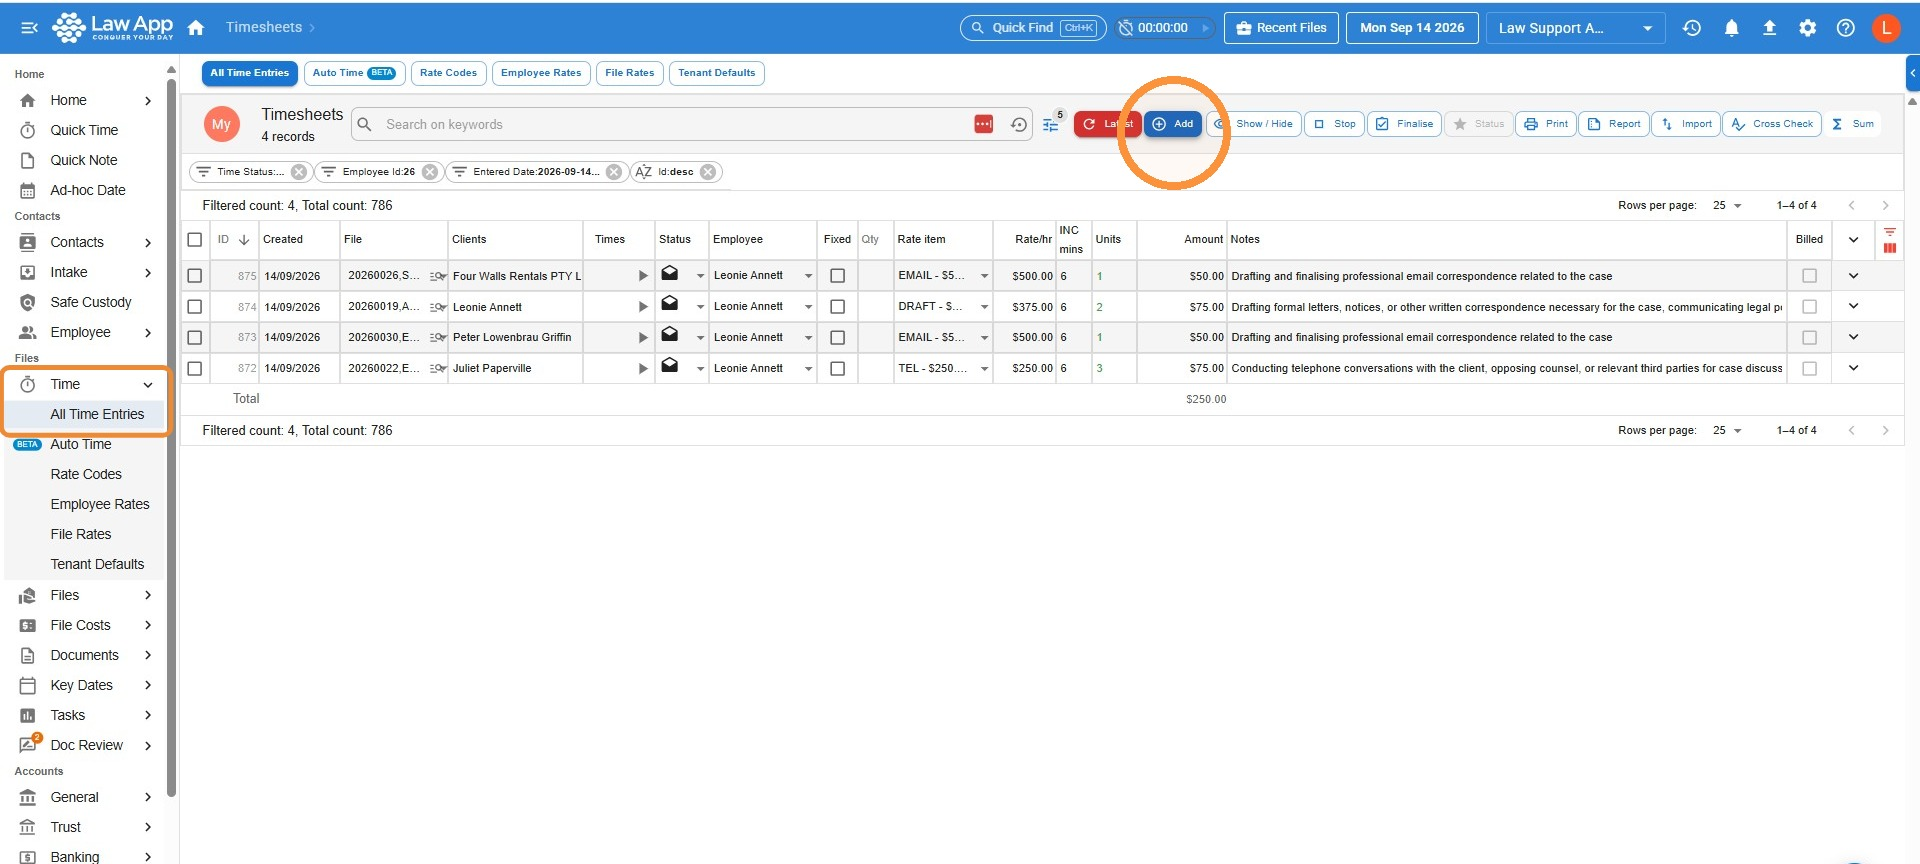
- Navigate to Time, All Time Entries, and hit Add.
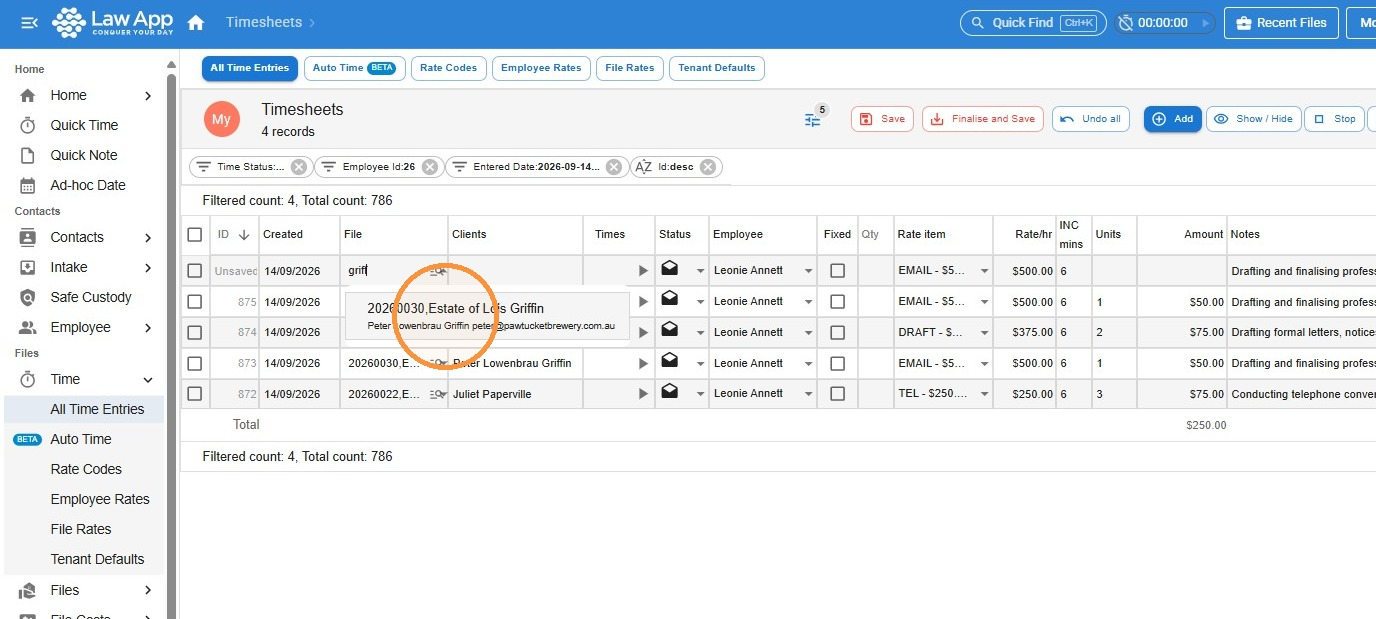
- In the File Number field, type a few letters of the client’s name or file name to initiate a search.
A drop-down list of matching files will appear.
Left-click on the correct file to select it for your time entry.
Using the Clock for Time Entry
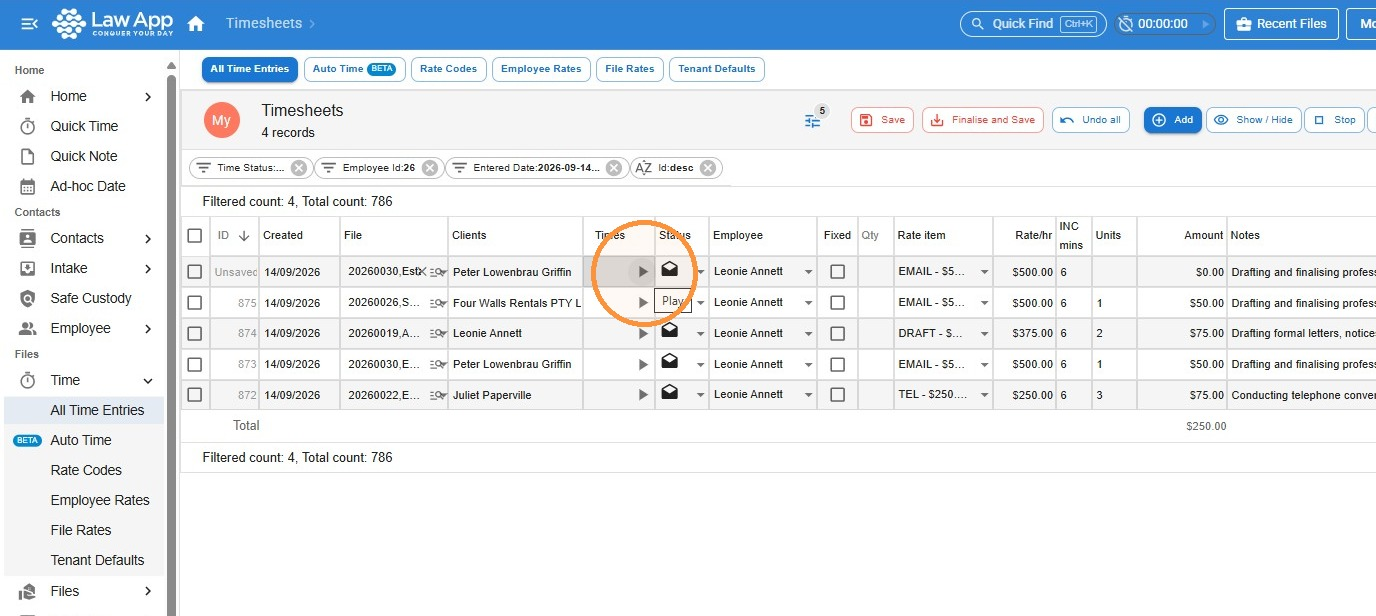
Click the Play button to start the clock. If you prefer the timer to start automatically for all of your time entries, you can set this in your personal settings by clicking the Settings icon in the top right hand corner of Law App.
The system will automatically calculate the units based on elapsed time. Press Pause when finished, and the unit value will be updated.
Using Fixed Items Instead of Time Entry
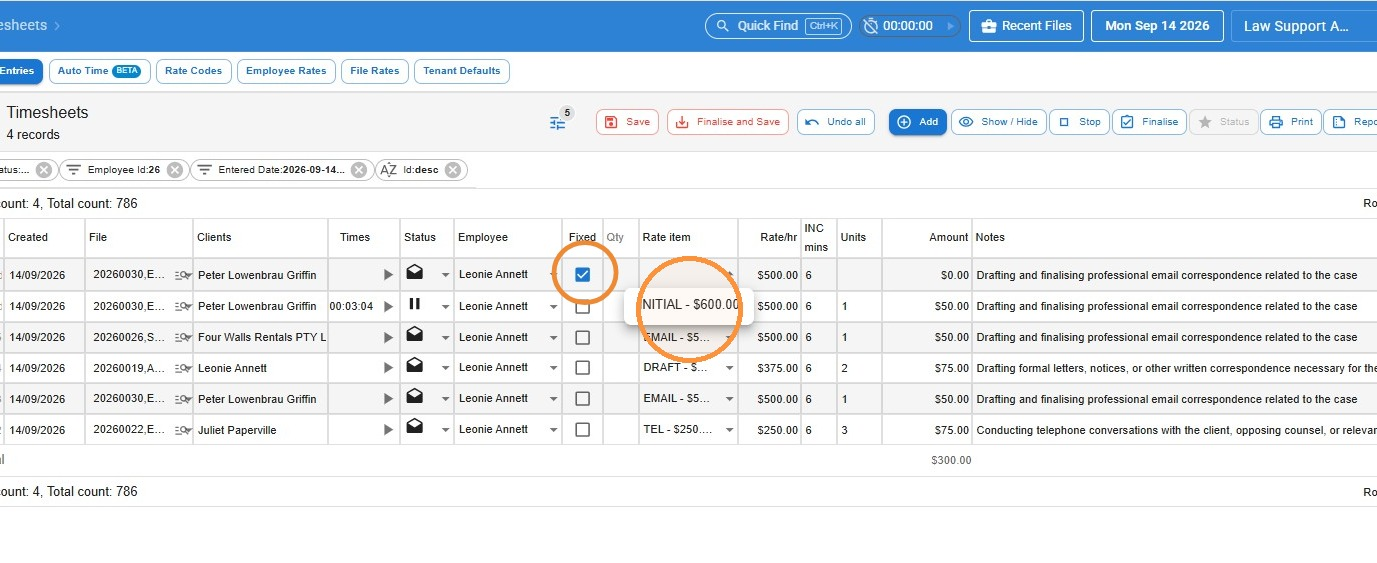
Check the Fixed Item flag to enable fixed-rate options. Enter the required Quantity in the field. The Rate Item drop-down will update to display only fixed items for selection.
Manual Time Entry (Choosing the Unit Value Manually)
Select a Rate Item to record the time spent on an activity. Enter the Unit Value manually to reflect the time worked. As long as the Fixed Item flag is not selected, the Rate Item drop-down will display only time-based rate items.
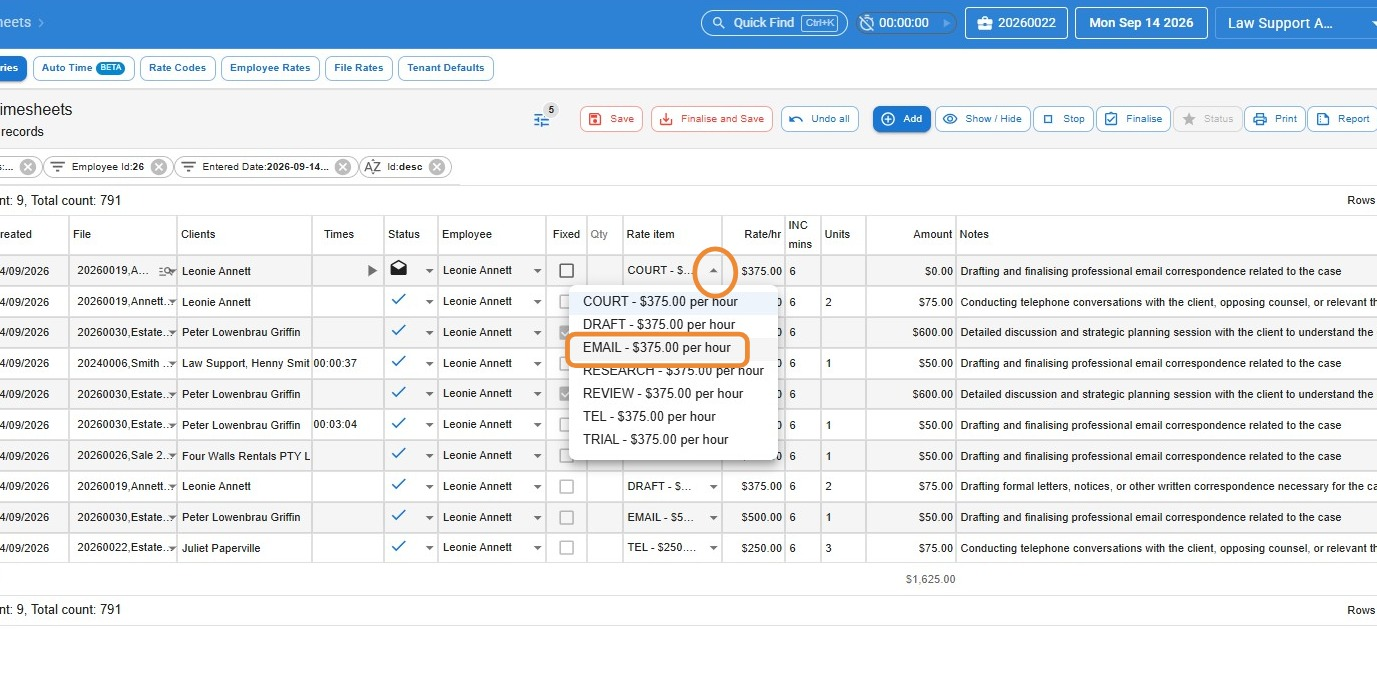
- Although Employee will default to you, you can select any Employee in the Employee drop down, so you record time for other staff if needed.
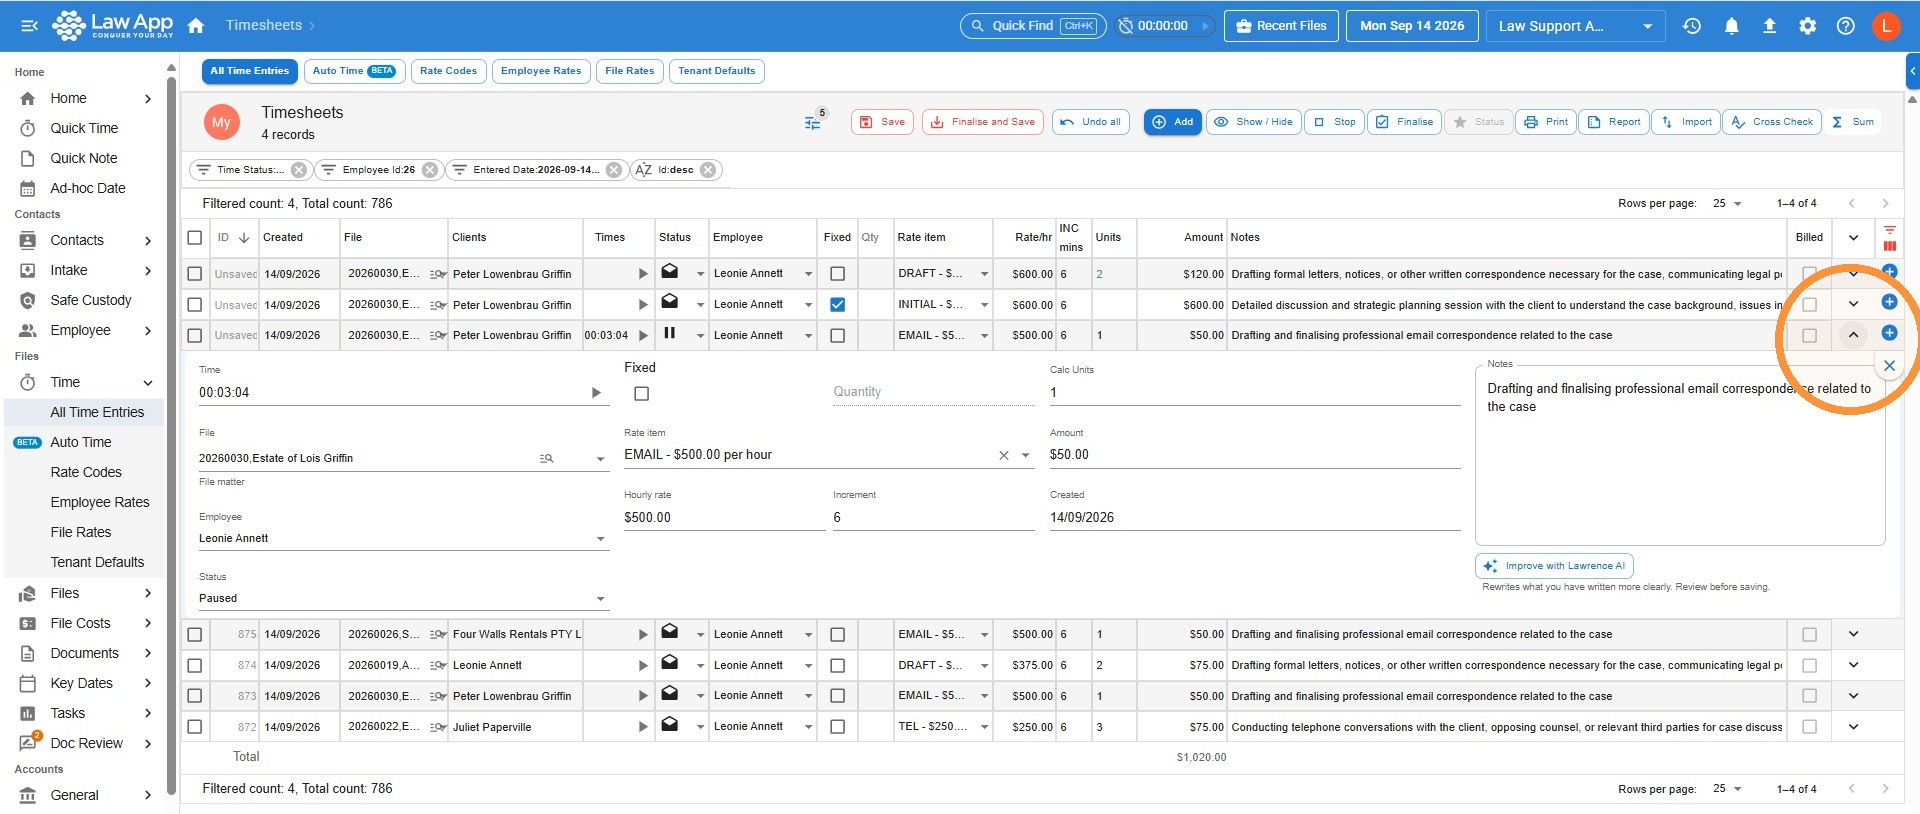
- Viewing Notes in Full. The visibility of the Notes section depends on your screen width. If the notes are not fully visible, click the drop-down arrow to expand and view the full text.
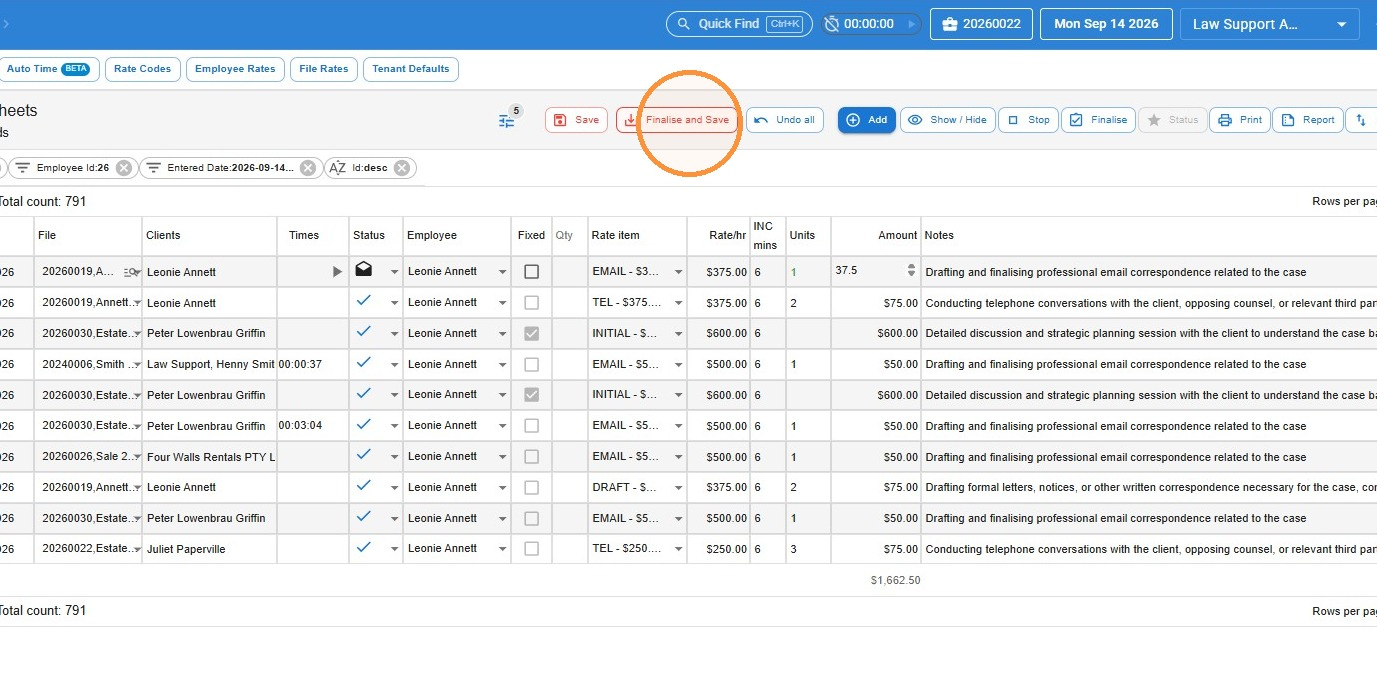
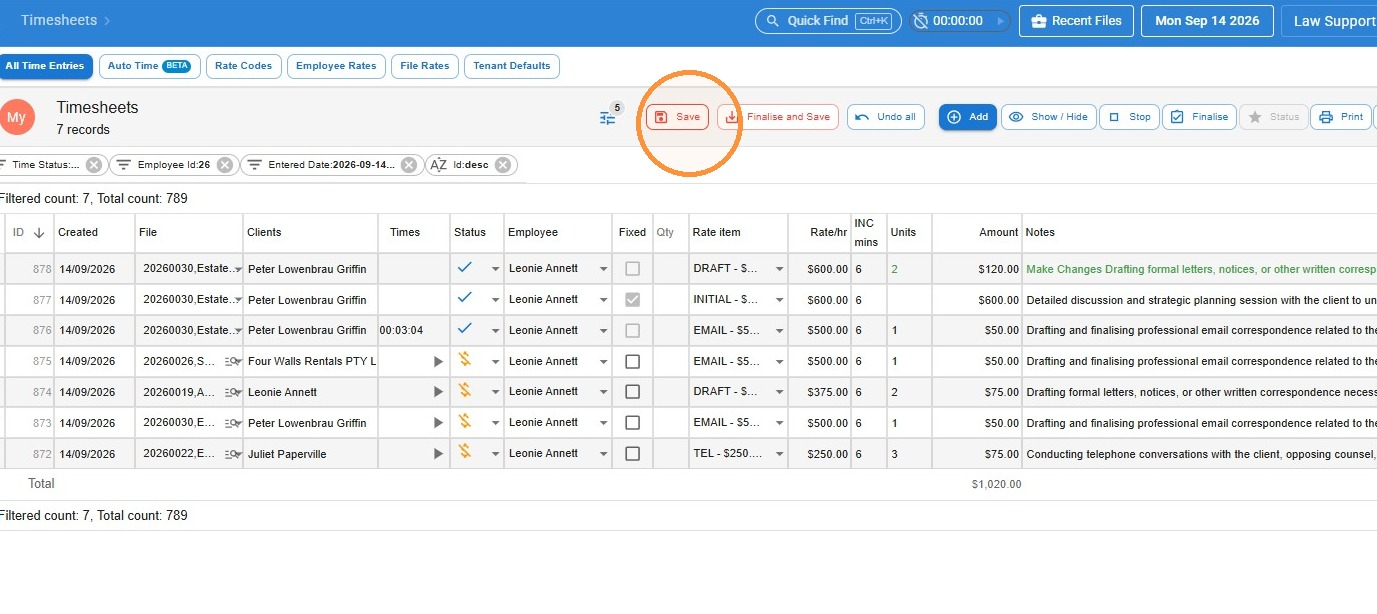
- Click Finalise and Save if you want to finalise your entries. Otherwise, if you want to leave them in draft for now, just select Save.
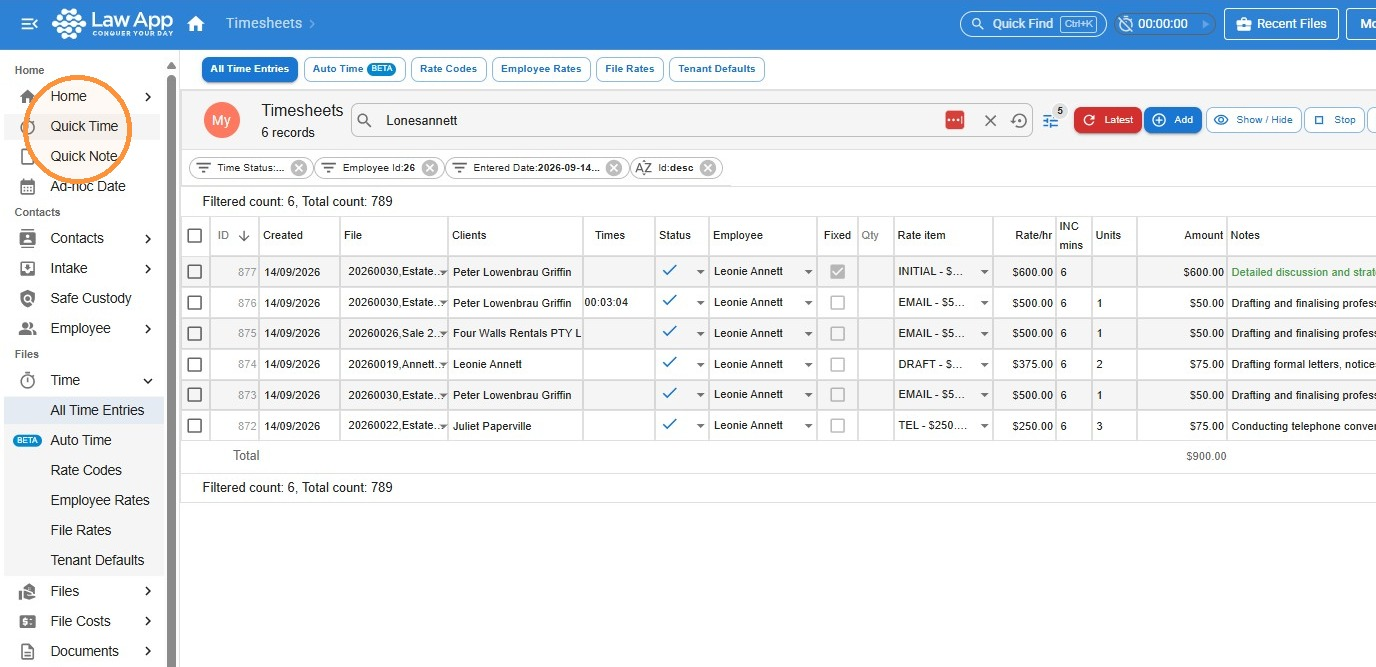
Recording time in Quick Time
- Click Quick Time.
- Click in the File field and search by file number or keyword. Left click to select your file.
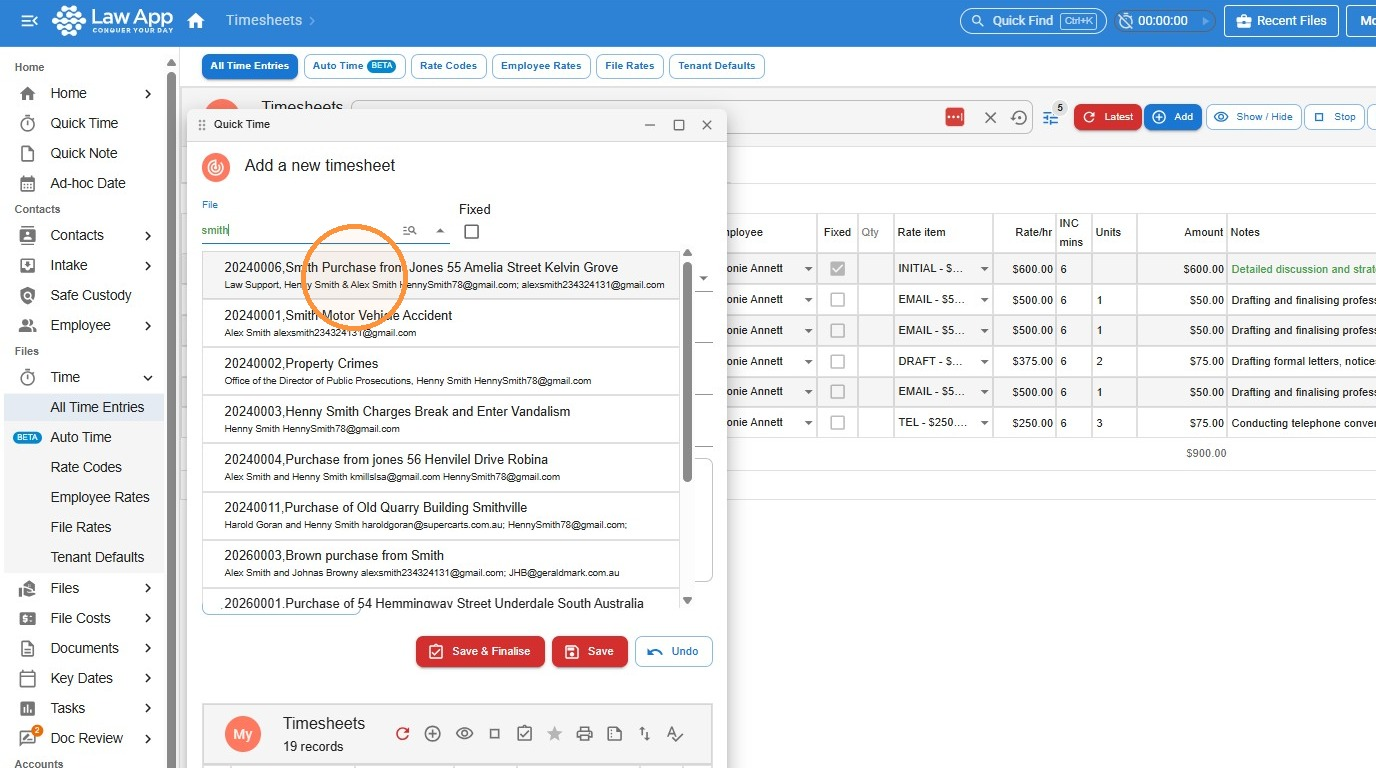
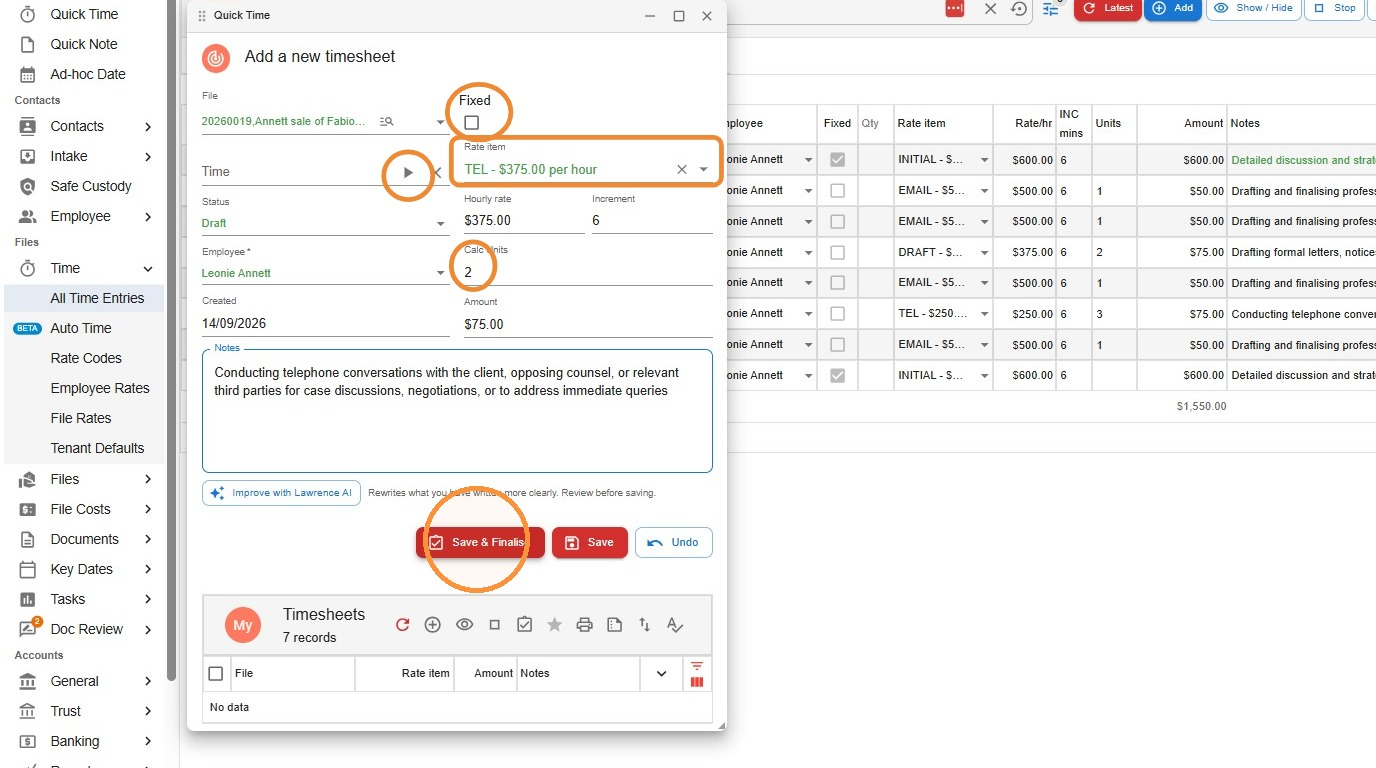
- You have all the same options to record in Quick Time as you do in All Time Entries.
You can start a timer to calculate the time,
Tick Fixed to select Fixed Fee entries,
Manually record time by inserting the number of units,
Select your rate code in Rate item.
Click Save and Finalise to finalise the entry, or Save to save it in Draft.
Recording time within the file
- Once you have your file open, head to Financials. To add a new entry, select Add.
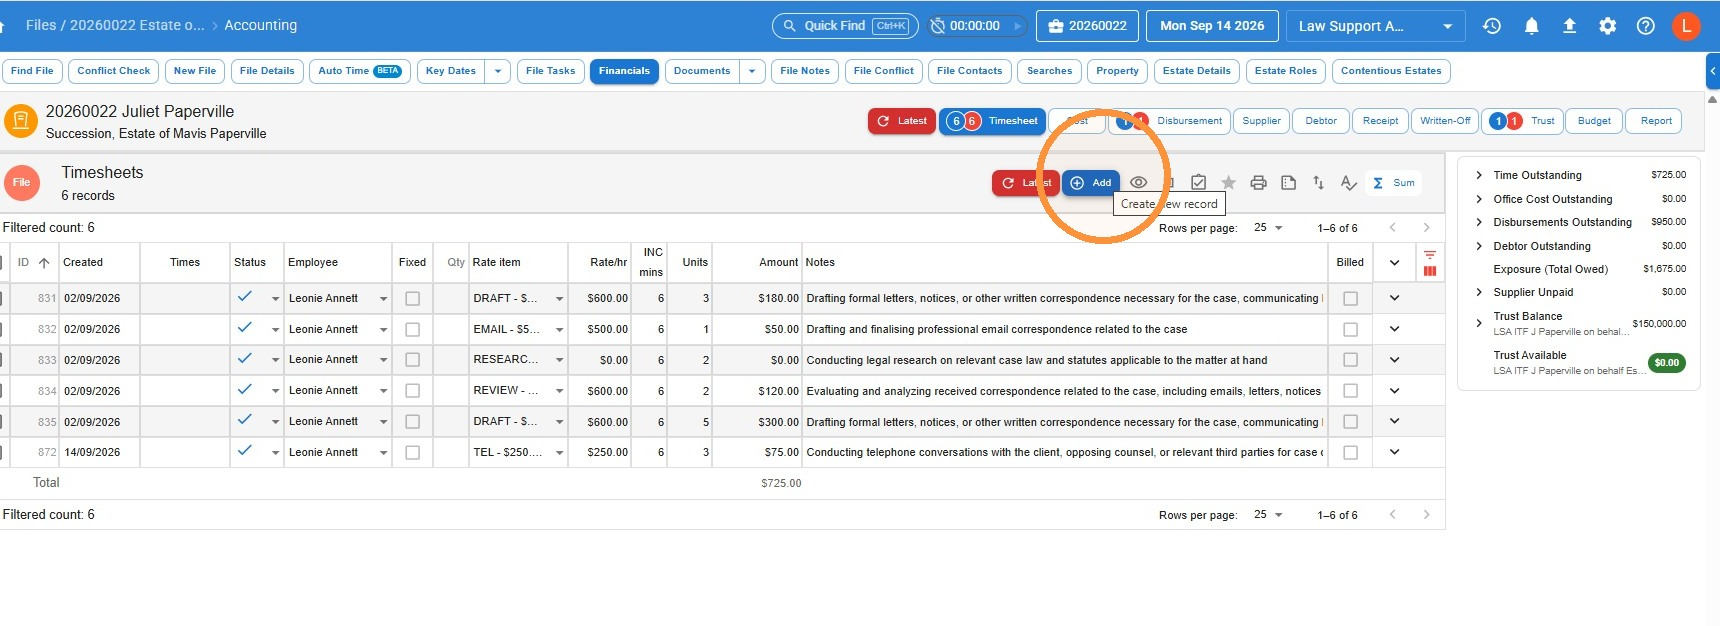
- Recording time in this area is very similar to recording in All Time Entries.
You can start a timer to calculate the time,
Tick Fixed to select Fixed Fee entries,
Manually record time by inserting the number of units,
Select your rate code in Rate item.
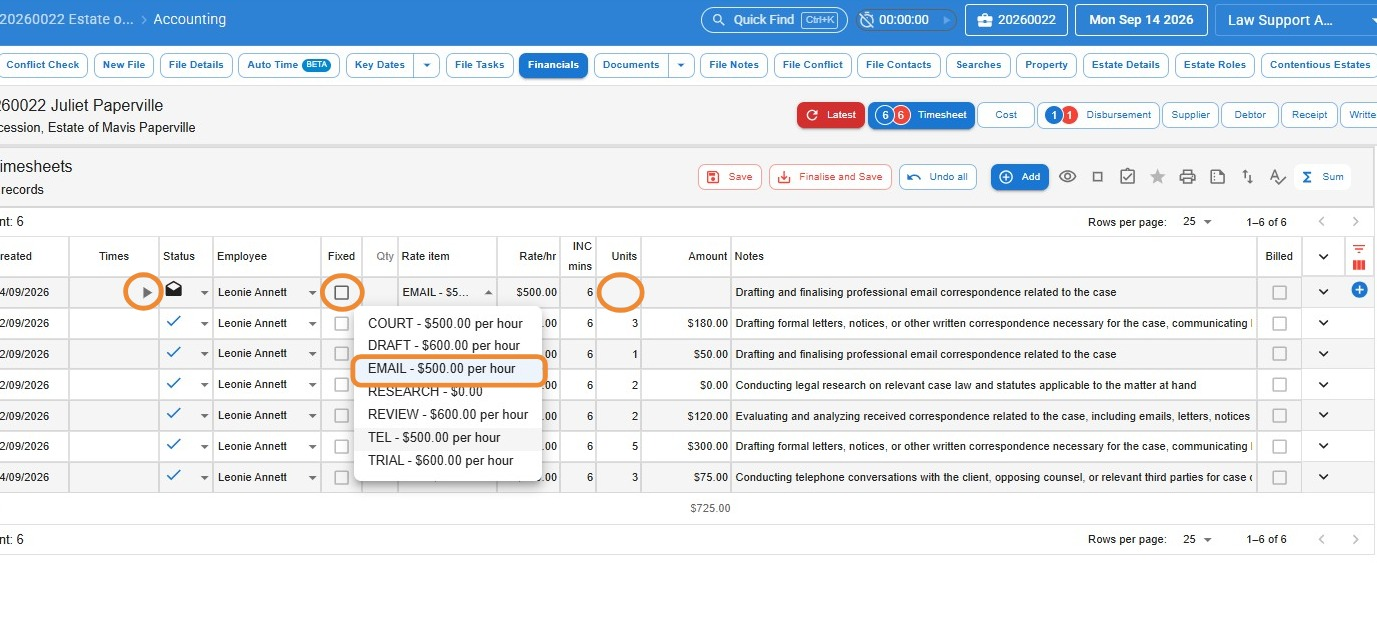
- Click Finalise and Save to finalise the entry, or Save to save it in Draft.
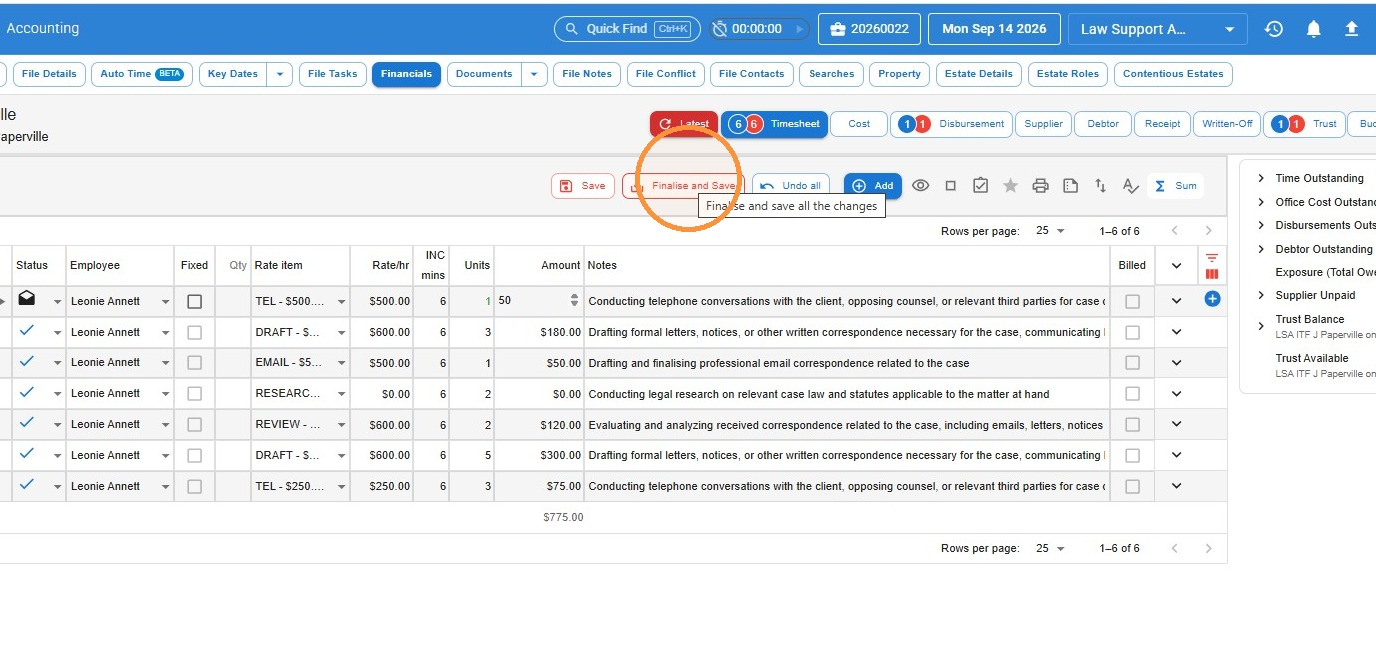
To make changes to a Finalised time entry
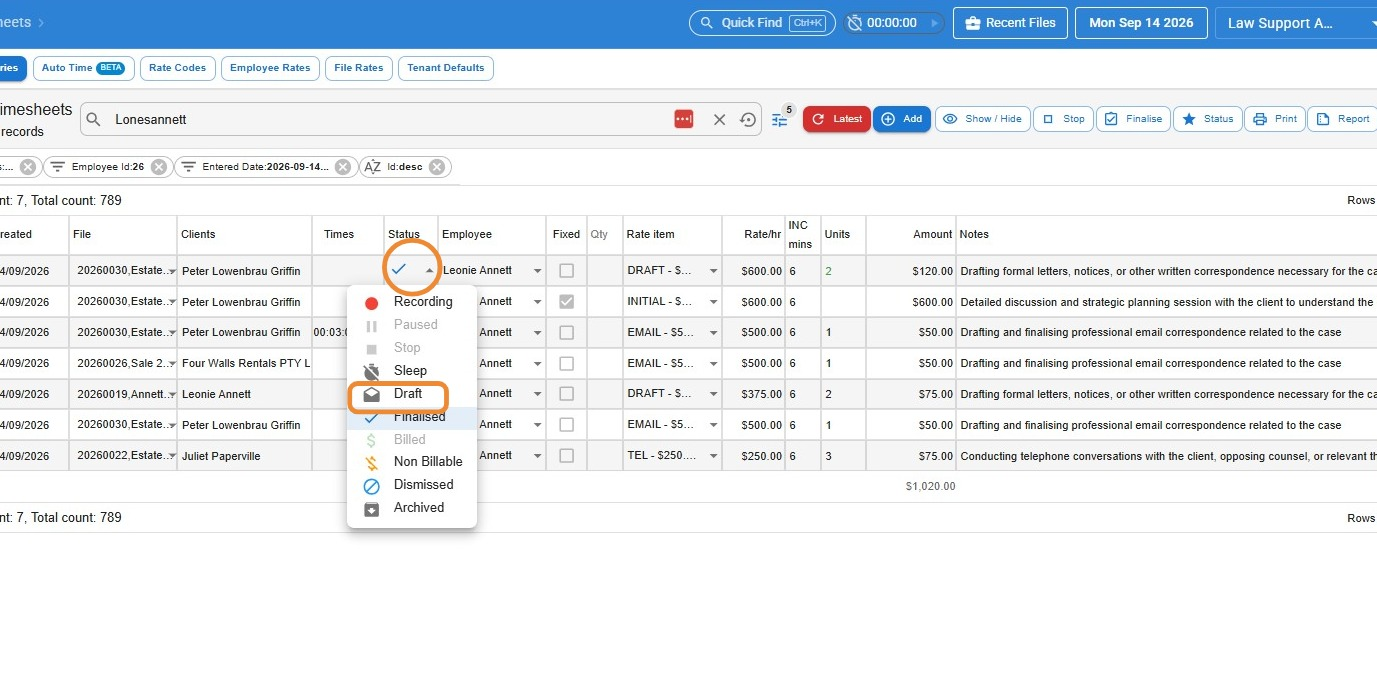
- As long as the entry has not been billed, you can revert it back to draft and make your changes. Click on the Status box and select Draft, then select Save.
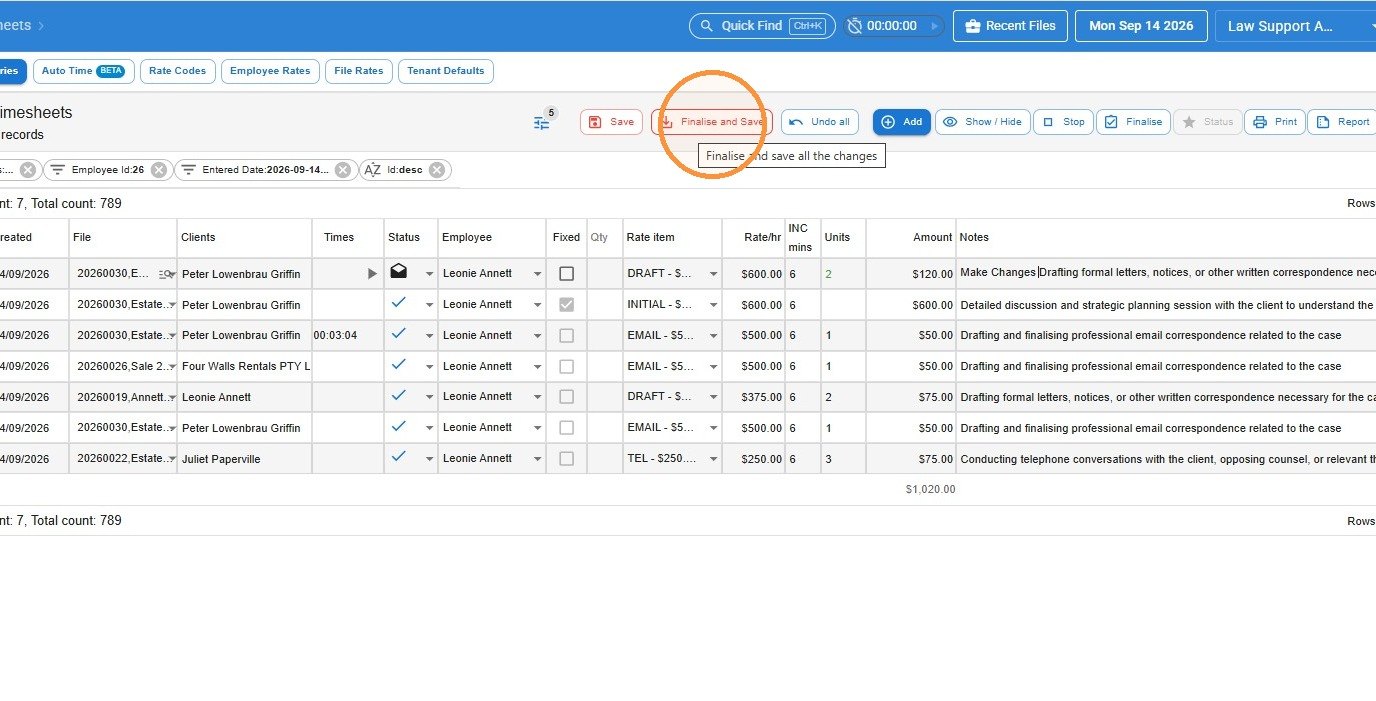
- Make your changes, and then select Finalise and Save.
Bulk Status Changes
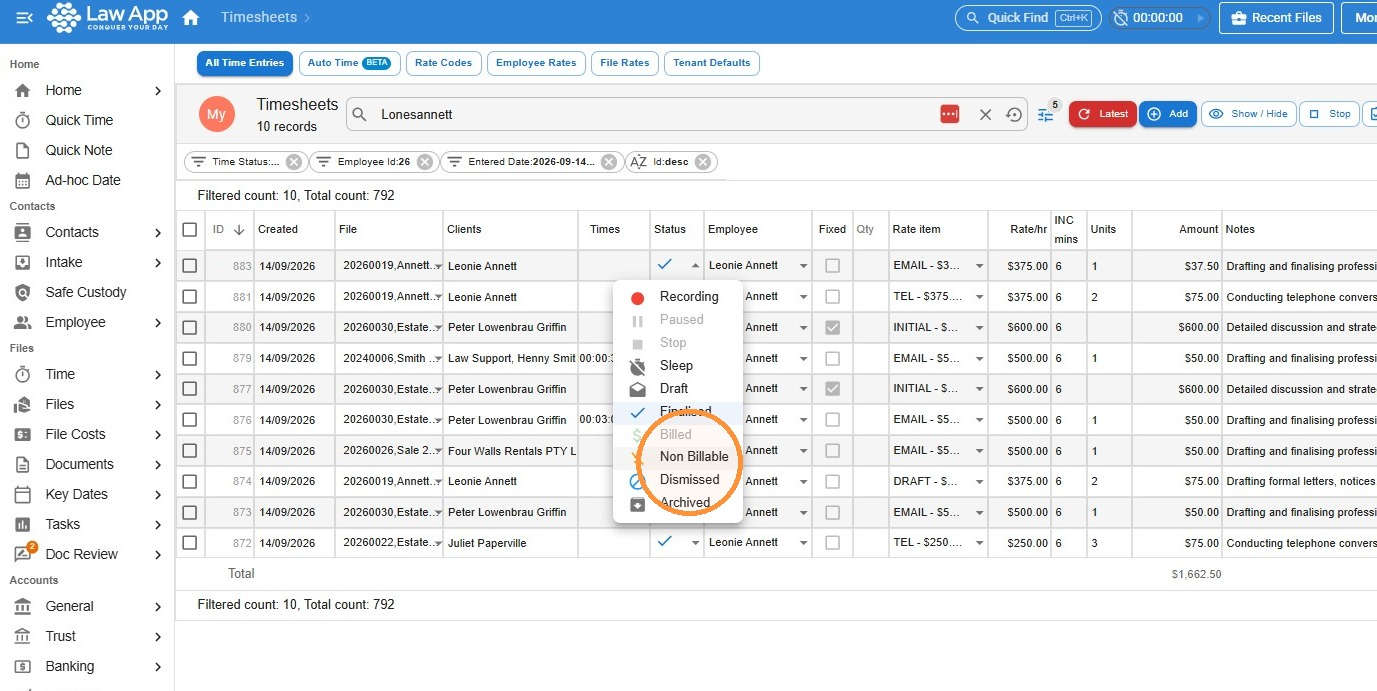
- Sometimes you may need to change the status on multiple time entries at once, for example, marking all entries on a file as non-billable. Simply tick all of the entries you want to change, and press the Status button.
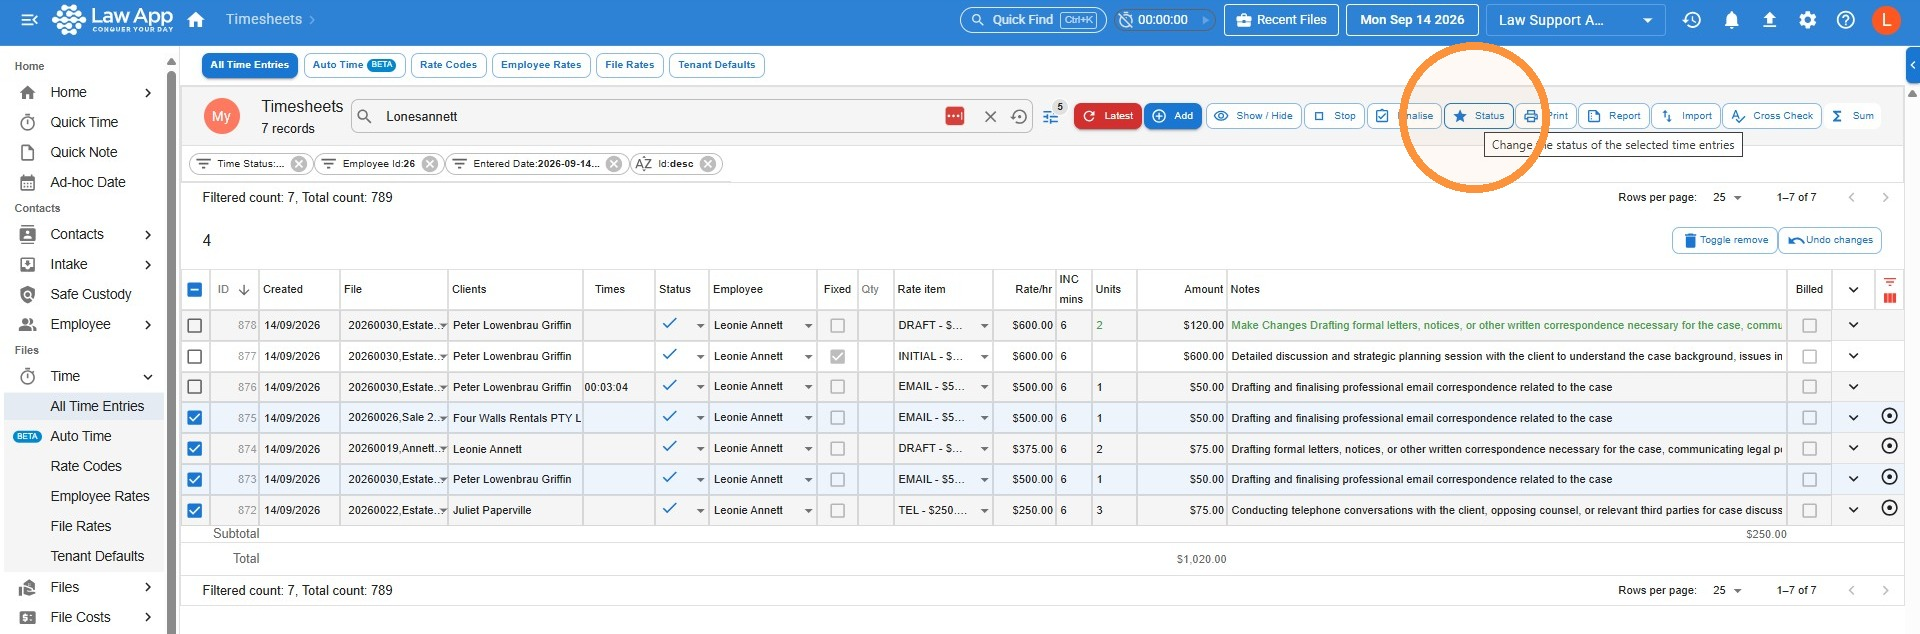
- Select what status you want to change the entries to.
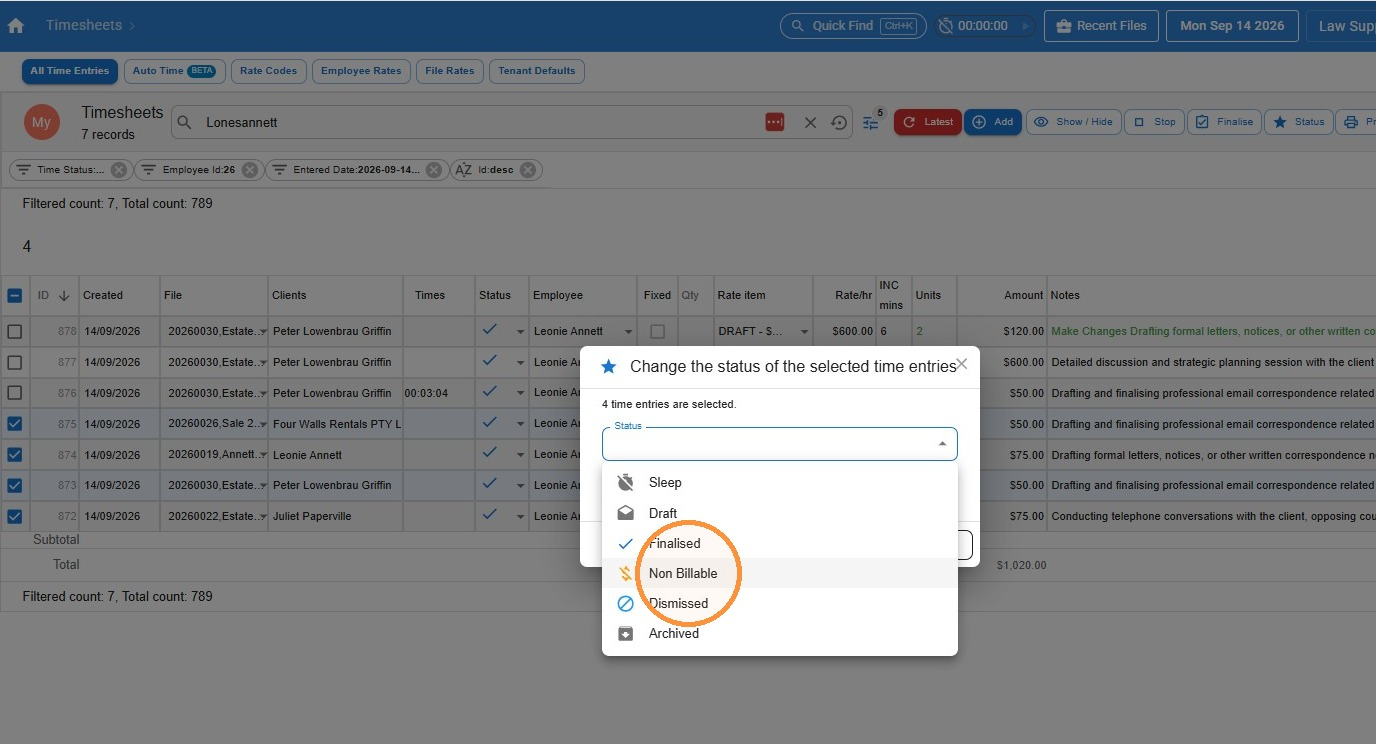
- Then Click Apply to selected.
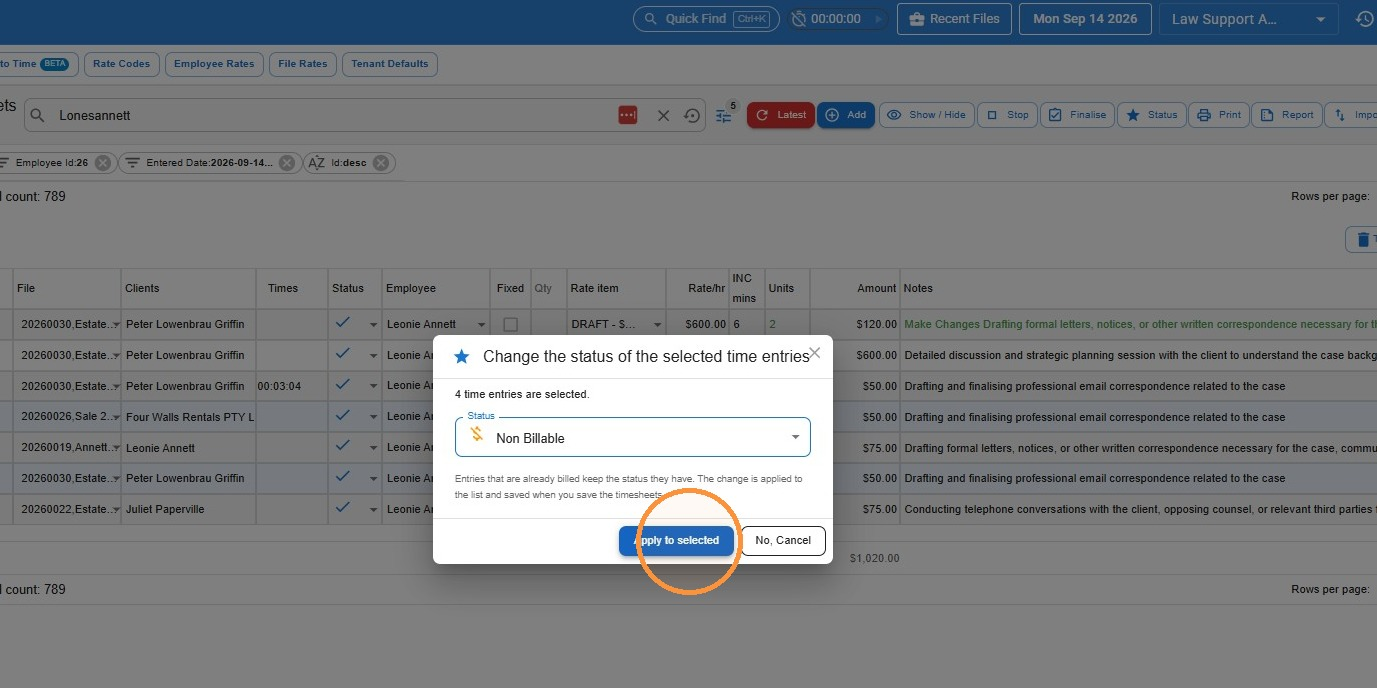
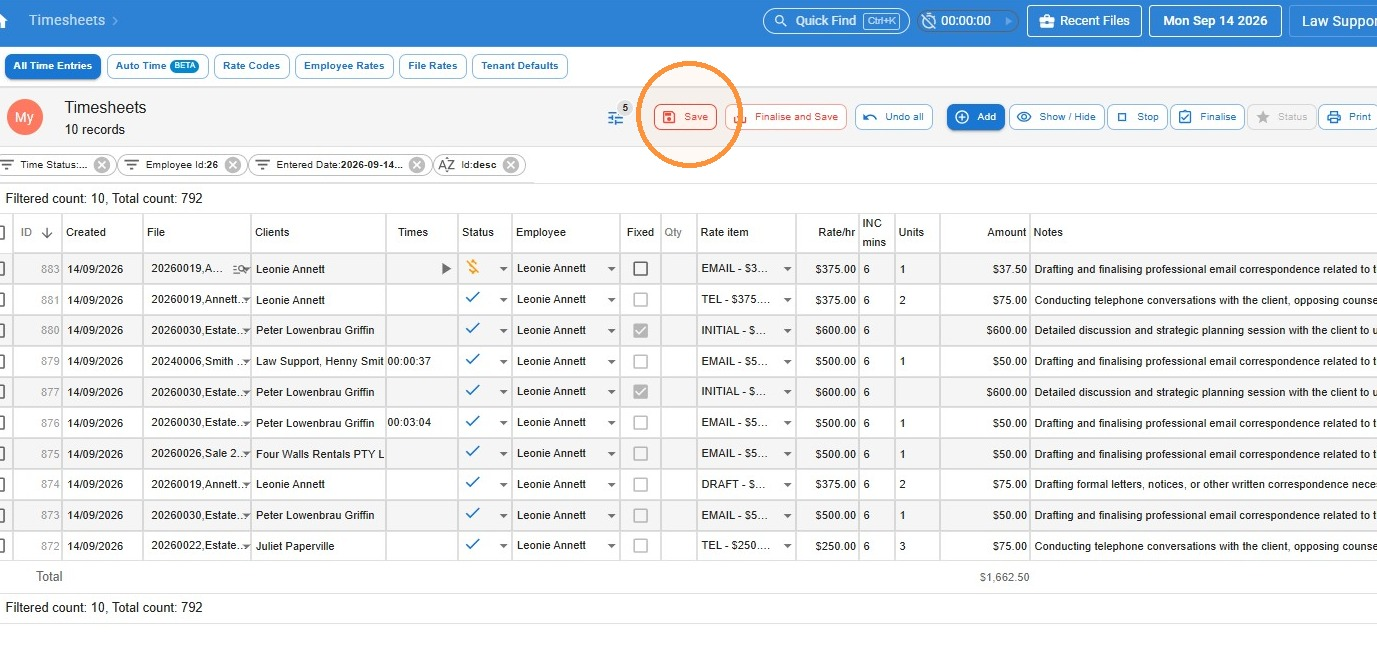
- Click Save.
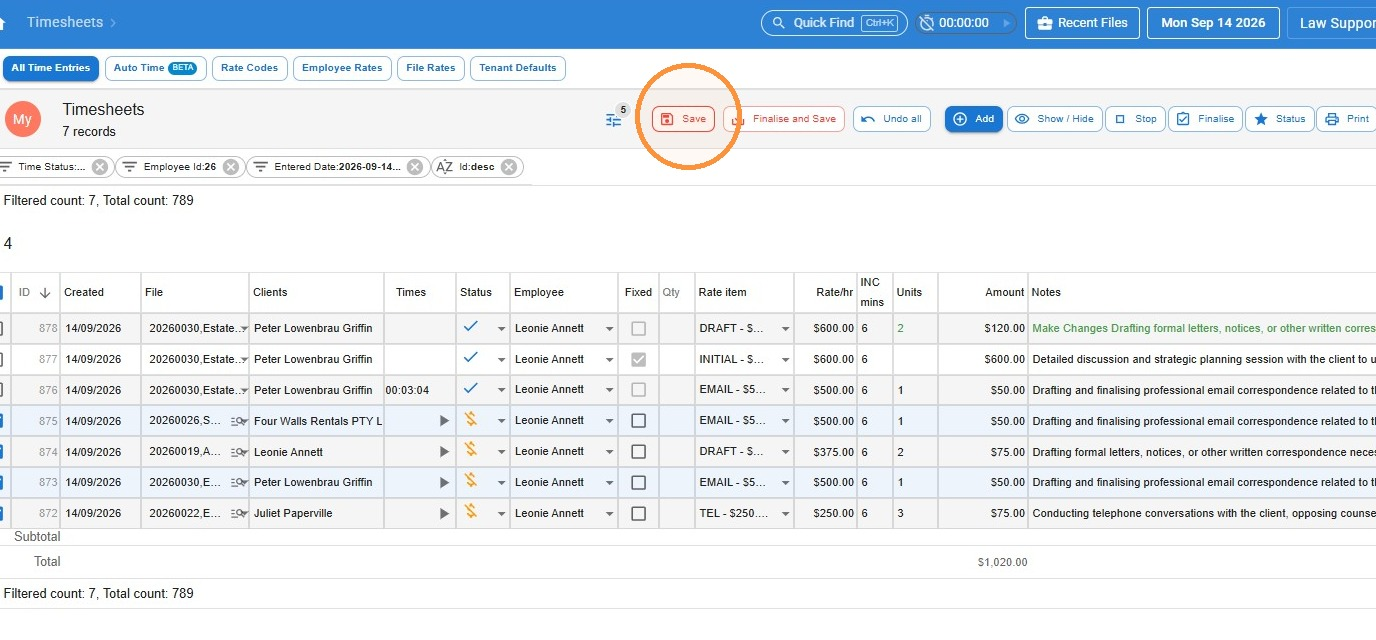
To delete a time entry
- To delete a time entry, tick the box for the item/s you want to delete, then click Toggle Remove.
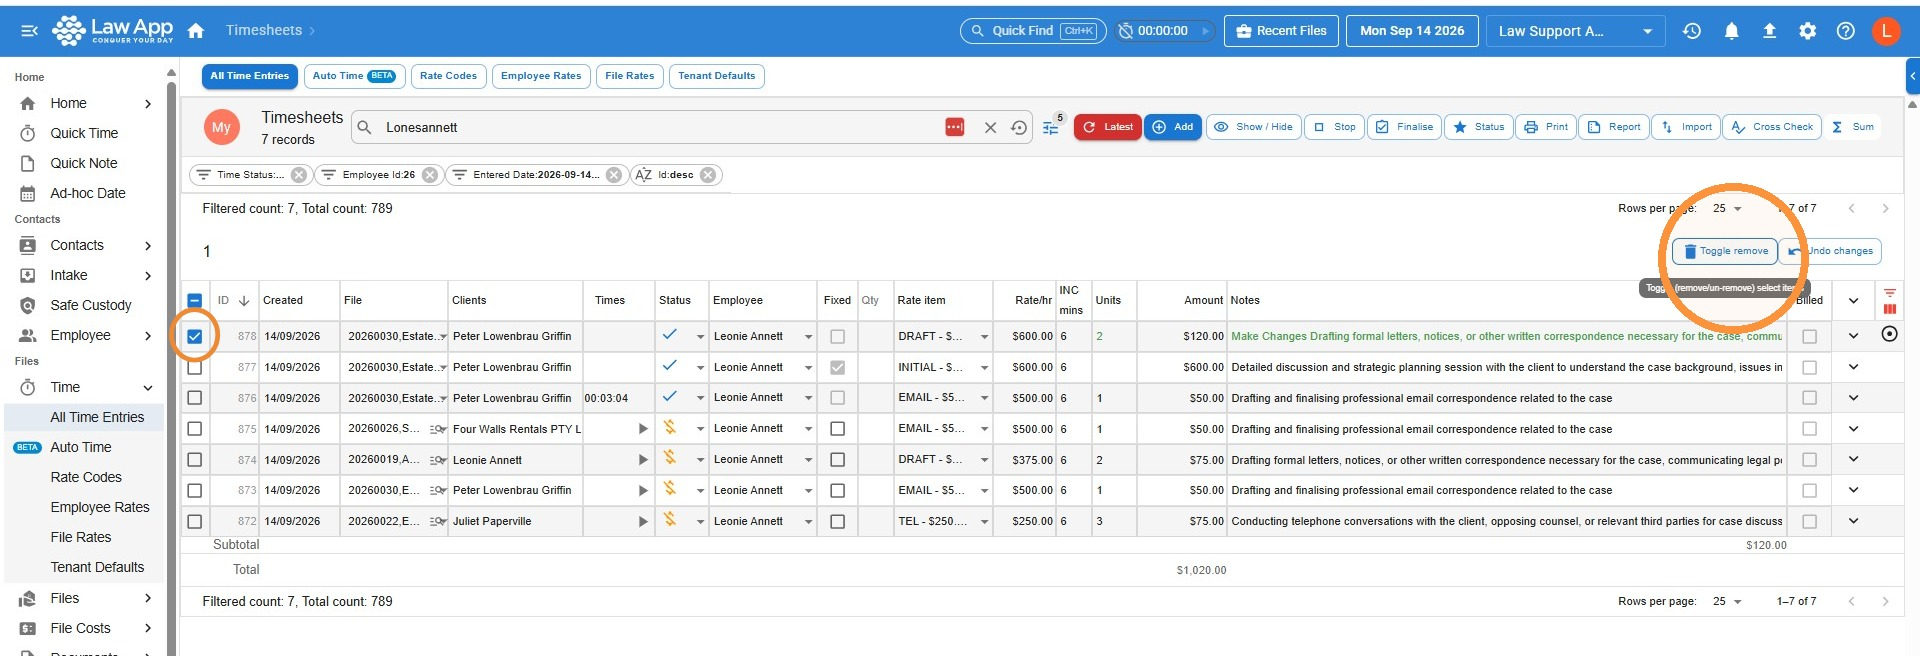
- Click Save.
The process of removing time entries in Quick Time or in the file timesheet is the same.
How to record non-billable time
- Sometimes you may need to track non-billable time for internal reporting, matter tracking, or compliance purposes. The process for recording non-billable time is exactly the same as recording regular time, but you will select Non Billable as the status.
- Then, select Save.
Leave a Reply