
You can apply a discount or write-up to an invoice in two ways — as a single adjustment across the whole bill, or line by line against individual timesheet entries. This guide covers both methods, plus how to remove a discount and how to print an invoice that shows it.
Good to know: A discount or write-up only ever adjusts your timesheet entries — it never changes the amount of any Office Costs or Disbursements on the file.
Applying a discount or write-up to the whole invoice
- Generate your invoice as normal. Once it’s drafted, open the Discounts section by clicking the small arrow. Here you can select a discount or charge type and reason — both are optional.
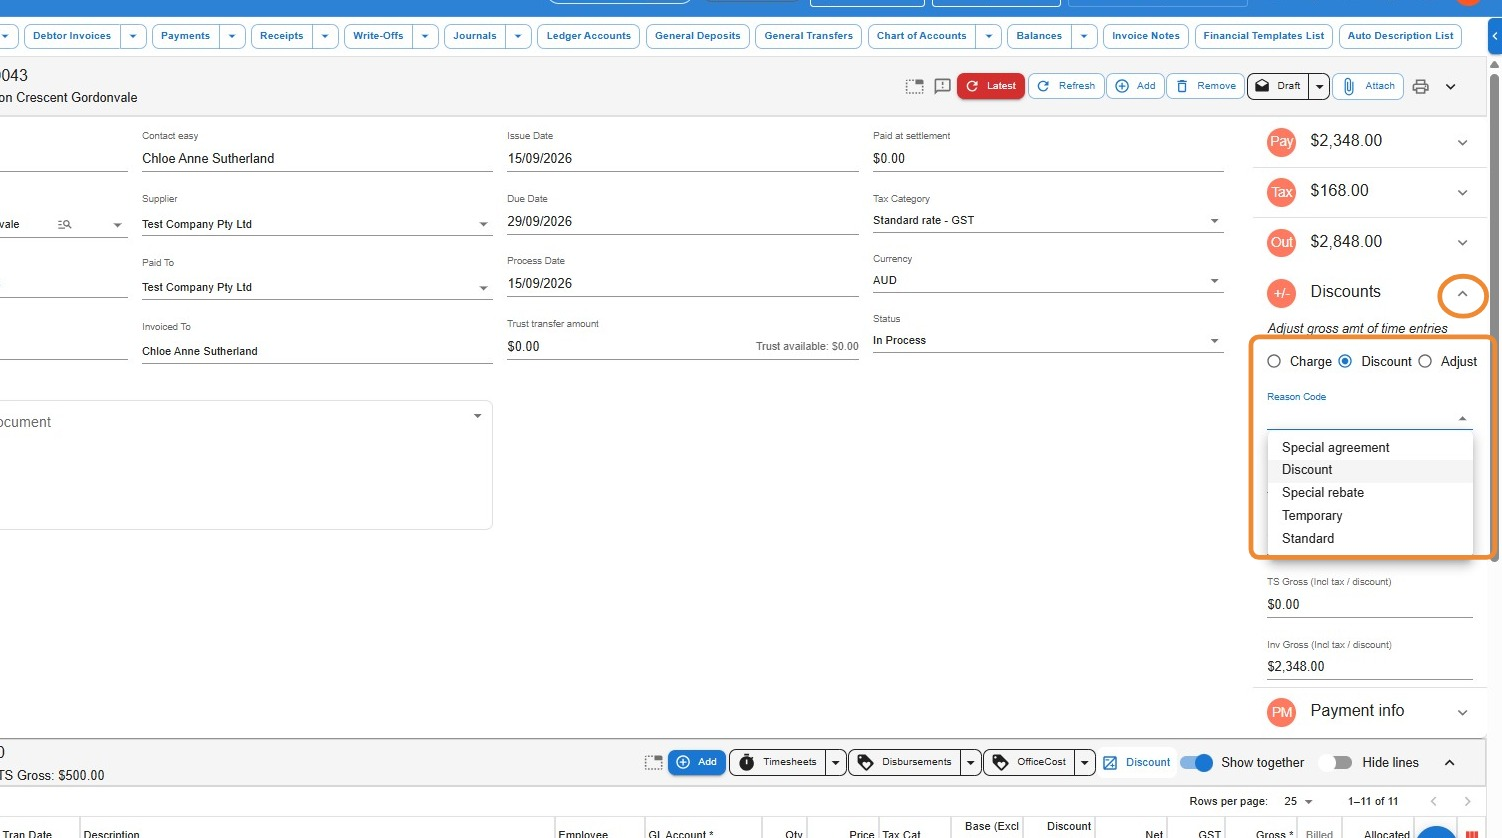
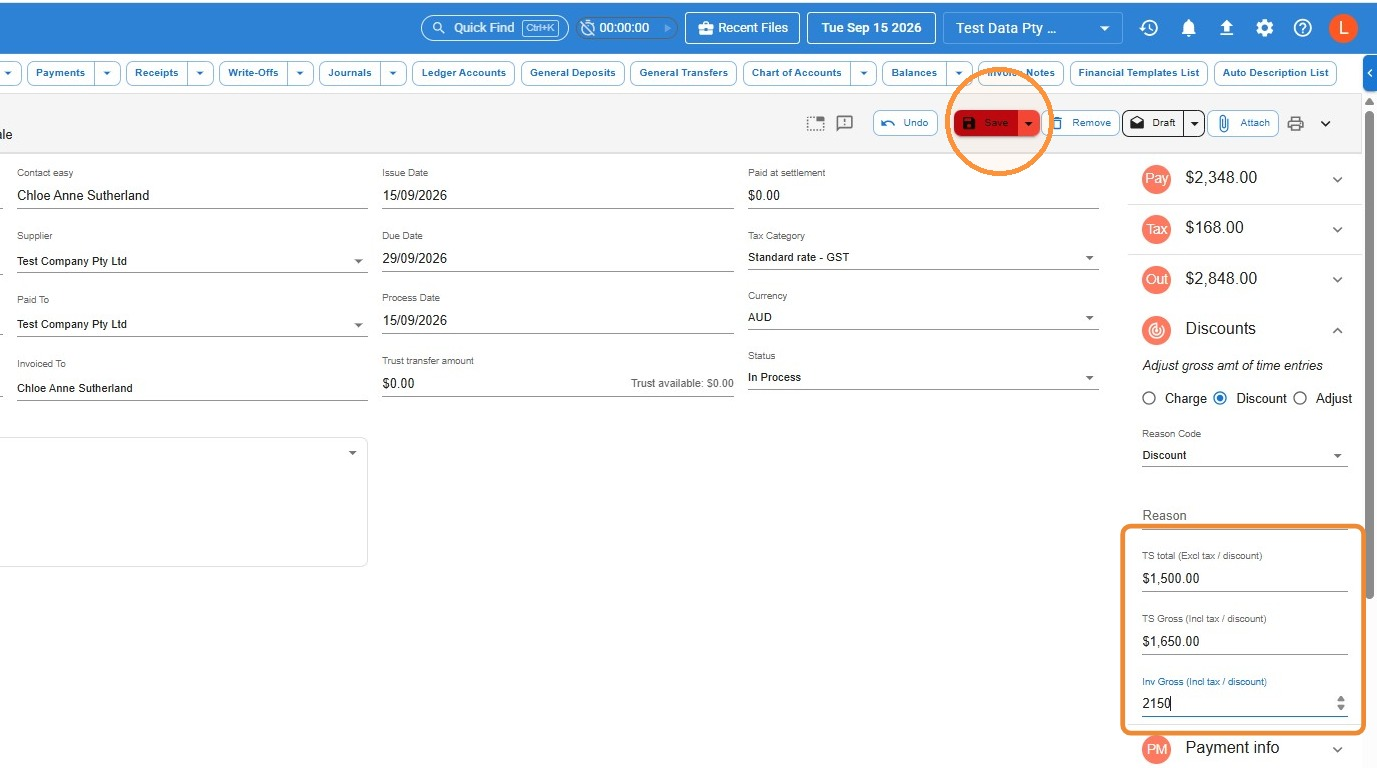
- Decide which figure you want to set, then enter your amount into the matching field:
Timesheet Total (Excl. Tax) — sets the total Professional Fees, excluding tax, to the amount you specify
Timesheet Gross (Incl. Tax) — sets the total Professional Fees, including tax, to the amount you specify
Invoice Gross Balance (Incl. Tax) — sets the total bill, including tax, to the amount you specify. Note that the total bill can’t be set below the Professional Fees on the matter, and Disbursements can’t be adjusted this way
Click Save.
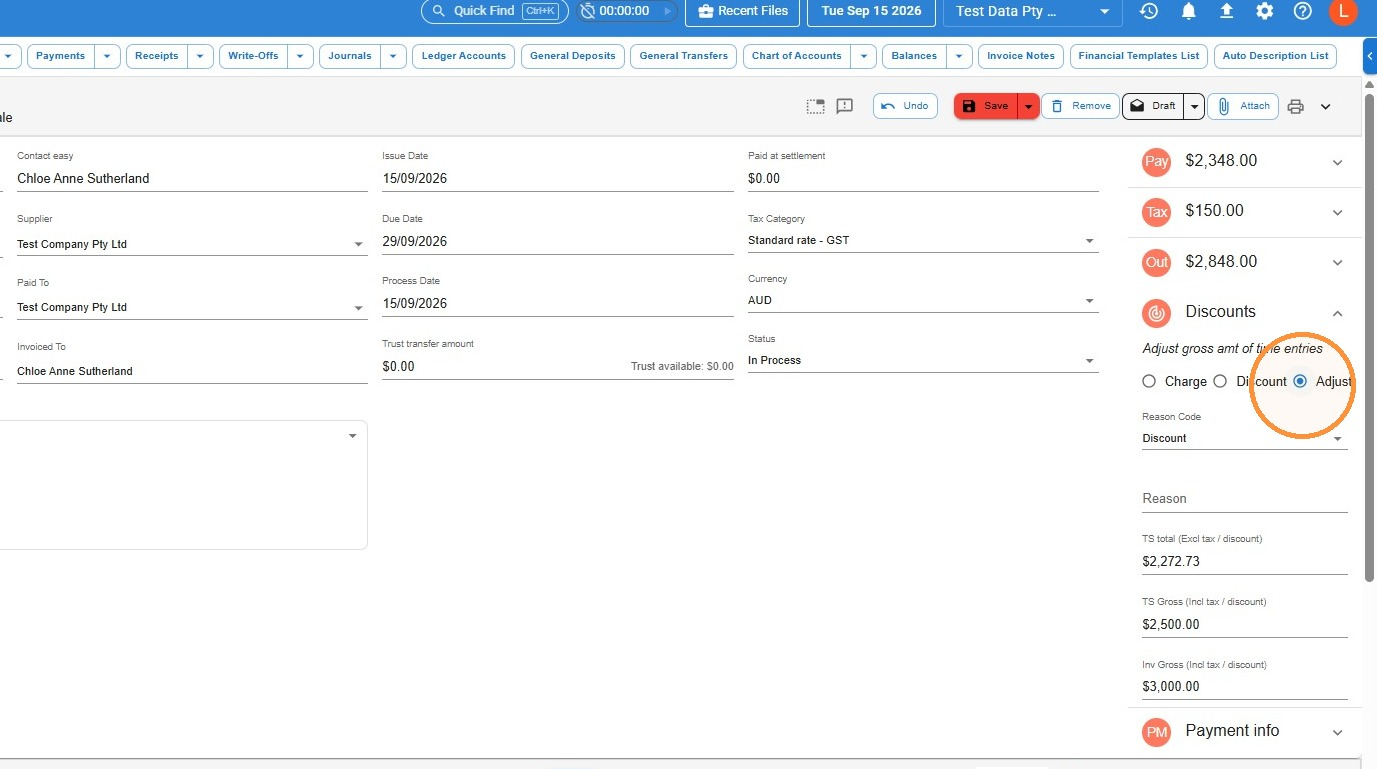
- Select Adjust in the invoice adjustment panel.
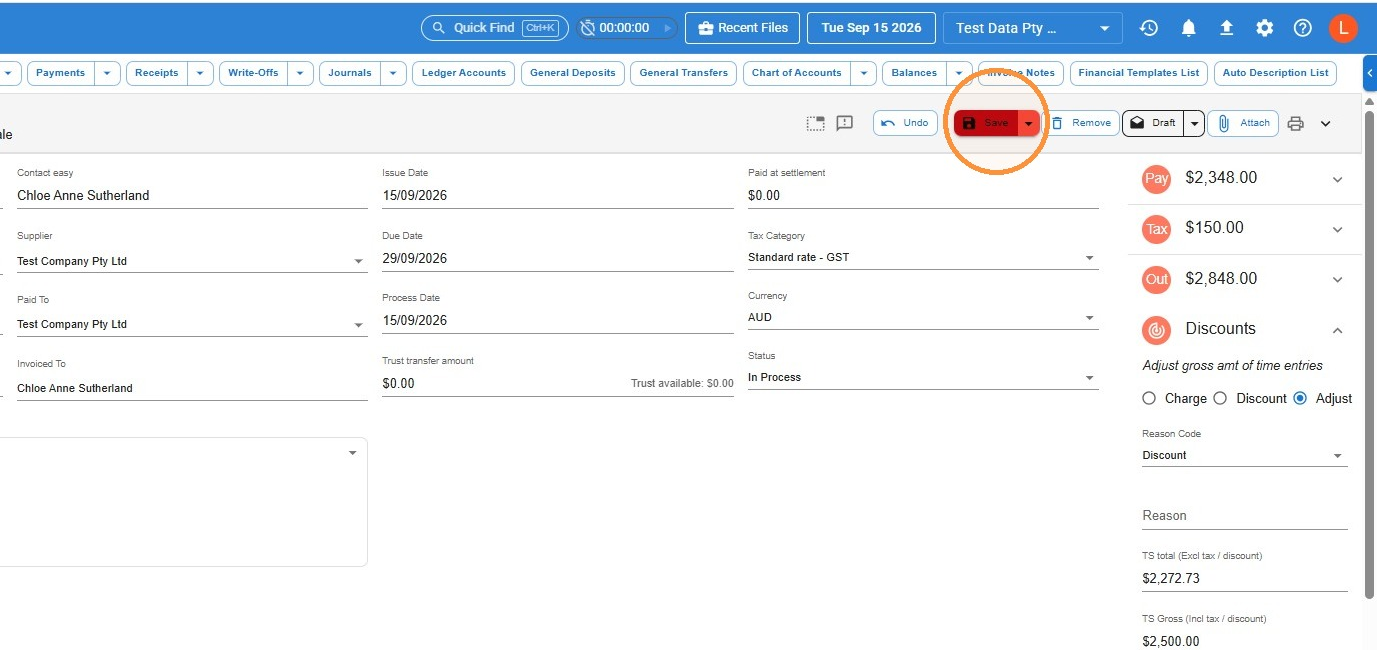
- Click Save to apply the adjustment.
Applying a discount or write-up to single lines of an invoice
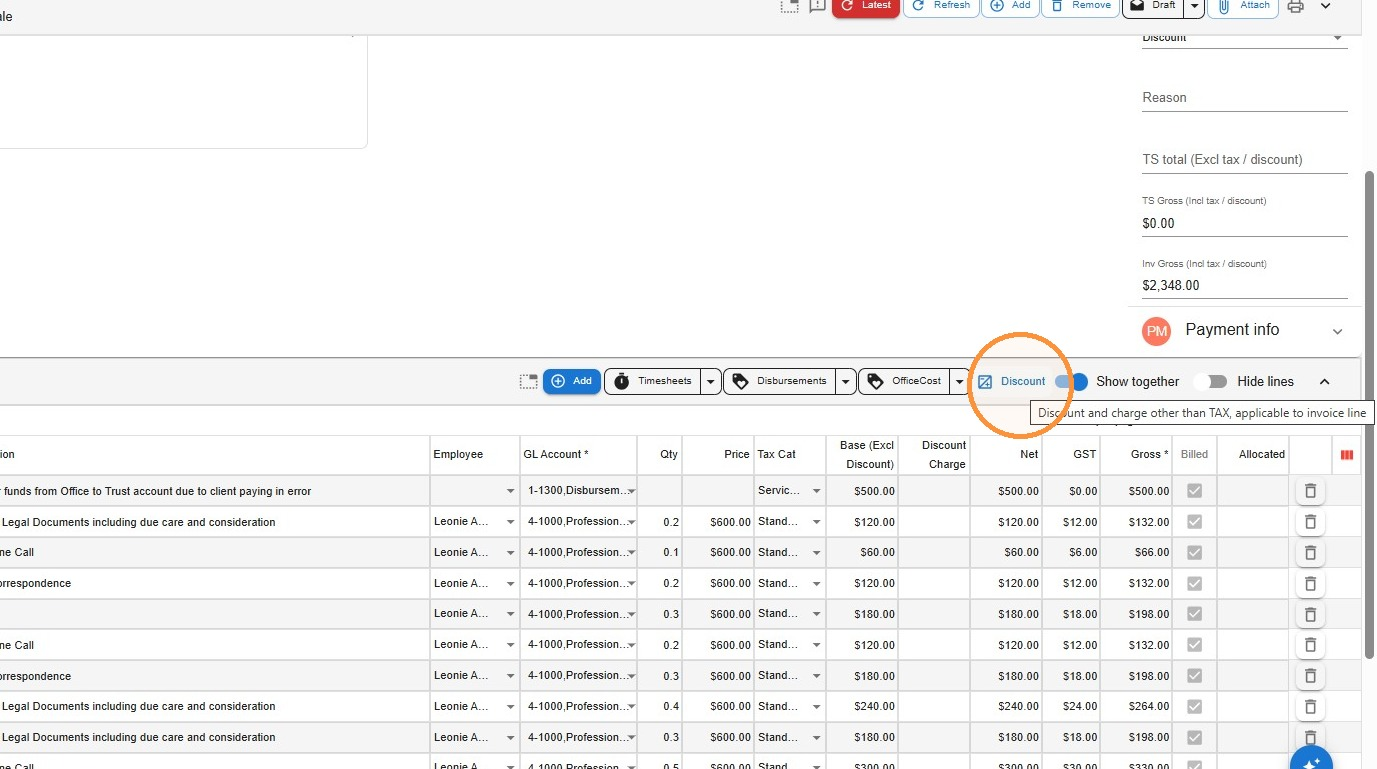
- Using this method, you can apply a discount or charge to certain timesheet entries on the invoice, rather than across all of them. Click the Discount button, as shown below.
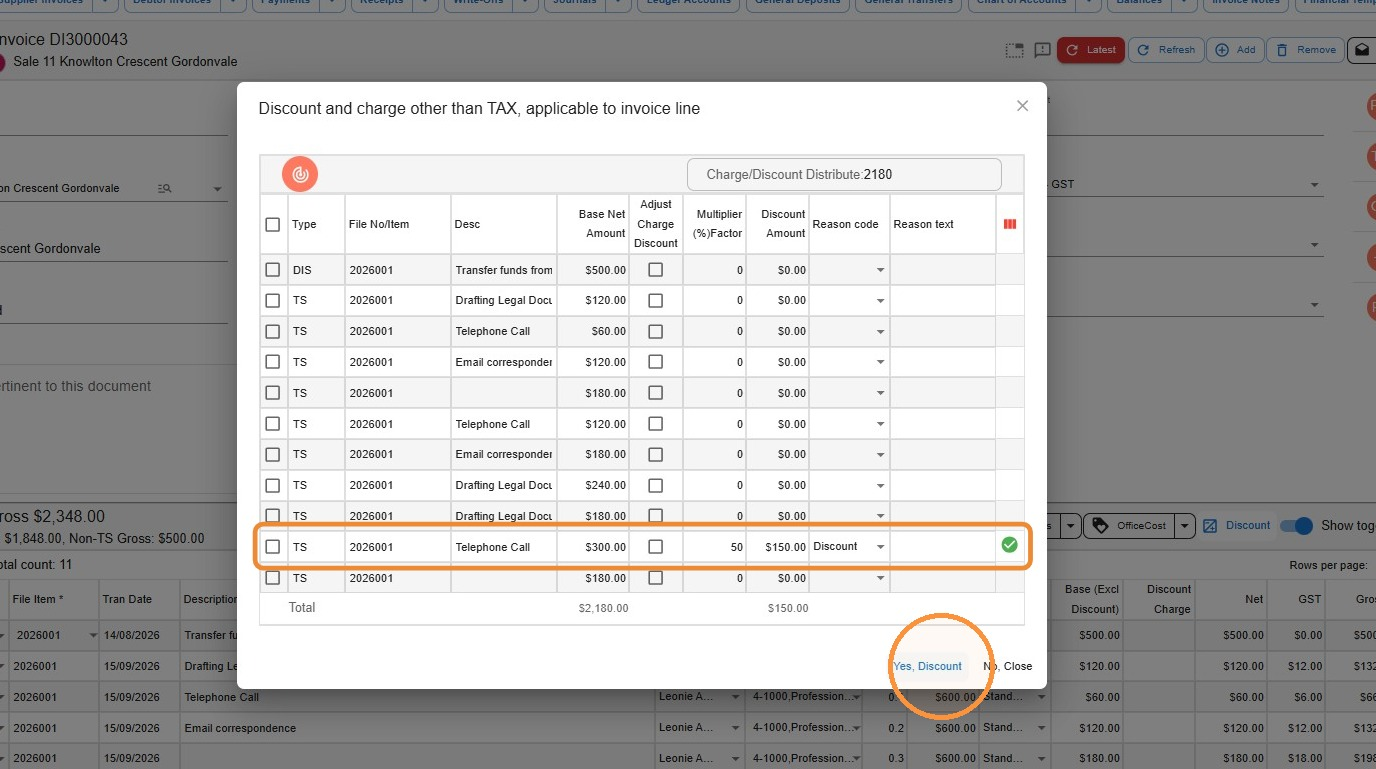
- Locate the line or lines you want to amend, then:
- To add a discount, enter the amount of the discount in the Discount Amount column. For example, if the entry is currently $300 and you want to reduce it to $200, enter $100.
- To add a charge, tick the box in the Adjust Charge Discount column, then enter the amount of the additional charge in the Discount Amount column. For example, if the entry is currently $300 and you want to write it up to $500, enter $200.
- You can select a Reason Code and enter a Reason — this is optional.
Click Yes, Discount to apply the changes. You’ll be taken back to the invoice screen — click Save.
Removing a discount or charge
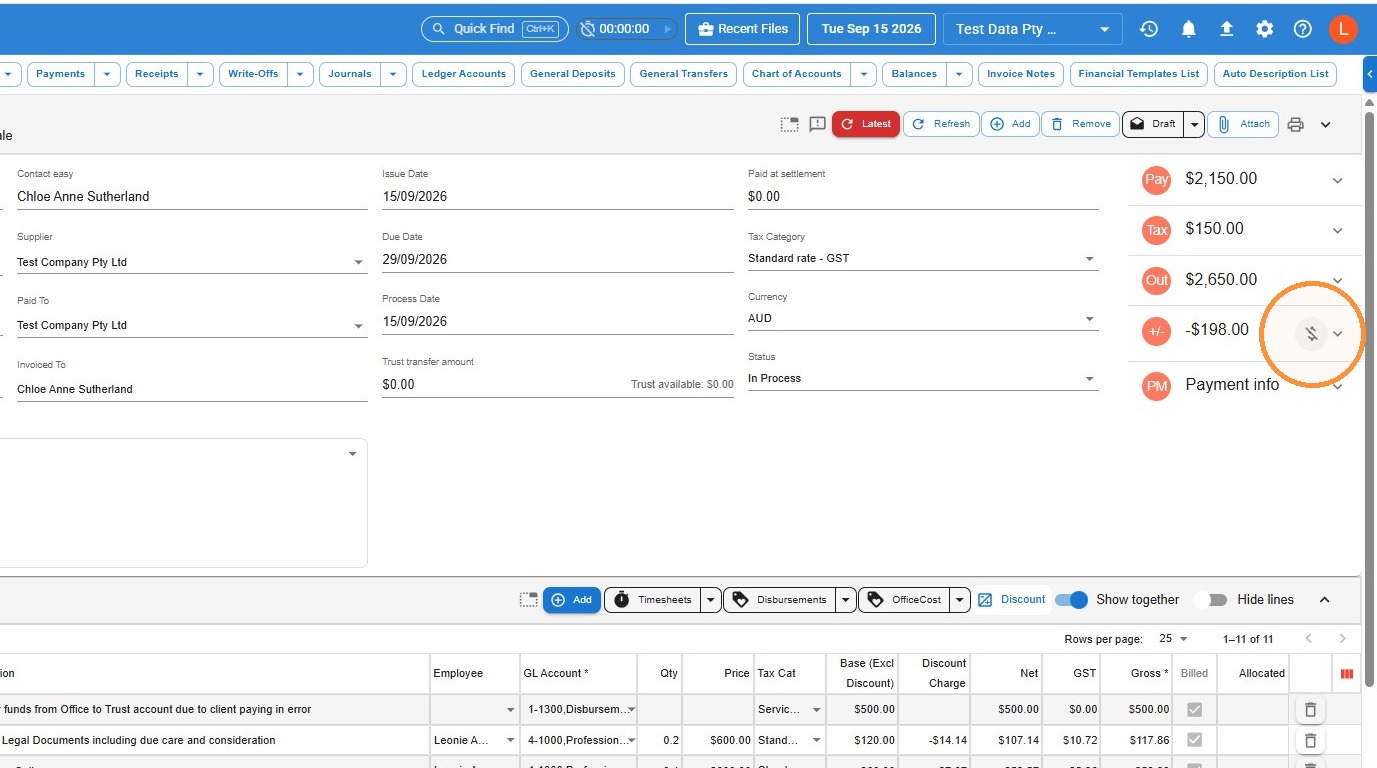
- Click the Remove icon, as shown below, to clear any discount or charge from the invoice. This resets the invoice back to its original amounts, based on the timesheet entries.
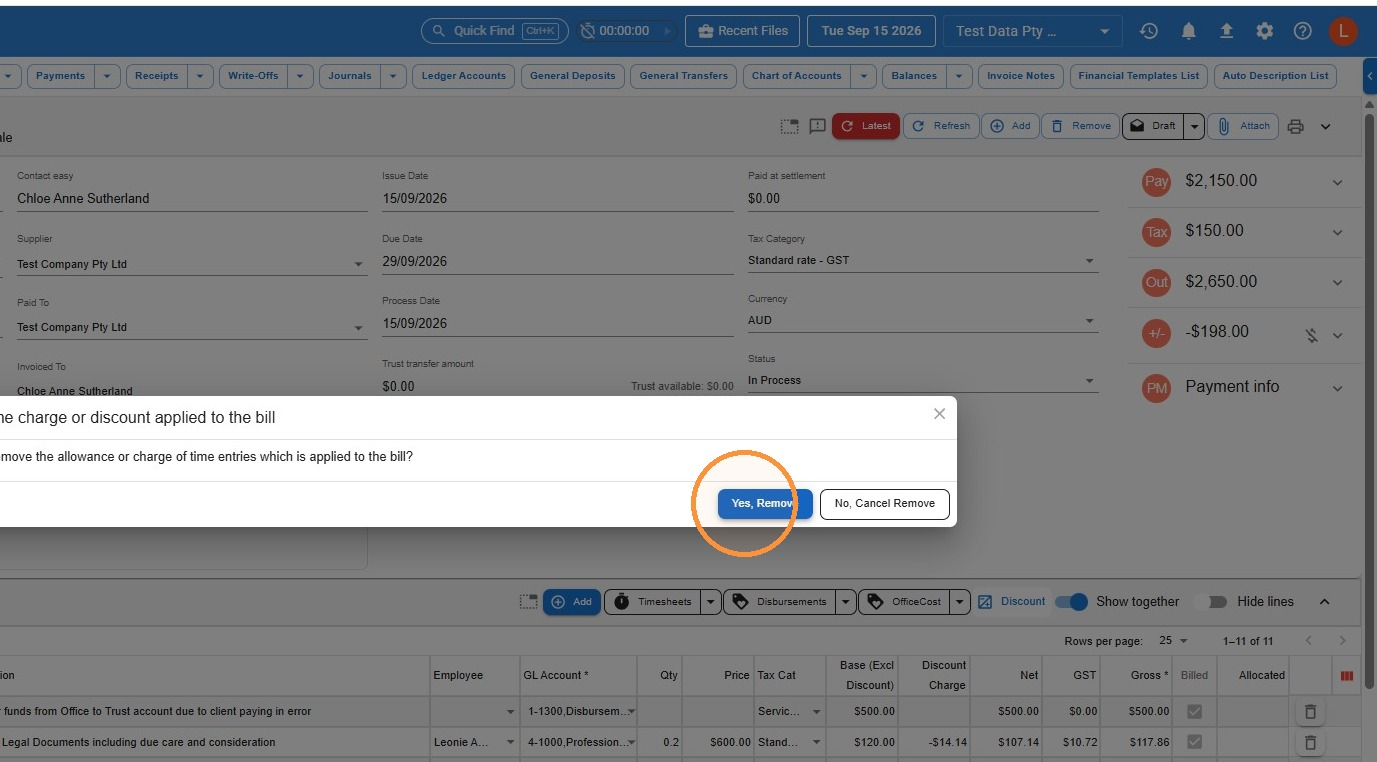
- Confirm removal by clicking Yes, Remove.
Printing an invoice that shows the discount
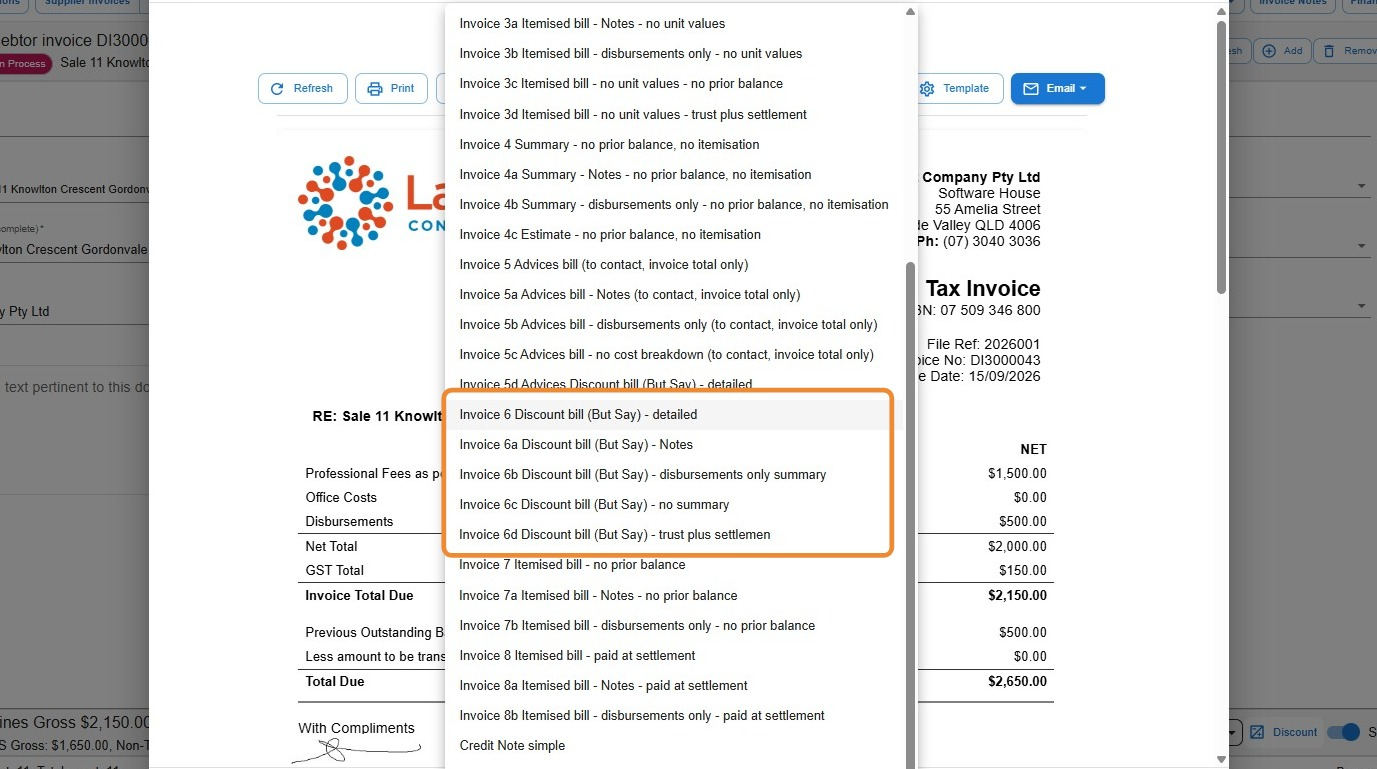
- Once you’ve applied your discount or charge, your regular invoice templates will simply show the new total. If you want to explicitly show the discount — commonly known as a “But Say” invoice — select one of the But Say templates from the 6 series, depending on what you do or don’t want included.
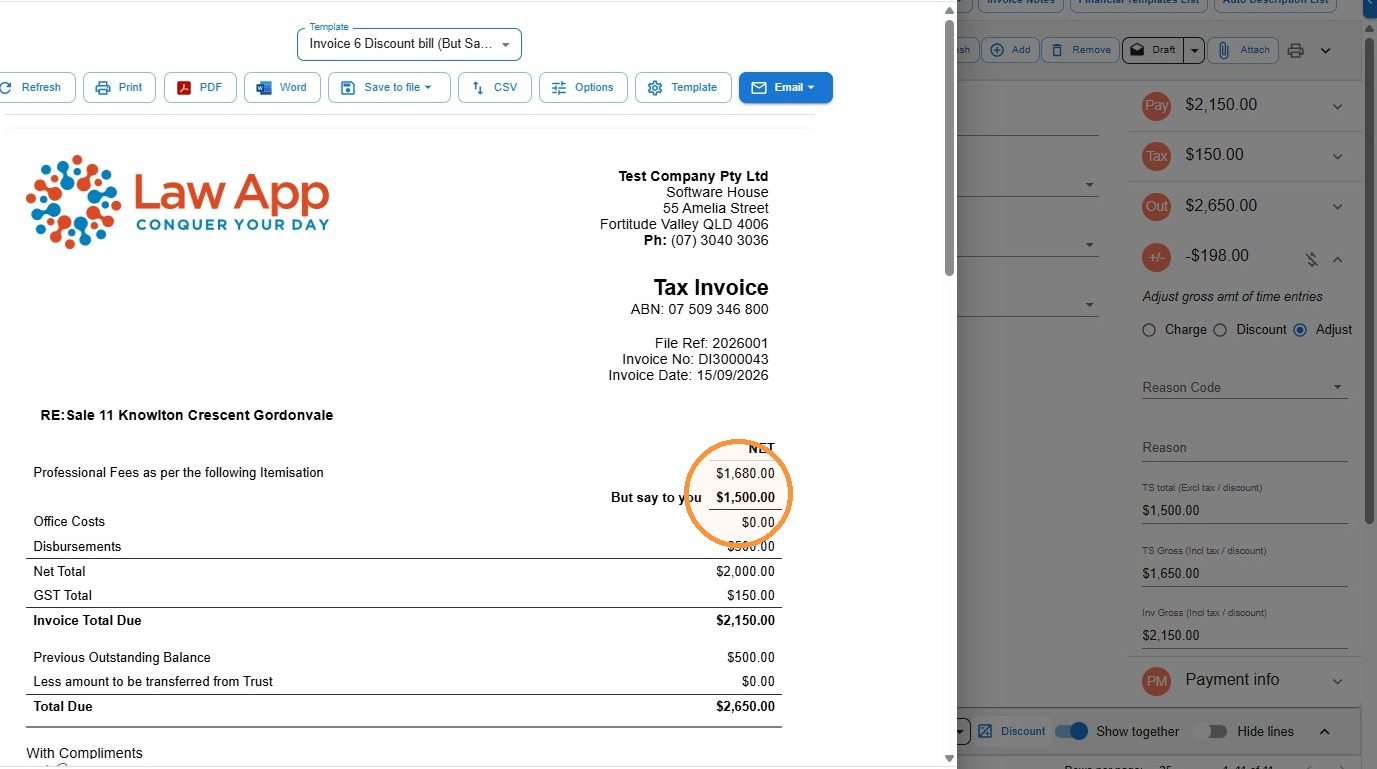
- The invoice will generate showing the original amount as well as the reduced amount.
Leave a Reply