
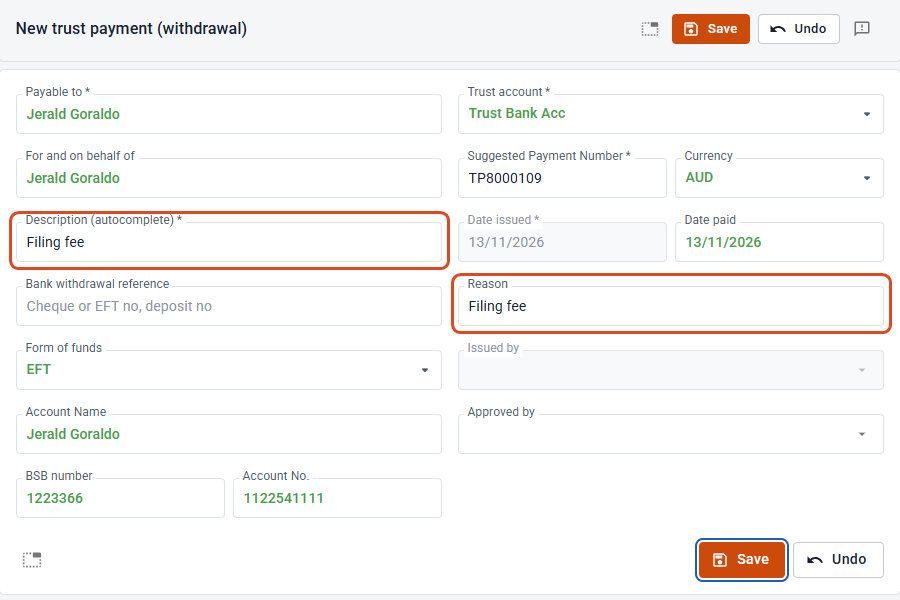
Every trust payment needs a Description: a few words saying what the money is for, such as Filing fee or Search fees. The Description field searches your firm’s saved list of descriptions as you type, so the same payment is worded the same way every time. The description you choose also fills in the payment’s Reason, which shows on the trust line and prints on the trust payment form.
This article covers the Description field on a trust payment, and where your firm manages its list of saved descriptions. It goes with How to record a Trust Payment in Law App, which covers the whole payment from start to finish.
When to pick, add or just type
Payments you make again and again
Filing fees, search fees, stamp duty, settlement payments. Pick the saved description, or add it once so it’s there next time. Ledgers, statements and reports then read the same way for every file.
A one-off payment
Type the description and carry on. It saves on this payment only and isn’t added to your list, so the list stays short and easy to search.
How to choose a saved description
- Start a new trust payment. In the left menu, select Trust, then Trust Payments, then click New payment. (From inside a file, click Financials, then Trust, then Withdrawal.)
- Fill in Payable to, then click in Description (autocomplete) and type at least two letters of the description or its code.
- Pick the description from the list. Each one shows its code underneath. The description fills the field, and Law App copies it into Reason for you.
How to add a new description to your list
When nothing in your list matches what you’ve typed, an Add new description panel appears under the field with two buttons.
- Type the description in full, exactly as you want it to read, for example Filing fee.
- Choose where it should be offered:
Add saves it with no category, so it’s offered in every Description field in Law App (contacts, files, invoices, receipts and payments).
Add to Payment Category saves it to the Payment category, so it’s offered only on payments: trust payments and general payments.
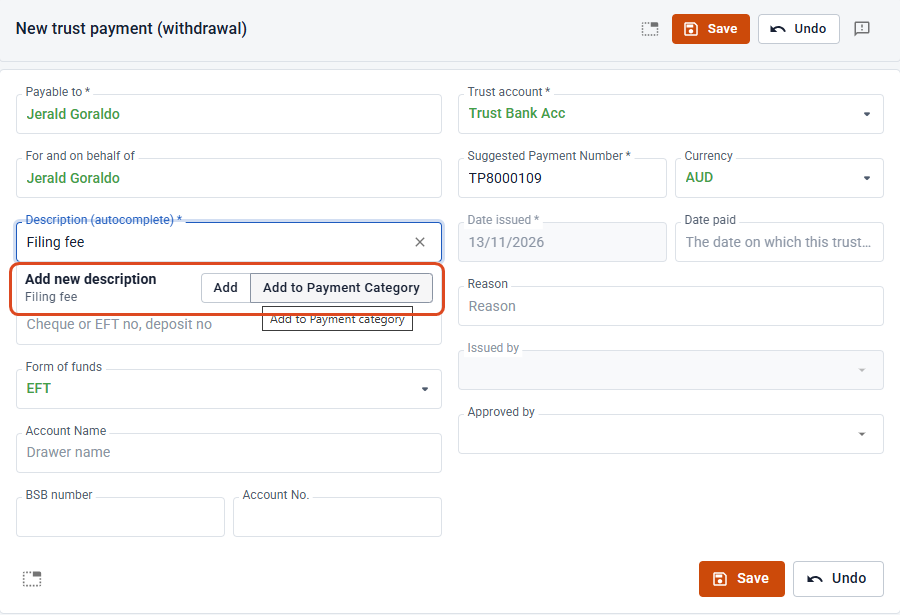
The new description fills the field straight away, and it’s in the list for everyone in your firm from then on. Law App gives it a code from its first four letters (Fili for Filing fee). You can change the code in settings.
Where the description appears
The Reason carries through to the trust line on the payment, then onto the printed trust payment form, both at the top under Reason and in the Details of the Transactions table. This is what your client or the payee sees, so keep it clear.
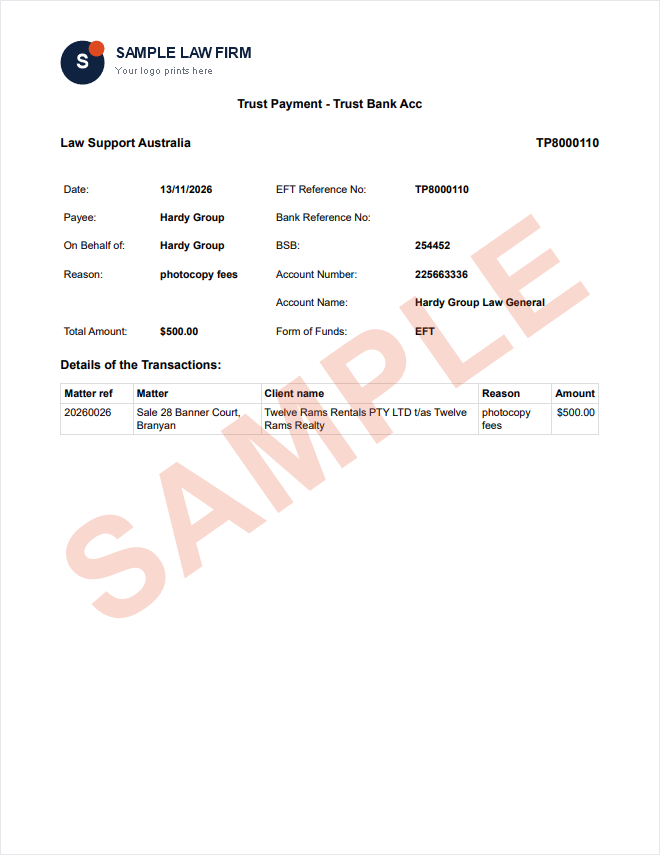
Sample only. Your firm’s own logo and details print on your forms.
How to manage your description list in Settings
Your firm’s saved descriptions are kept in one list. Use it to fix wording, change a category or code, add several descriptions at once, or retire ones you no longer use.
- Click Settings at the bottom of the left menu.
- Under General, select Descriptions (auto). You can also type Descriptions into Quick Find (Ctrl+K) to go straight there.
- Change what you need in the grid, then click Save.
Columns in the list
| Column | What it does |
|---|---|
| Category | Which Description fields offer it: Contact, File, Supplier Invoice, Debtor Invoice, Payment, Receipt, Trust or Other. Trust payments use Payment. Leave it blank to offer it everywhere. |
| Code | A short code you can type to find it quickly. Each code must be unique. |
| Description | The wording that goes on the payment. |
| Contact | Optional. Links the description to a contact. |
| Archived | Tick to stop it being offered. It isn’t deleted. |
Common questions
Why can’t I find a description I know we use?
Check three things: you’ve typed at least two letters, the description isn’t ticked Archived, and its category is Payment or blank. A description saved to another category, such as Receipt, won’t be offered on a payment.
Why doesn’t the Add new description panel appear?
It only appears when nothing in your list matches what you’ve typed exactly, by description or by code. If the description is already saved, pick it from the list.
Can I leave the Description empty?
No. Description is required, and the payment won’t save without it.
Leave a Reply