
In Law App you pay a supplier invoice by creating a supplier payment, then allocating that payment against the supplier’s outstanding invoices. Allocation is the step that links your money to the right invoices and pulls the correct GST through to your Cash BAS, so it’s worth doing properly. This guide uses an ASIC search invoice as the example, but the same steps work for any supplier.
Before you start
Only finalised, outstanding supplier invoices can be allocated to a payment. If an invoice is still in draft, or has already been paid, it won’t appear in the allocation list. Finalise the supplier invoice first if you haven’t already.
Step 1 — Create the payment header
The payment header records who you’re paying and from which bank account. You need a saved header before Law App will let you add any payment lines.
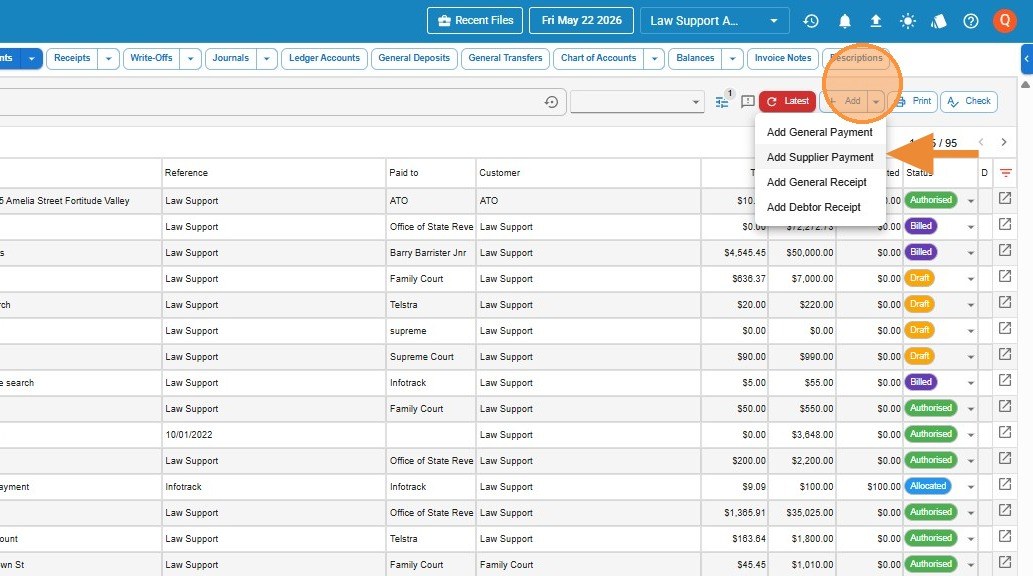
- Go to Accounts → General → Payments and click Add Supplier Payment.
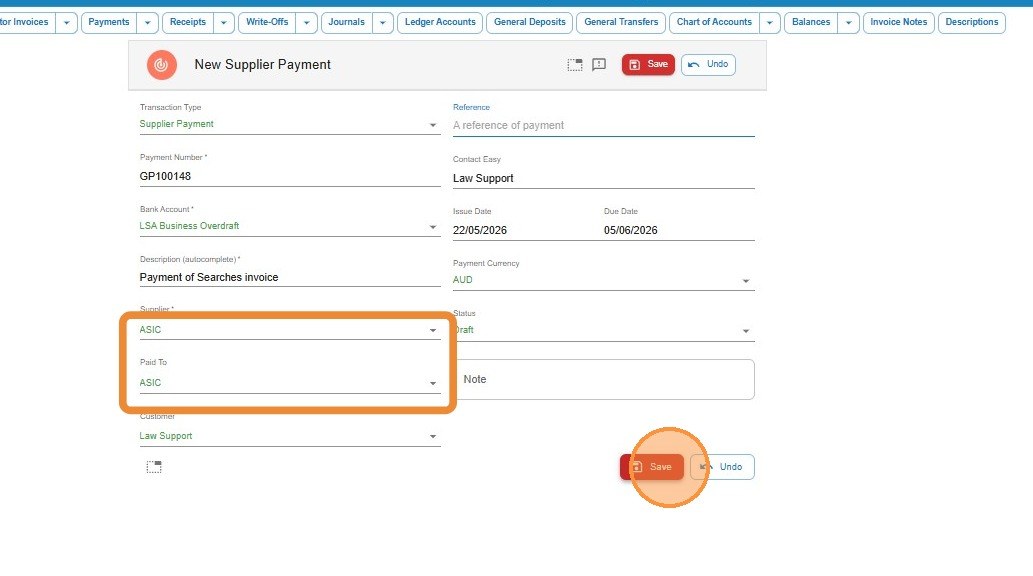
- Select the supplier (for example, ASIC) and complete the header — payment date, the bank account the money is coming from, and any reference.
- Click Save to create the payment header.
Step 2 — Add the payment line
The line is the actual amount you’re paying. You enter the gross figure here and let Law App handle the GST in the next step.
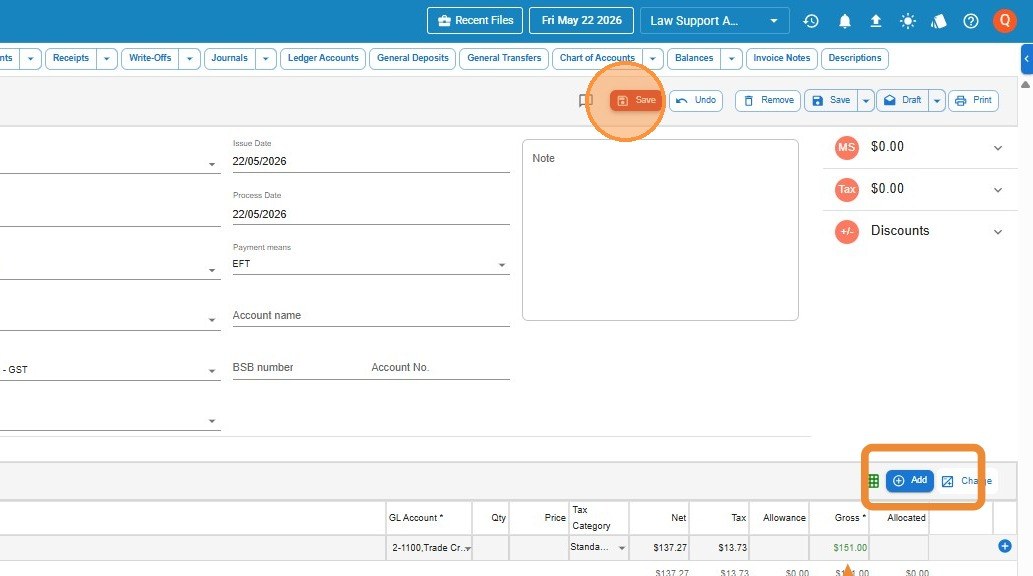
- Click the add (+) button to add a line.
- Set the line Type to Supplier.
- Enter the gross amount of the payment — the full amount you’re paying, GST included.
- Click Save.
Step 3 — Allocate the payment to invoices
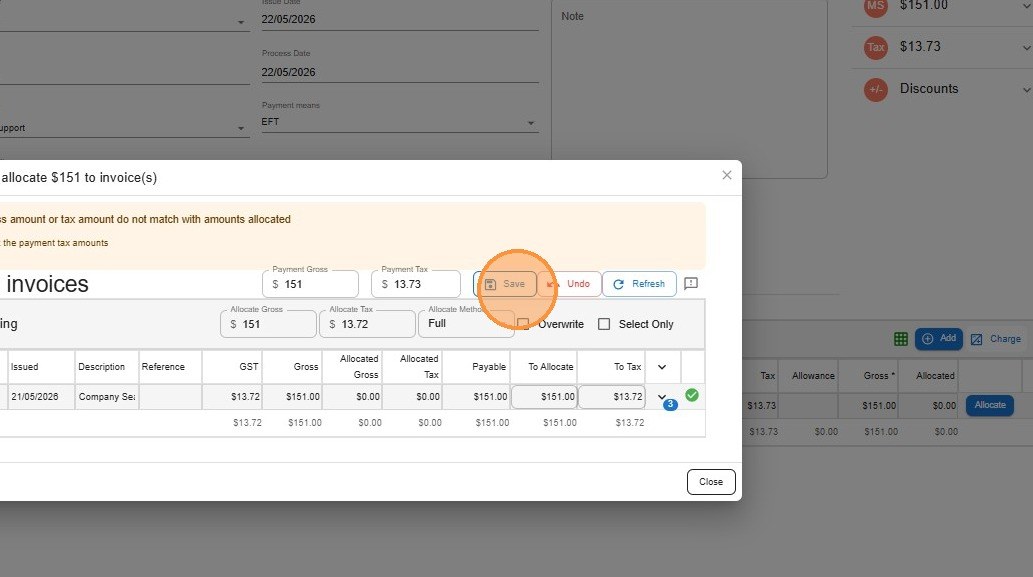
Allocating matches your payment to the supplier’s specific invoices. Once you save the line, Law App gives you the option to Allocate.
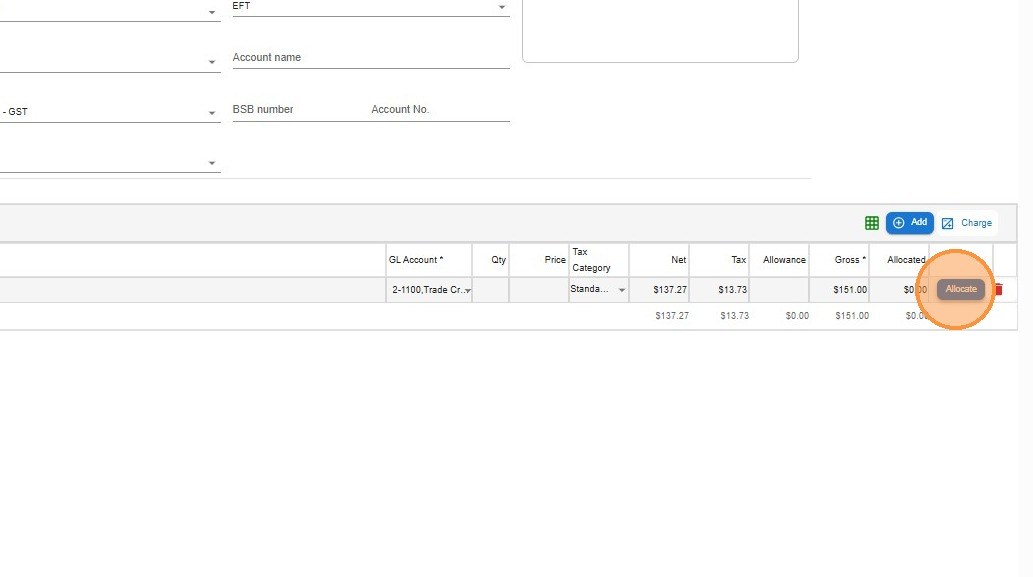
When you click Allocate, Law App lists the supplier’s finalised, outstanding invoices, oldest to newest. You can either let it pay them down in order, or pick specific invoices yourself.
Pay oldest first
Law App allocates to the oldest outstanding invoices first, automatically. Leave it as it is to pay the account down in order.
Pay specific invoices
Click Select only, then tick just the invoices you want to pay. Use this when you’re paying particular invoices rather than the whole balance.
- Click Allocate.
- Review the list of finalised, outstanding invoices — shown oldest to newest.
- Leave the default to pay oldest first, or click Select only and tick the invoices you want to pay.
- Click Save to allocate.
Leave a Reply