
In Law App, the address fields on a contact stay blank and locked until you add an address row first. To enter a contact address, press Add in the Addresses section — that opens an editable address you can fill in, then flag as Primary, Postage, or both.
Creating from scratch
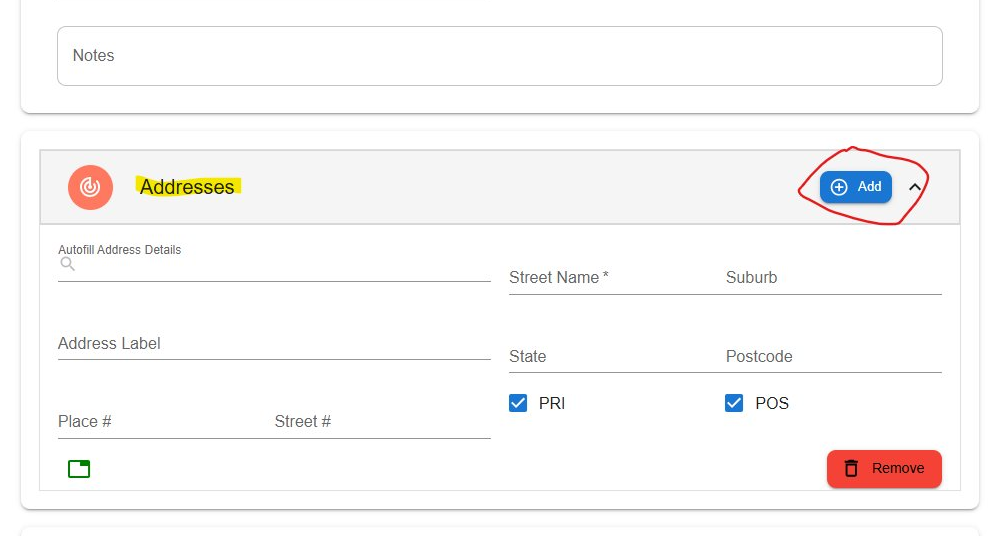
The Addresses section sits directly under Notes. Press Add to open a blank address, then enter the details.
Editing a saved contact
Open the contact from your Contacts list to fold it out into Form view, then add or edit addresses the same way.
Add an address to a new contact
When you create a contact from scratch, the Addresses section starts empty, which is why the Street Name, Suburb, State and Postcode fields won’t accept any typing yet. You have to add an address row before those fields become editable.
- Scroll to the Addresses section, directly under the Notes box.
- Press the blue Add button on the right of the Addresses header.
- A blank address opens. The easiest option is always there — type into the Autofill Address Details search, pick the Google match, and it auto-fills the street, suburb, state and postcode for you. Or enter each field manually.
- Check or complete Street Name (required), Suburb, State and Postcode, and add a Place #, Street # or Address Label if you need them.
- Tick PRI and/or POS to set the address as Primary, Postage, or both.
- Press Save at the top of the contact.
Set the Primary and Postage flags
Each address has two flags: PRI (Primary) and POS (Postage). Primary is the contact’s main address; Postage is the address mail is sent to. These flags control which address Law App uses where, so set them deliberately.
Edit a contact address on an existing contact
If the contact already exists, you don’t start a new one — you open the existing record and edit it in place.
- Go to Contacts and find the contact you want.
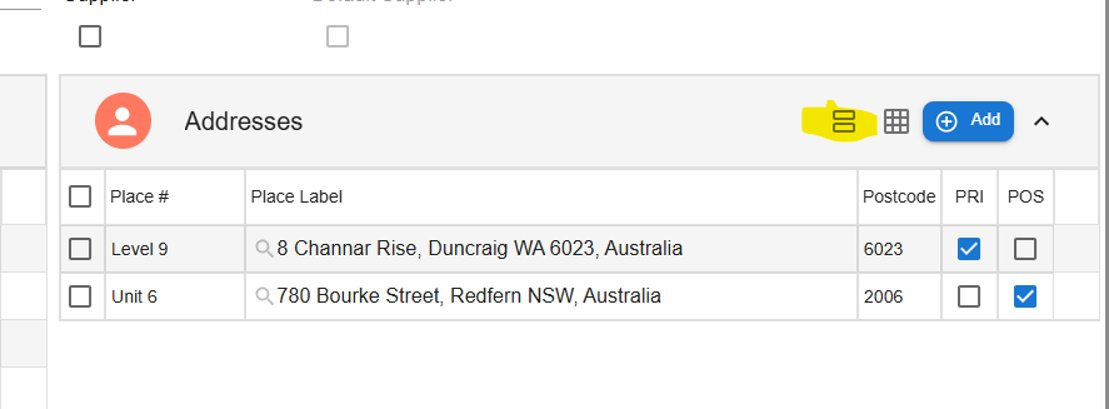
- Use the drop-down (expand) control on the contact to open it. It folds out into Form view — the same layout you see when creating a contact.
- In the Addresses section, press Add for a new address, or edit an existing one. Adjust the PRI and POS flags as needed.
- Press Save.
Leave a Reply