
Law App’s firm and global templates let you generate client-ready documents in a few clicks, with merge fields pulling details straight from the file and contact record so you’re not retyping them. This article covers creating a document from a template, completing the merge fields, and editing, converting or organising it afterwards.
Creating a document from a template
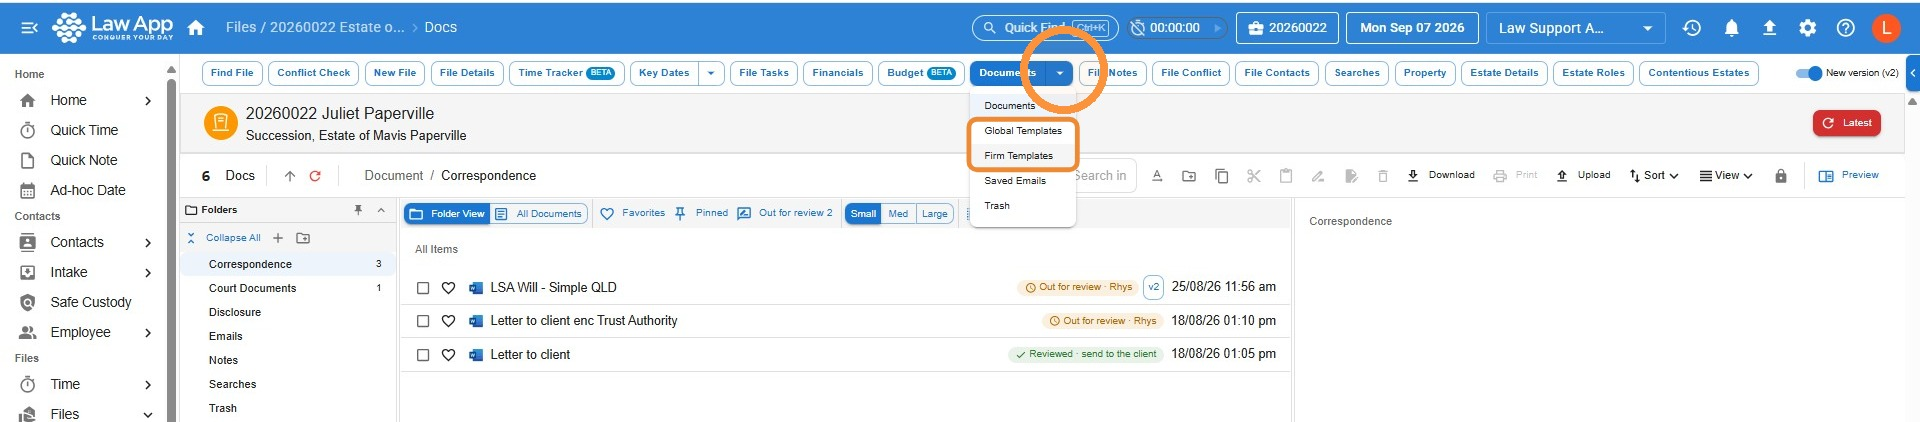
- Open the Documents menu and choose Firm Templates (templates your firm has created and saved) or Global Templates (templates Law App manages, such as court forms, Lexon documents and Titles forms).
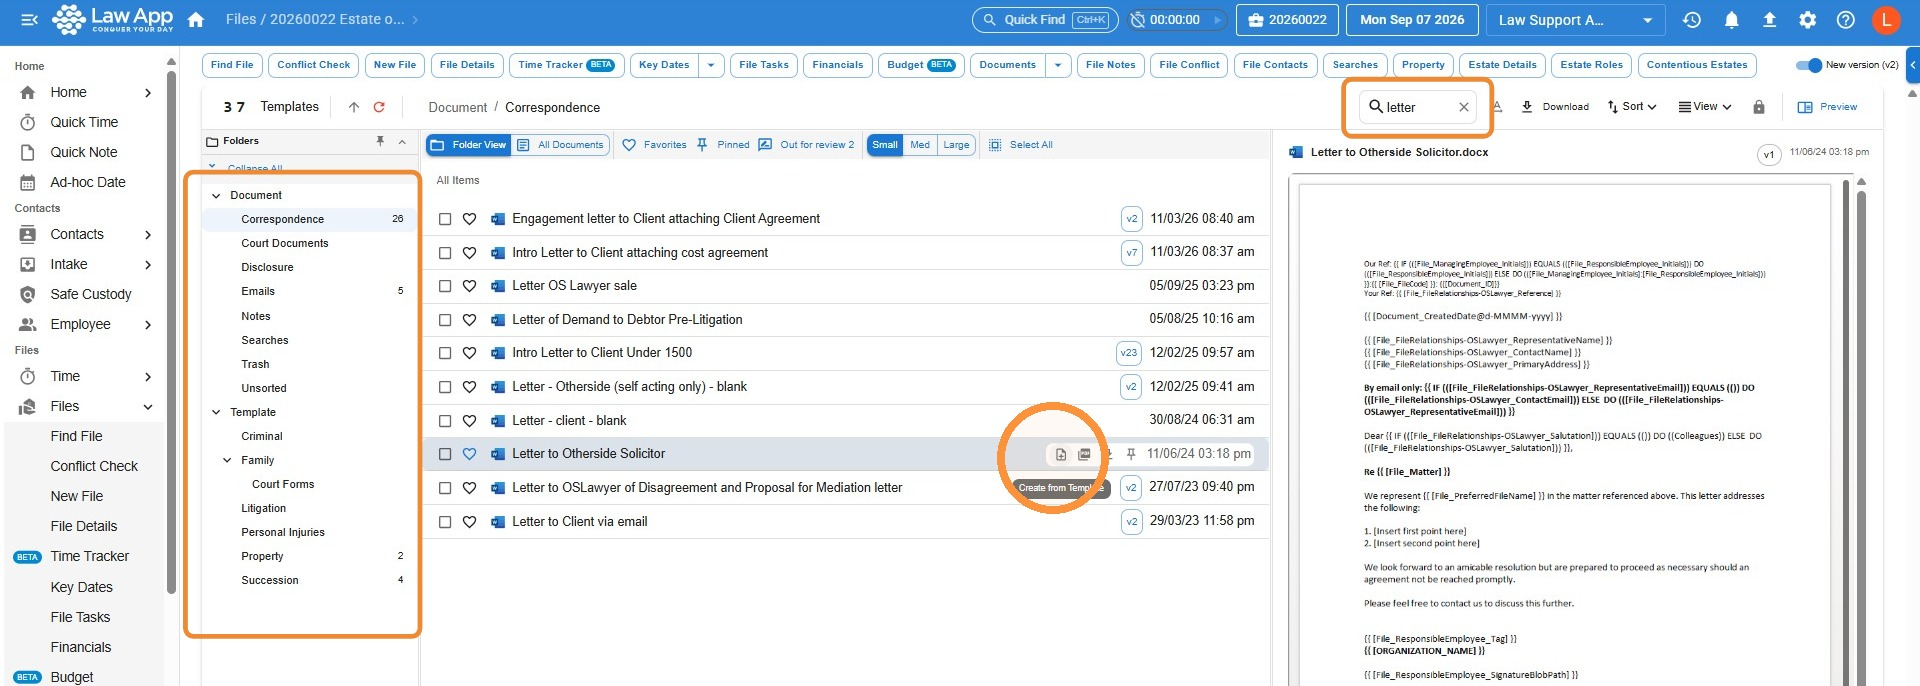
- Search for a template by name, or browse using the folders on the left. Click a template to preview it.
- Hover over the template you want and select Create from Template.
Completing the merge fields and creating your document
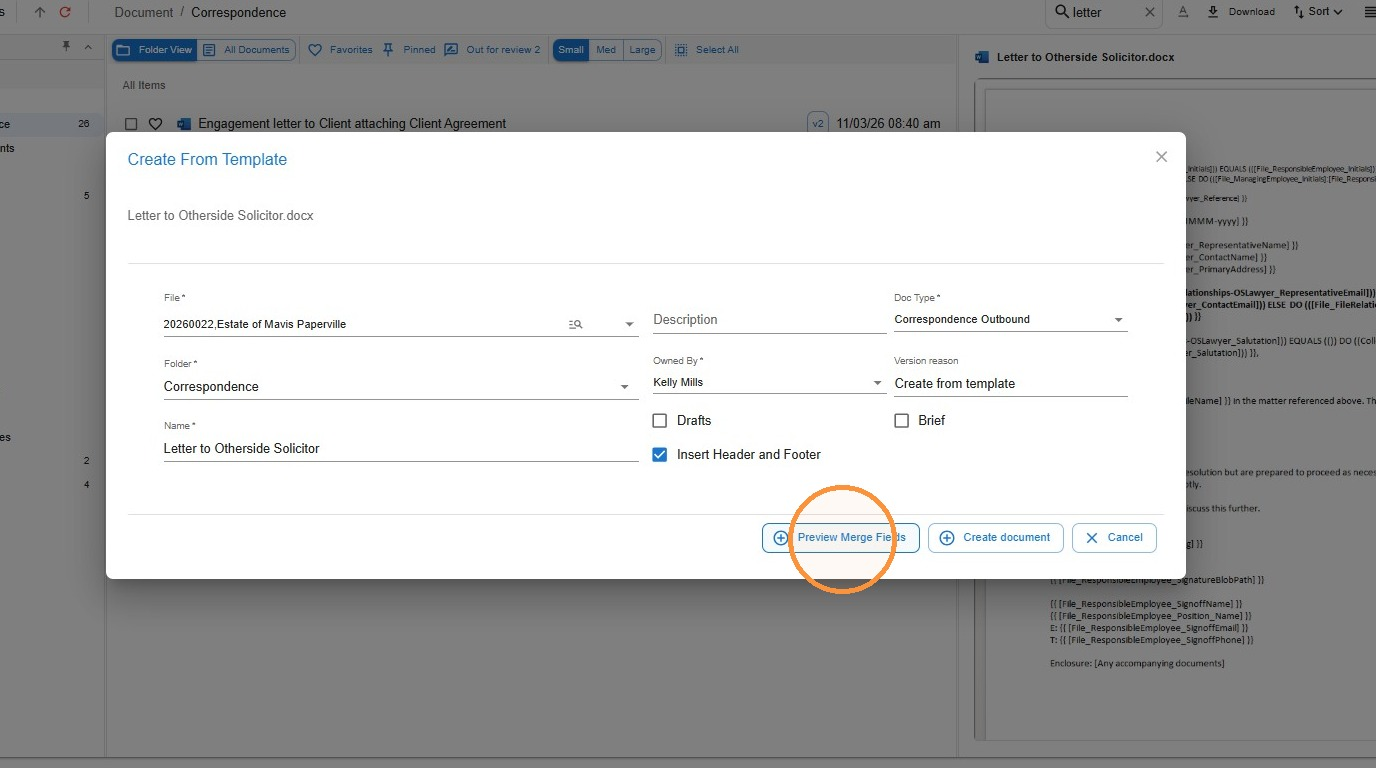
- On the Create From Template screen, check the fields — File defaults to the file you were in when you opened the template, Folder defaults to the location the template is set to save to, and Name defaults to the template’s name. Change any of these if you need to, and add a Description if you want one — it’s optional.
- Select Preview Merge Fields.
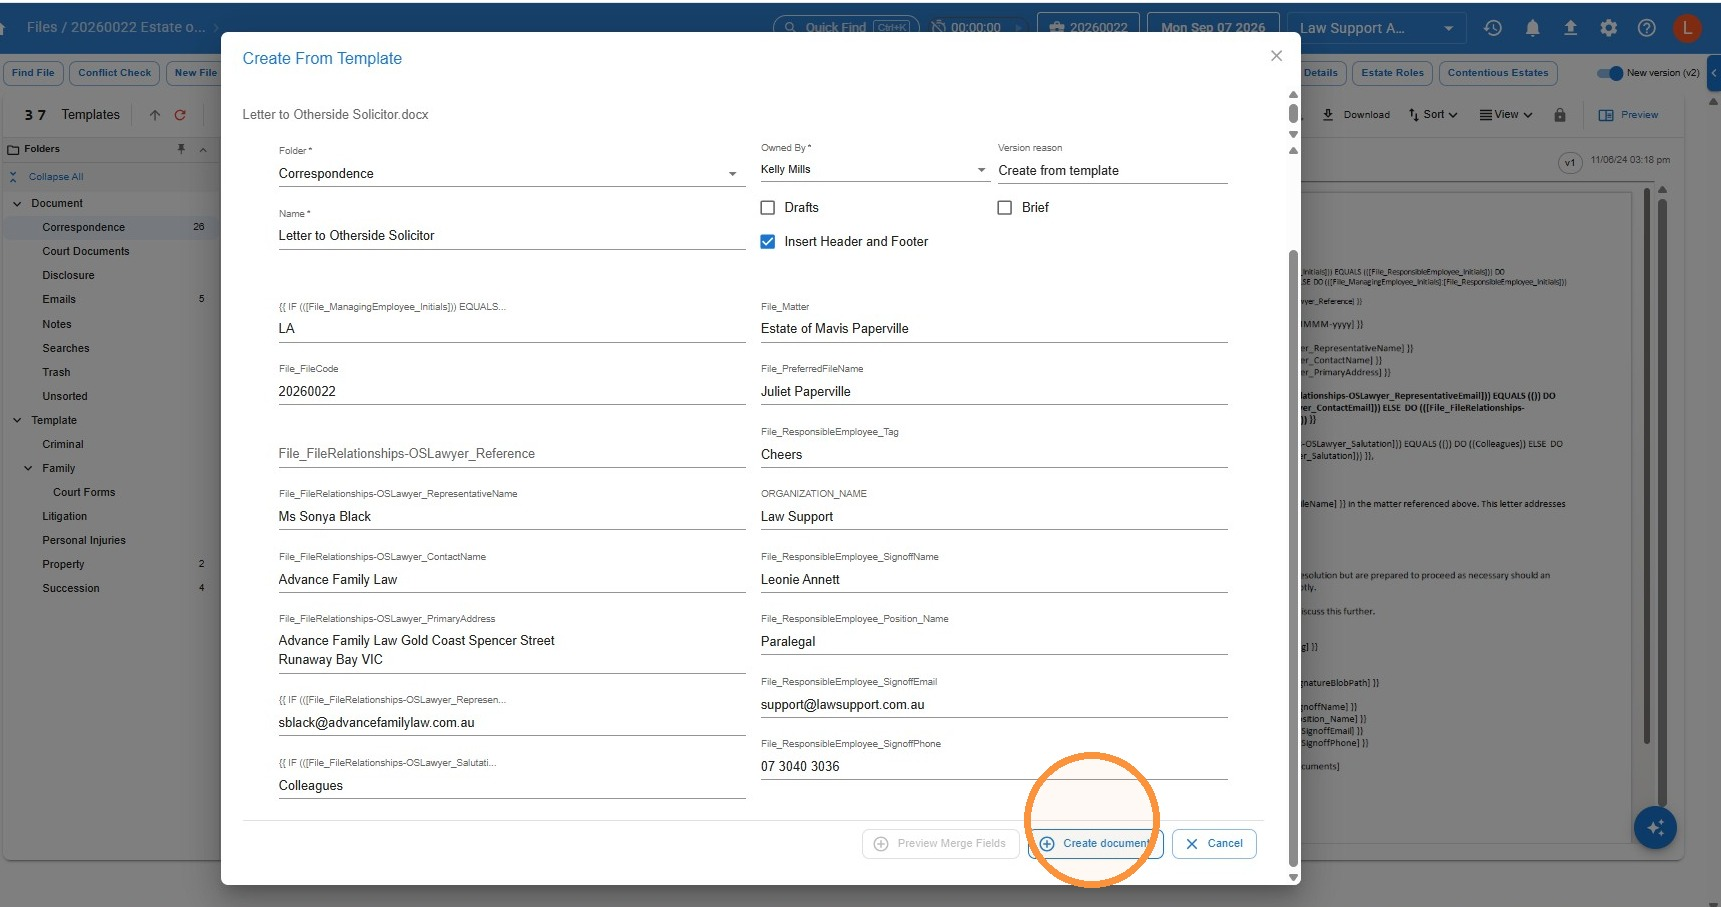
- Review the merge fields listed. A blank field usually means that information isn’t filled in on the file or contact record yet — you can type directly into the field to complete it now, but it’s worth updating the file or contact too, so it’s there next time.
- Once everything looks right, select Create document.
Opening and saving the document in Word
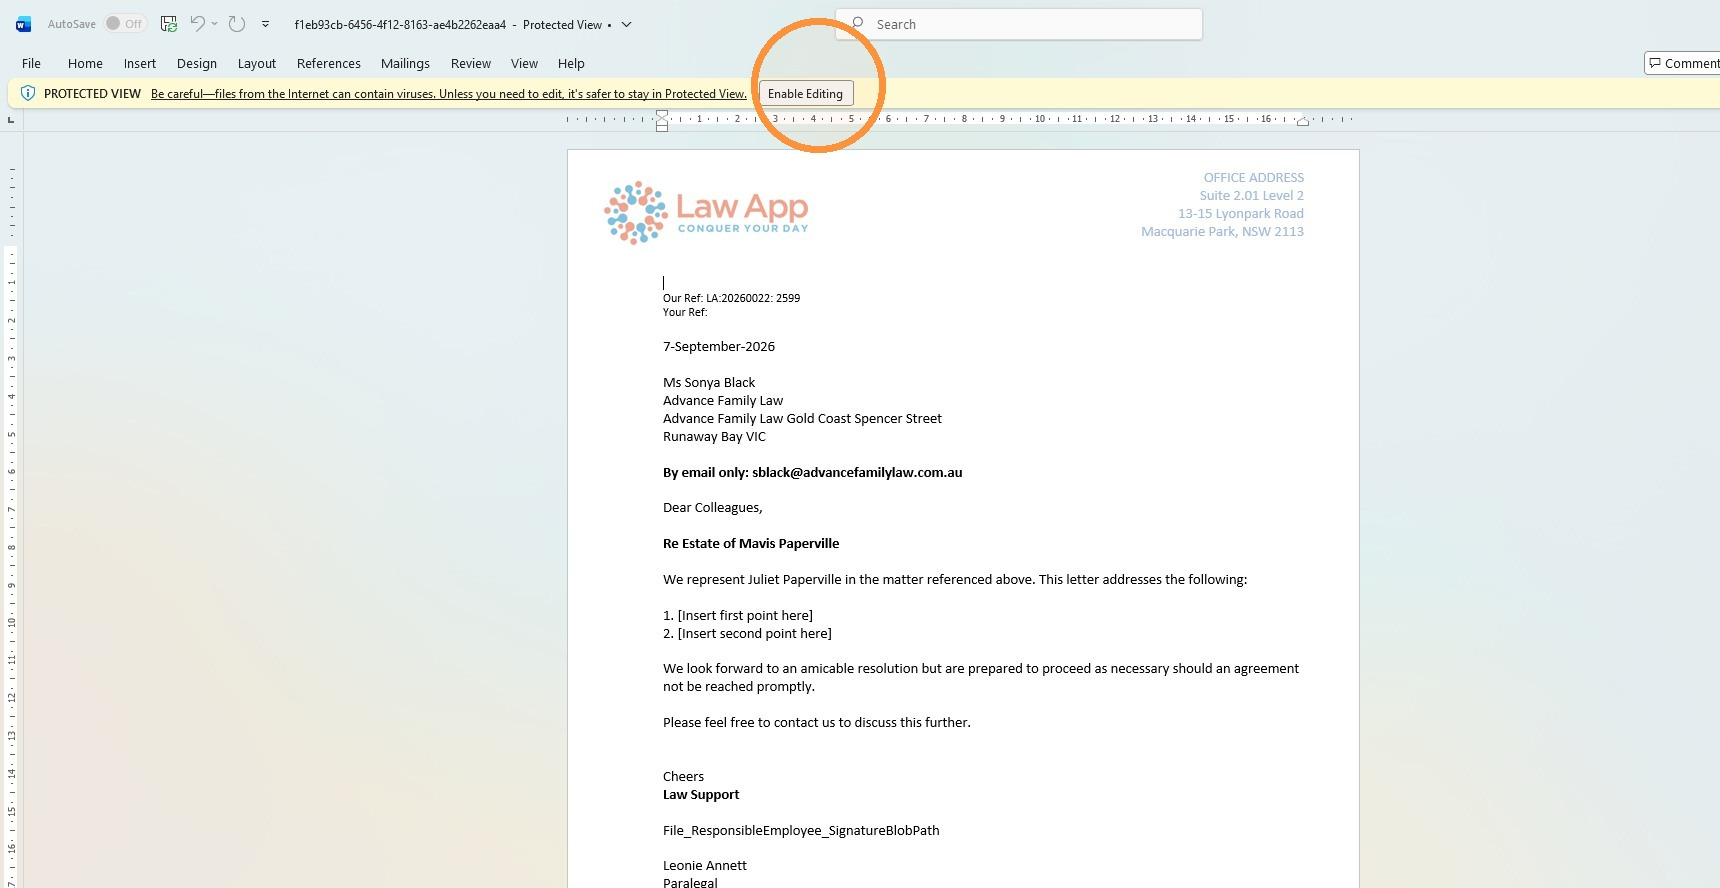
The document opens in Word, ready for any final touches.
- If you see a Protected View warning, select Enable Editing. Whether this warning appears depends on your firm’s settings — check with your IT team if you’d like it turned off.
- Make any changes you need, then save and close the document.
Editing a document after it’s created
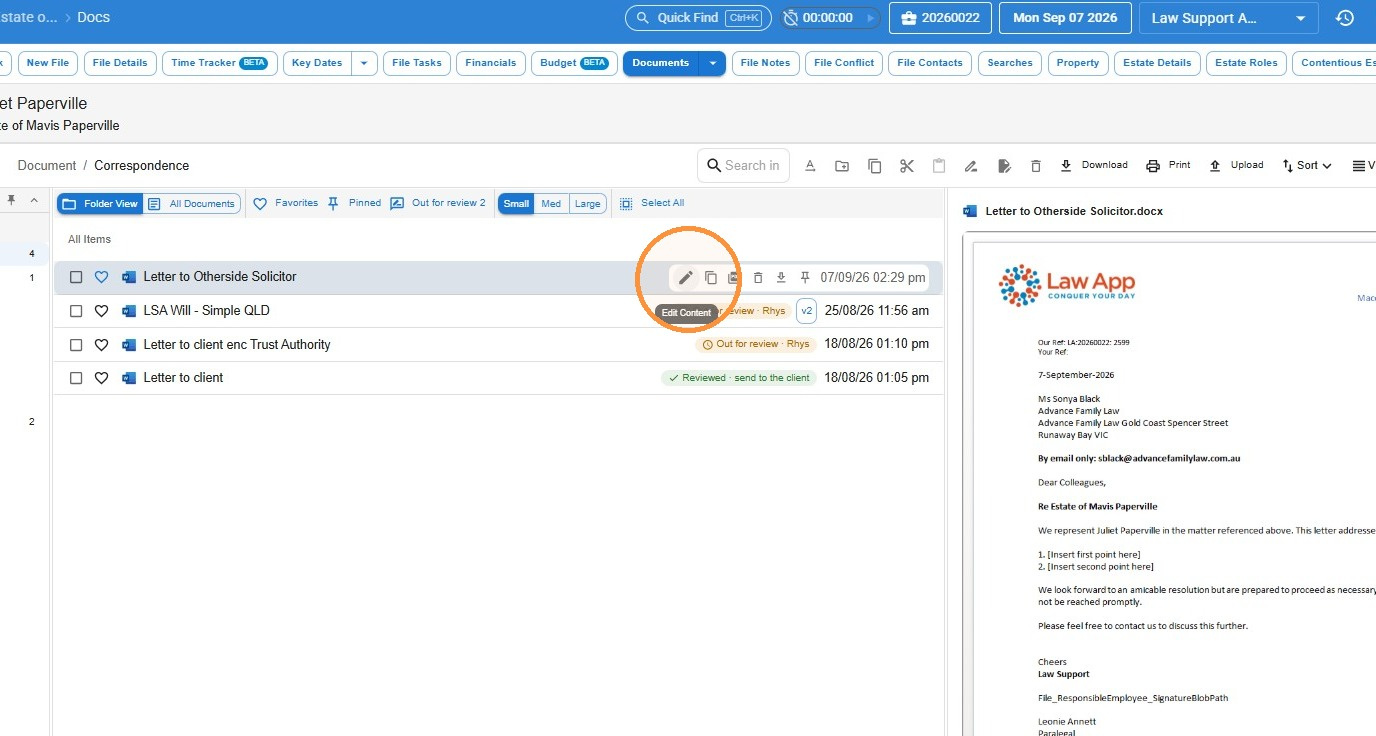
Back on the file’s Documents section, your new document now appears in the list.
- Click the document to view it in the preview panel.
- To make further changes, hover over the document and select Edit Content.
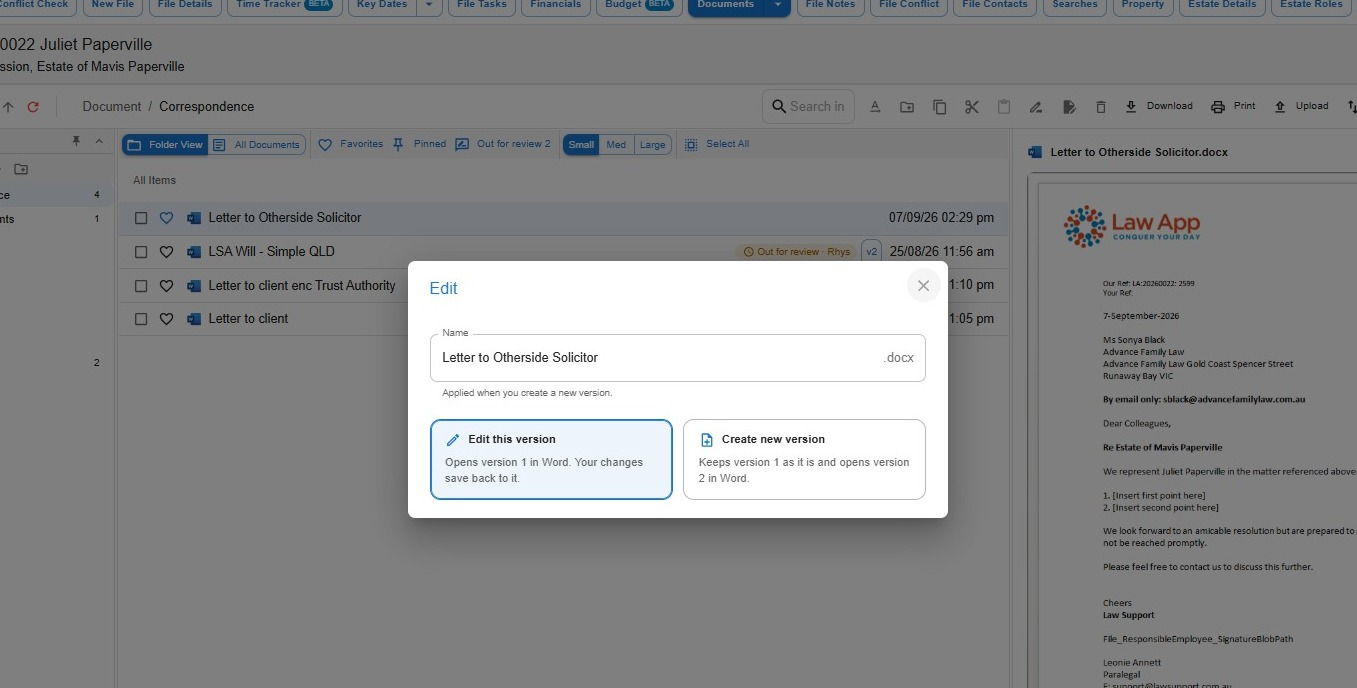
You’ll then be asked to choose one of two options:
Edit this version
Opens the current version in Word and saves your changes back to it. Only available to whoever created the document — or, if later versions exist, whoever created the most recent one.
Create new version
Opens a new version in Word and leaves the previous version untouched. Past versions can be viewed and managed by right-clicking the document and selecting View Versions.
Converting, renaming and organising documents
A few more things you can do with any document in the list:
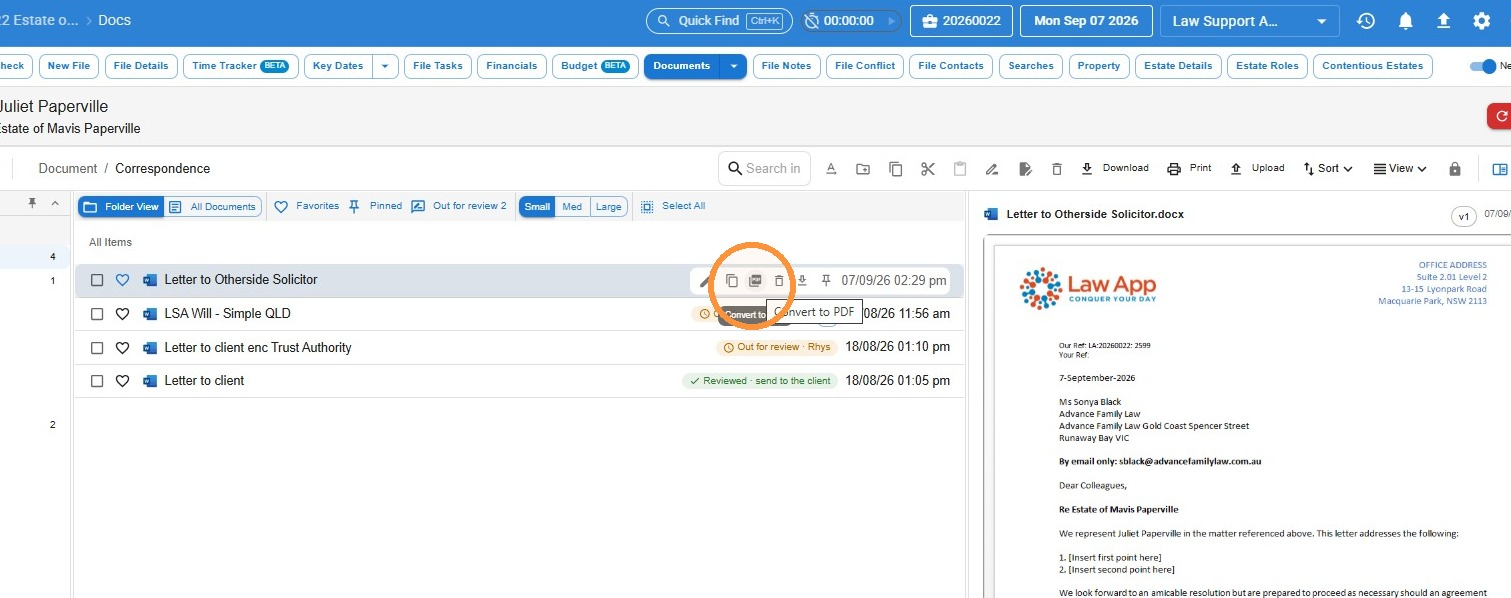
- To convert a document to PDF, hover over it and select Convert to PDF.
- To rename a document, double-click its name, type the new name, then click away to save it.
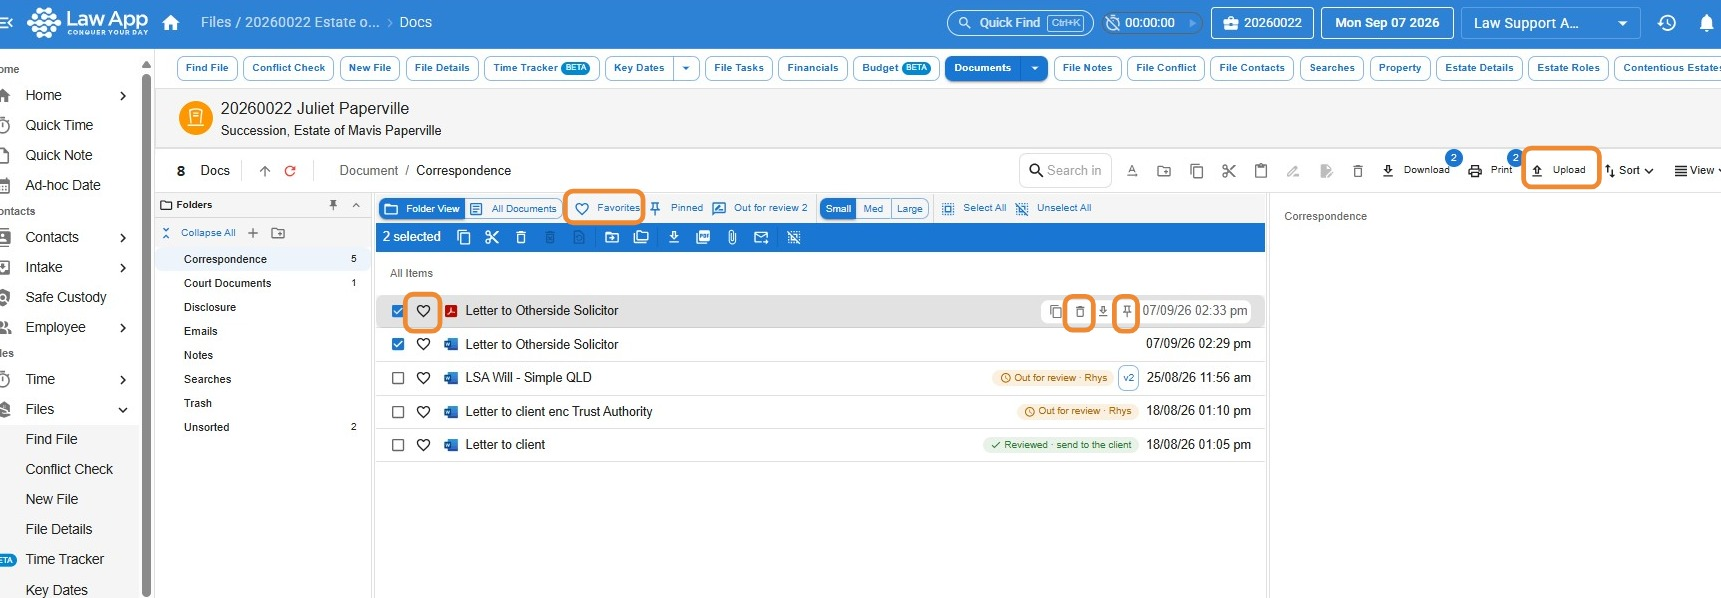
- To upload a document from elsewhere, click into the folder you want to save it in, select Upload and locate the file — or just drag and drop it in, as long as you’re in the right folder.
- To delete a document, hover over it and select the Trash icon. You’ll need to click twice to confirm — that’s intentional, to prevent accidental deletion.
- To pin a document to the top of your documents list, regardless of which folder you’re viewing, hover over it and click the pin icon. Click it again to unpin.
- To mark a document as a favourite, click its heart icon. Use the Favourites button any time to see everything you’ve marked, and click the heart icon again to remove it.
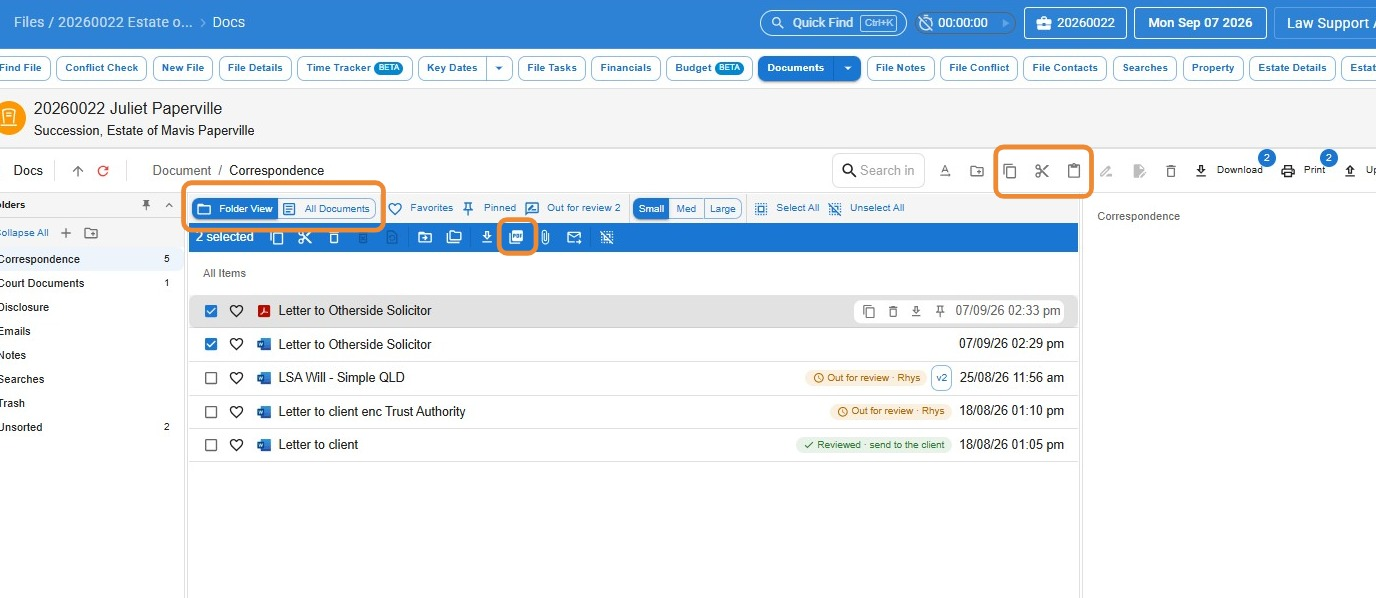
- To combine multiple documents into one PDF, tick the ones you want and click the PDF icon. On the next screen you can reorder the documents, name the output file, and choose the folder to save it in.
- To move or copy a document to a different folder, tick it, use Cut or Copy from the toolbar, then click into the destination folder and select Paste.
- Use Folder View and All Documents to switch between browsing by folder or seeing every document on the file in chronological order. Use Sort to change the order.
Why aren’t the fields in my document populating?
When a merge field doesn’t populate, it’s almost always because the information behind it hasn’t been entered in Law App yet — not a fault with the template itself.
The most common things that get missed:
- File contacts often need a second Representative Type ticked. Your client should always have Client ticked, but many forms also need a party-specific type — such as Buyer, Seller, Applicant, Respondent or Executor — ticked as well. Some forms use client-specific merge fields and others use party-specific merge fields, and without that second type ticked, Law App has no way to tell which party the contact is in the matter.
- Changes to a contact’s details — such as their address or email — won’t flow through to a file they’re already linked to unless you save with Update Relationships/Contact. Choosing Update Contact Only saves the change to the contact record alone.
- Solicitor details on a form — such as email, phone or address for service — are pulled from the employee’s card under Employee > Active. If these fields are blank in your document, they’re usually just missing from that employee’s card.
Leave a Reply