Learn how to accurately record and allocate supplier payments in Law App. This step-by-step guide covers navigating to the payments section, entering payment details, selecting suppliers, and allocating invoices — including best practices for large bills and reconciliation.
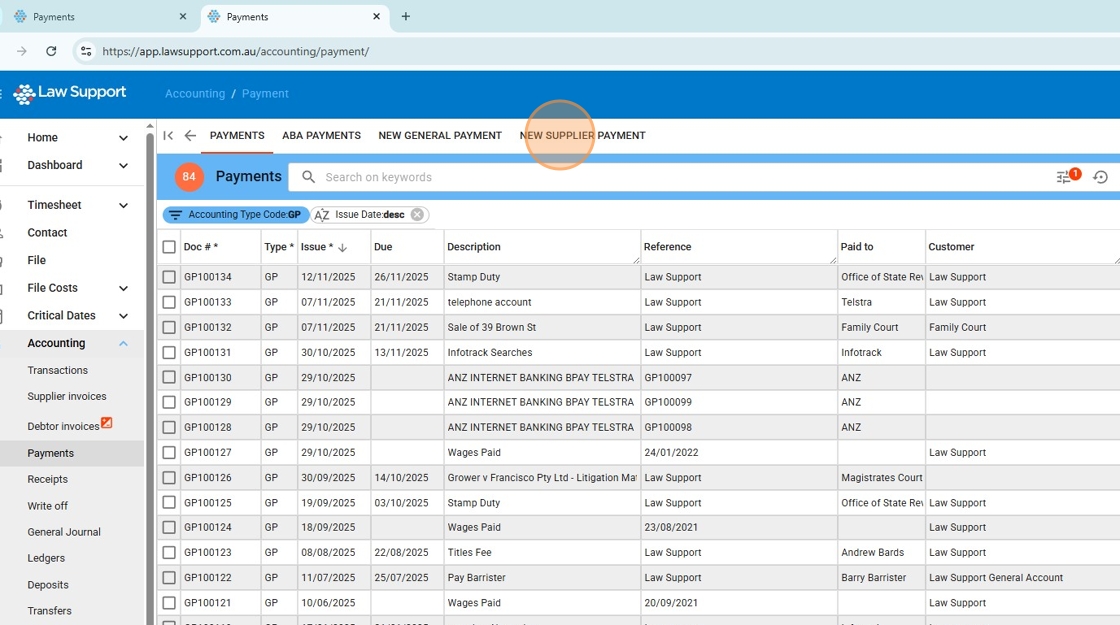
1. Navigate to Supplier Payments
From the left-hand menu, click on Accounting to expand the section.
Then select Payments to access the supplier payment screen.
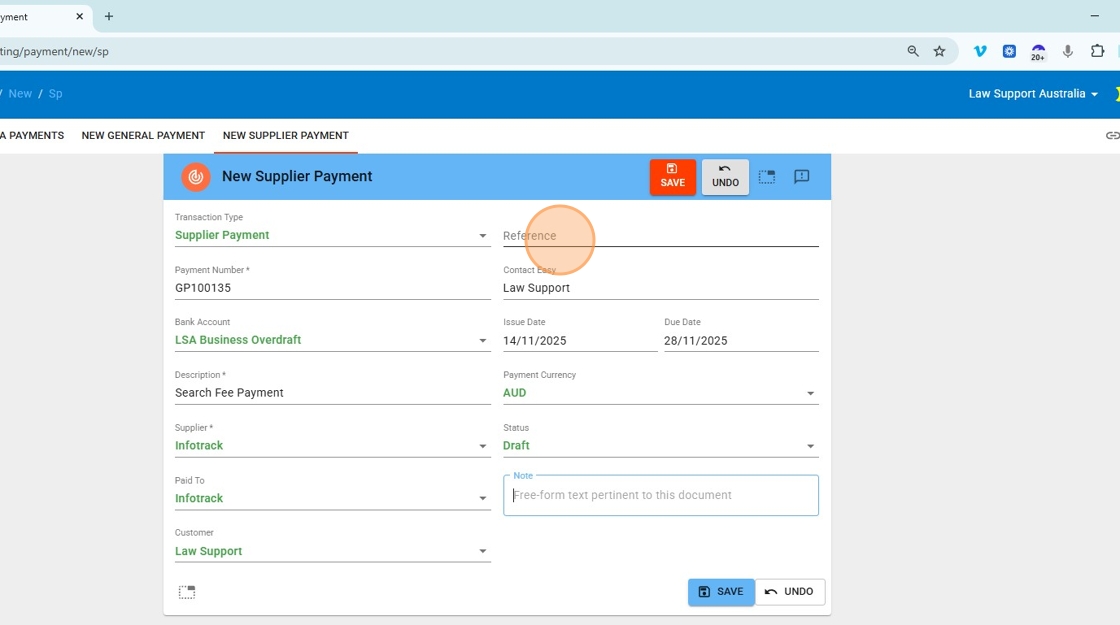
2. Click the NEW SUPPLIER PAYMENT tab
3. Fill in all blank fields, including the Description field to summarise the payment.
Make sure to select a supplier, begin typing the first three to four letters of their name. A filtered dropdown list will appear — select the correct supplier from the list.
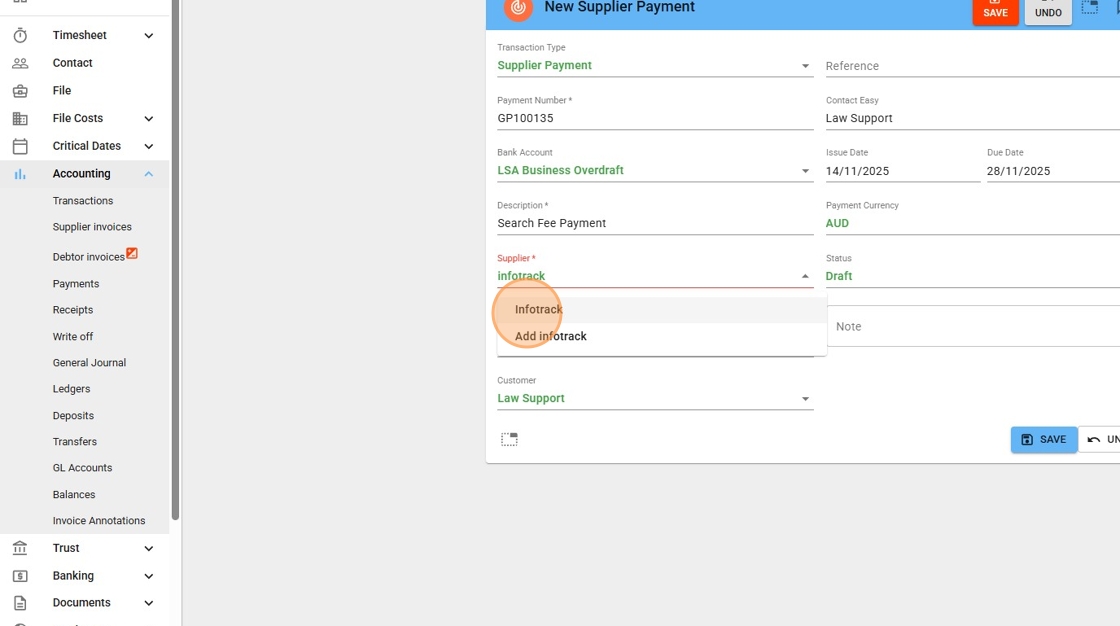
4. Click on A reference of payment — this field is used to record the supplier’s invoice number or payment reference.
You can enter:
- The exact supplier invoice number, if paying a single invoice
- A summary such as “Various”, if covering multiple invoices
- A list of reference numbers, if space permits
This field is flexible — it’s primarily for your internal tracking, so enter whatever will help you or your team identify the payment later.
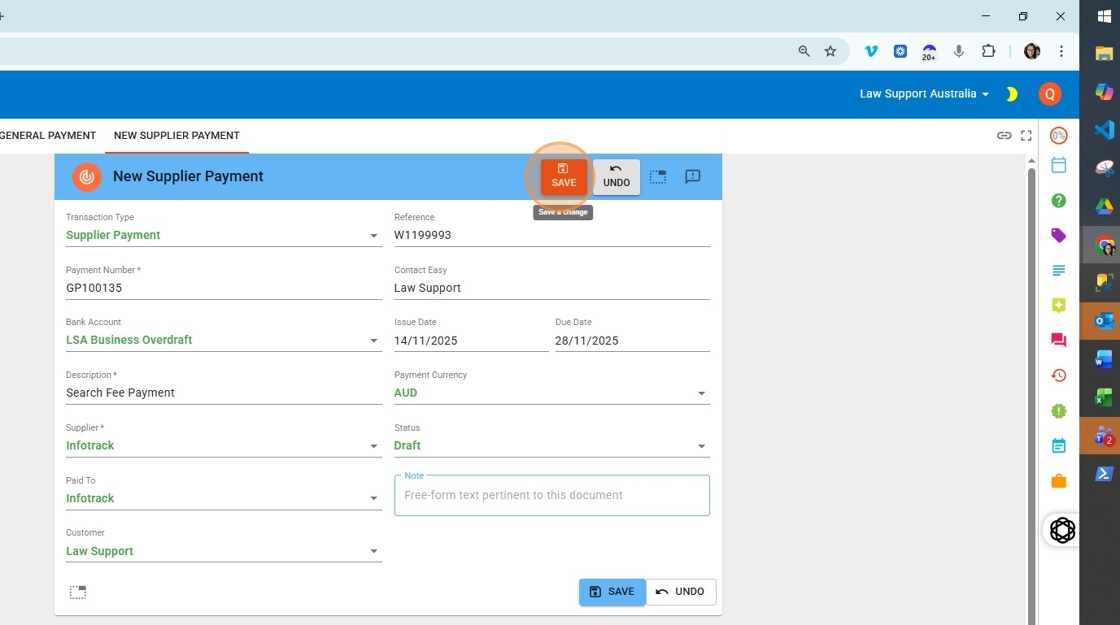
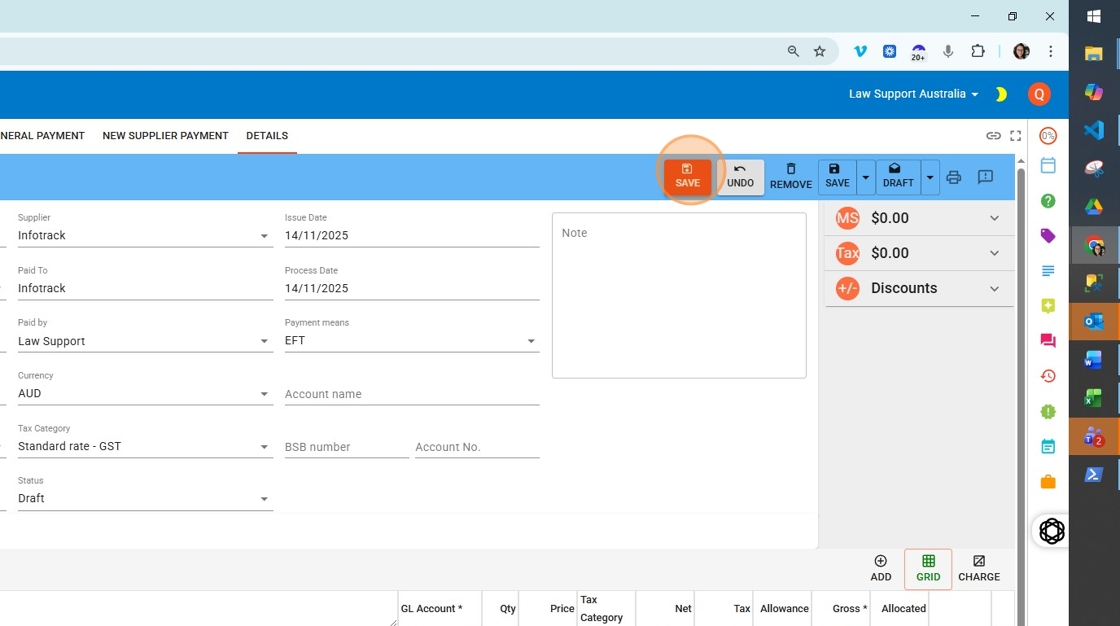
5. Click “Save” to move to the entry of the individual lines.
6. Click “Add” to add a new line to this transaction
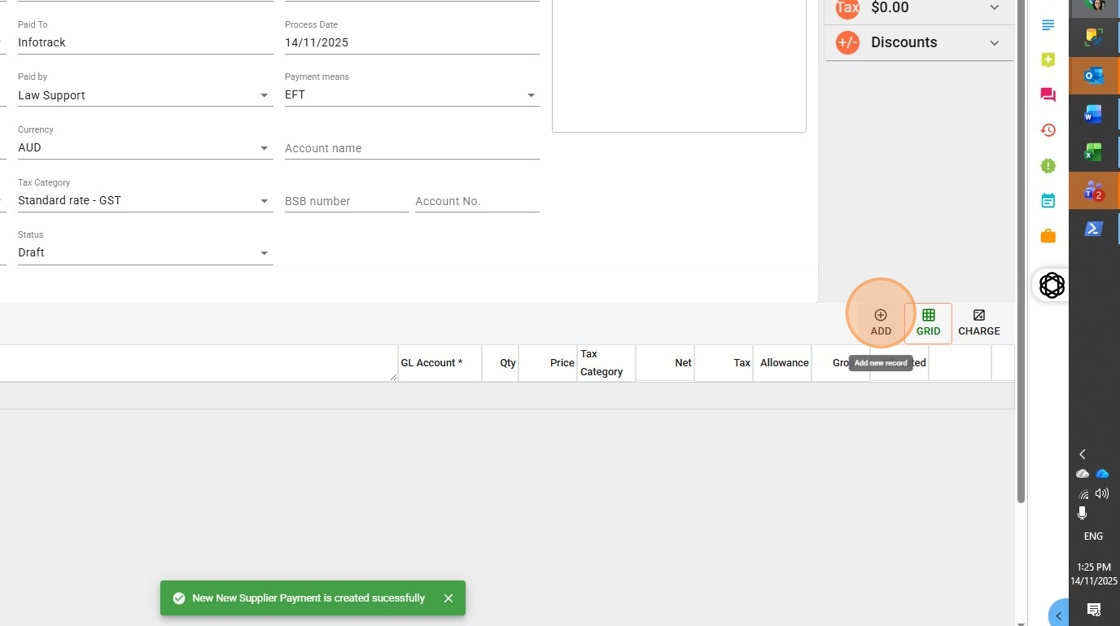
7. In the Type dropdown, select SUPPLIER to indicate this is a supplier payment.
Then enter the Gross Amount — this should be the full amount you are paying, including GST if applicable.
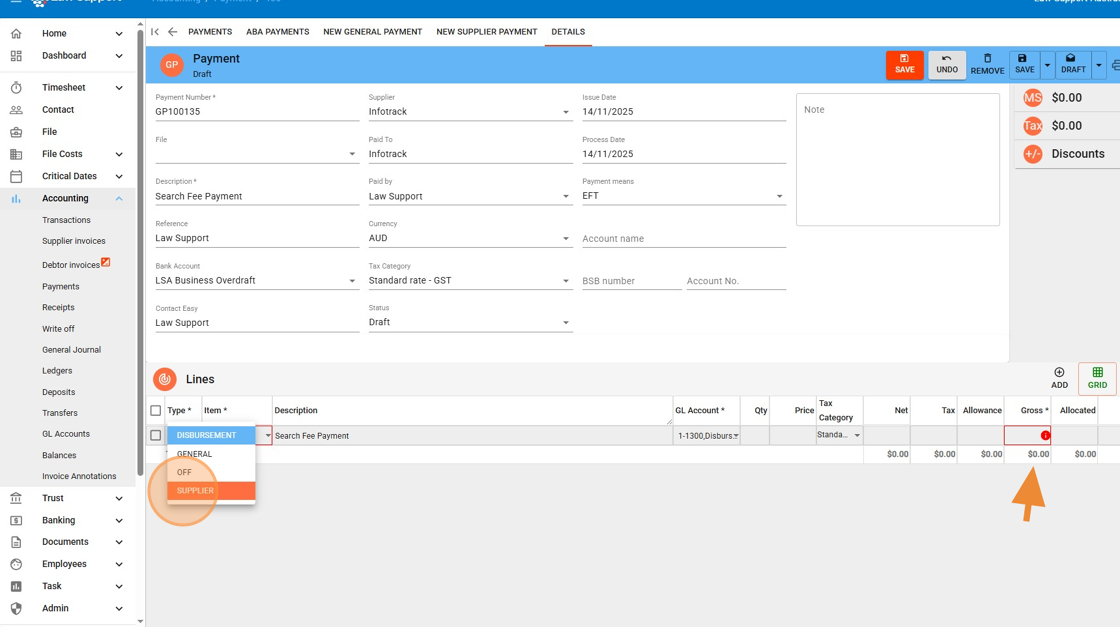
8. Click Save before proceeding to allocation.
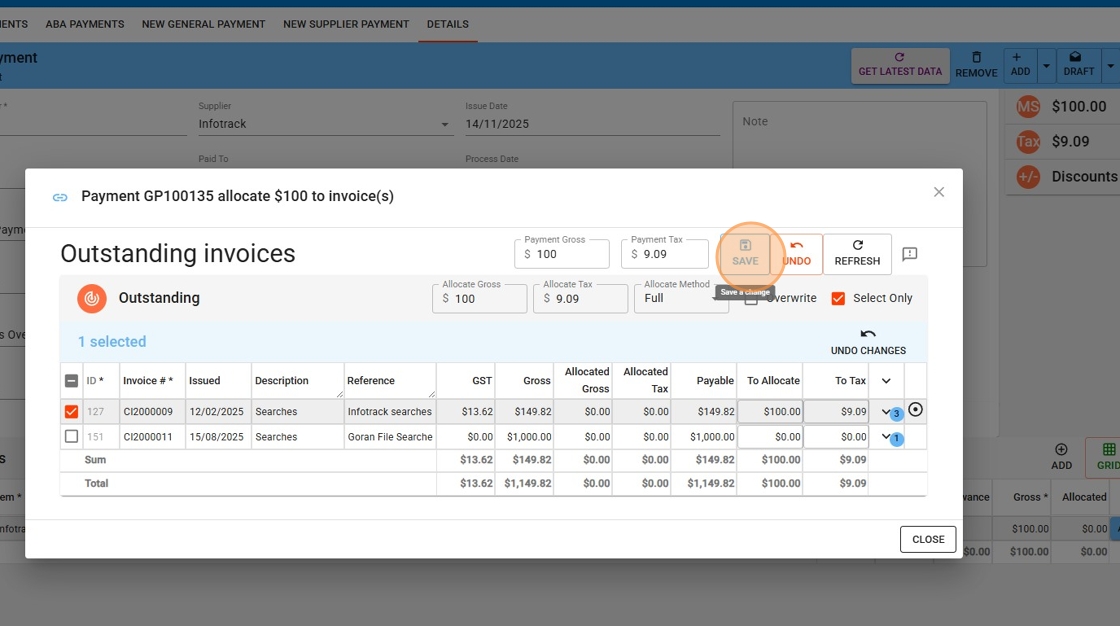
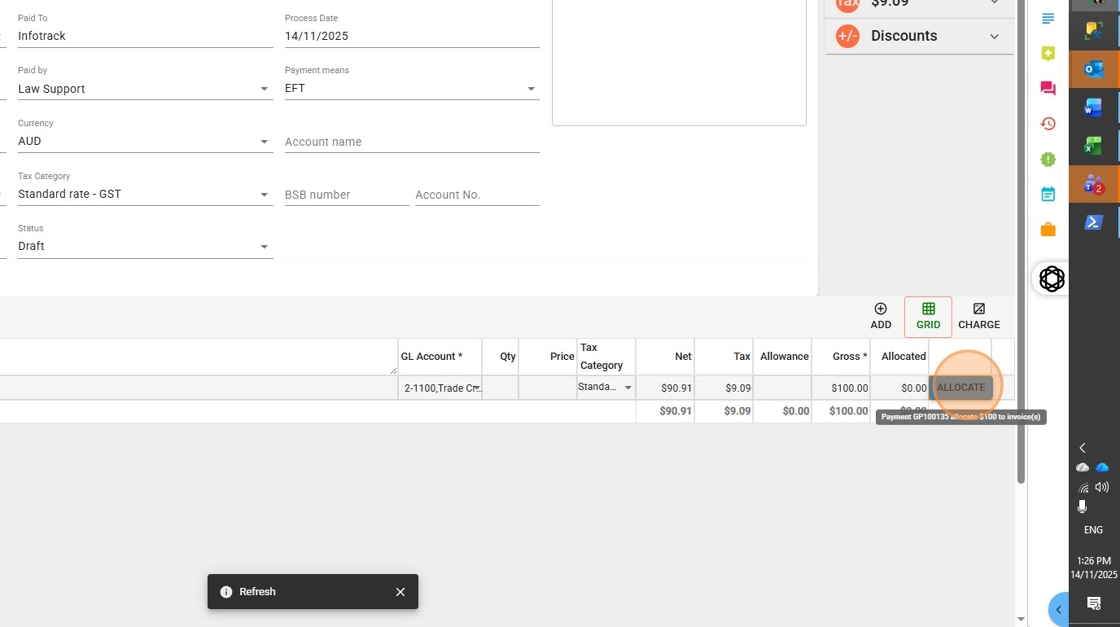
This allows the system to retrieve and display all outstanding invoices linked to the selected supplier, ensuring you can accurately allocate the payment.
9. Now that you’ve clicked Save, the Allocate button will appear next to each transaction line where the Type is set to SUPPLIER.
Click Allocate to begin assigning the payment to one or more outstanding invoices for that supplier.
10. It’s recommended to tick the Select Only checkbox before choosing invoices to allocate.
This lets you manually select exactly which invoices you’re paying — especially helpful for large supplier bills (e.g. InfoTrack), where you may want to cross-check items like search fees.
If you skip Select Only, the system will automatically allocate the payment starting from the oldest unpaid invoice, which may not match what you’re intending to pay.
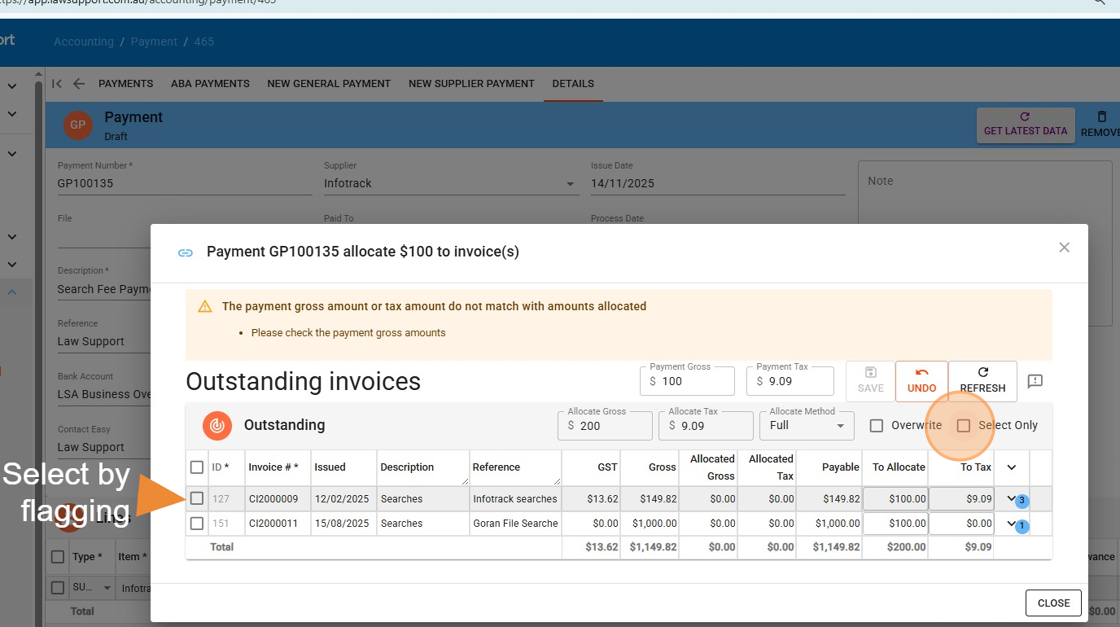
11. Click “Save” once you have selected relevant invoices.