
A debtor statement gives your client a complete view of what they owe on a file, and you can generate one in a couple of clicks from the file’s Financials tab in Law App. It’s especially helpful when a client has:
- Multiple bills from prior months
- Part-paid invoices with a balance still owing
- Credits or adjustments that change the total amount owed
How to open the debtor statement
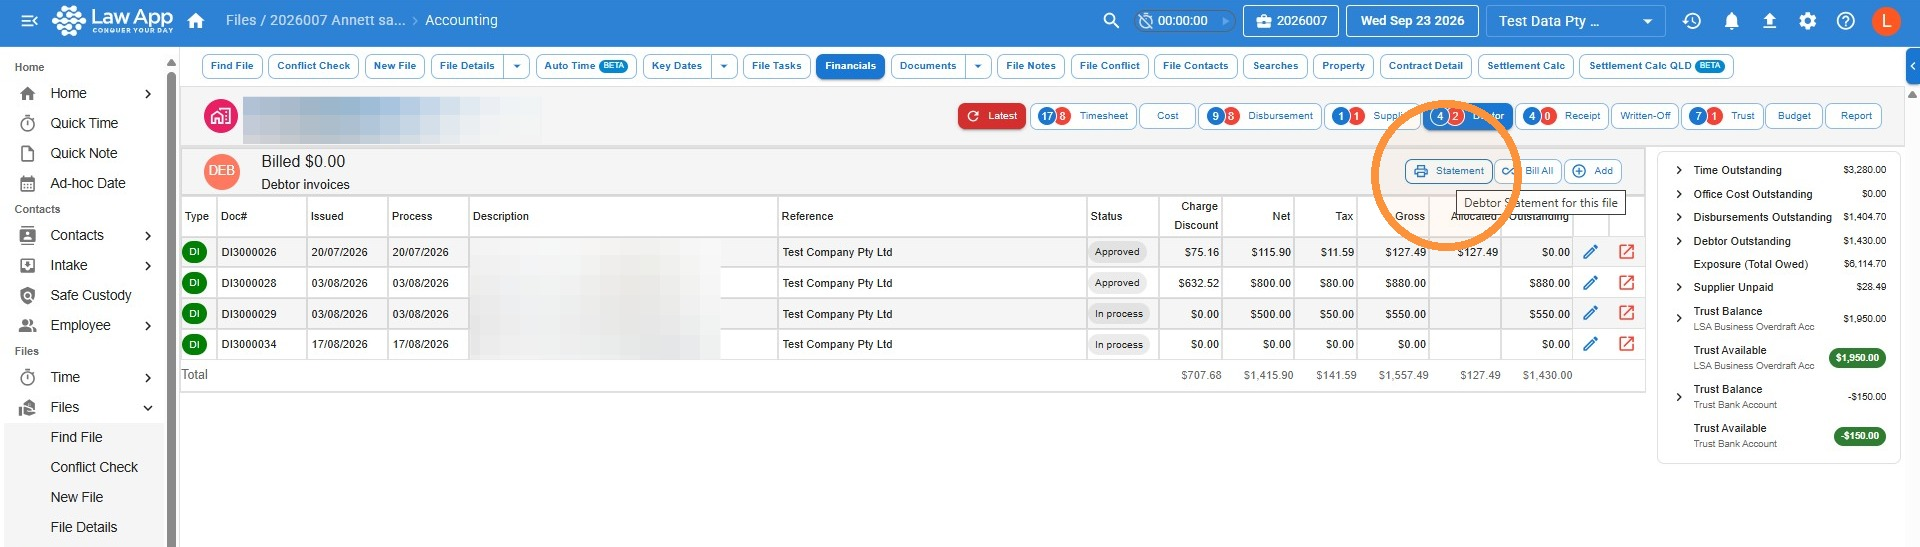
- In your file, go to Financials, click Debtor, then click Statement.
Choosing a date range and exporting your debtor statement
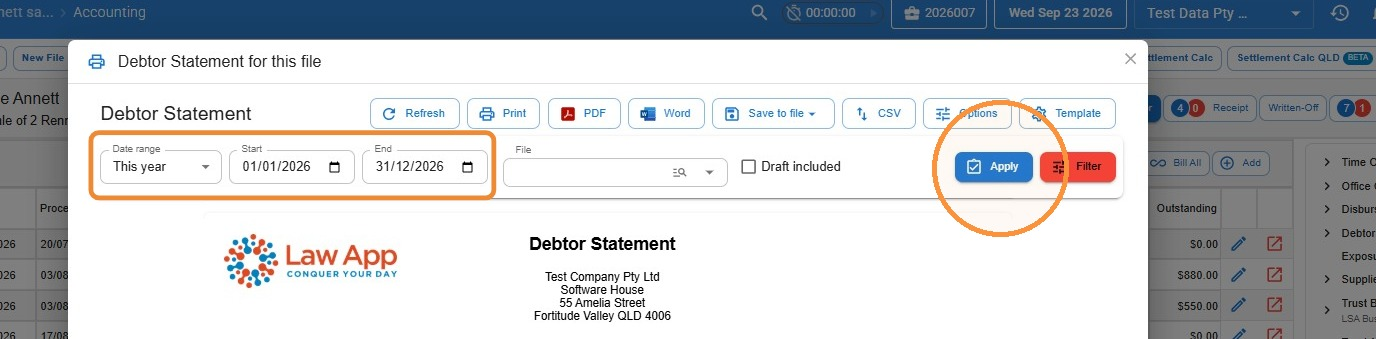
- Choose a Date range for the statement, or select None to show the file’s full history — handy for long-running files. Then click Apply.
- Generate a PDF or Word copy of the statement, or use Save to file to save it straight to the file.
Leave a Reply