
CSV import is the manual fallback for getting bank transactions into Law App. It is used when neither bank feeds nor OFX files are available from your bank, or when you need to manually enter a specific missing transaction that the bank feed didn’t capture.
Unlike bank feeds and OFX files, CSV imports have no duplicate detection — Law App cannot tell whether a transaction imported via CSV has already come in through another method. If you later sync or import the same transaction again, it will appear twice. See Bank Feeds and OFX Import for the preferred methods. If you are using CSV to recover a missing transaction from your bank feed, make sure you read the sync date warning below before proceeding.
What is a CSV file?
CSV stands for comma-separated values. It is a plain spreadsheet format — essentially a table of data saved as a text file, where each column is separated by a comma. Most banks let you export statements in CSV format, and you can open and edit a CSV file in Microsoft Excel or Google Sheets just like a normal spreadsheet. When you save it again, make sure you save it as CSV (not as an Excel .xlsx file) — Law App expects the plain CSV format.
Open the import screen
From the left-hand menu, click Banking, then click Import.
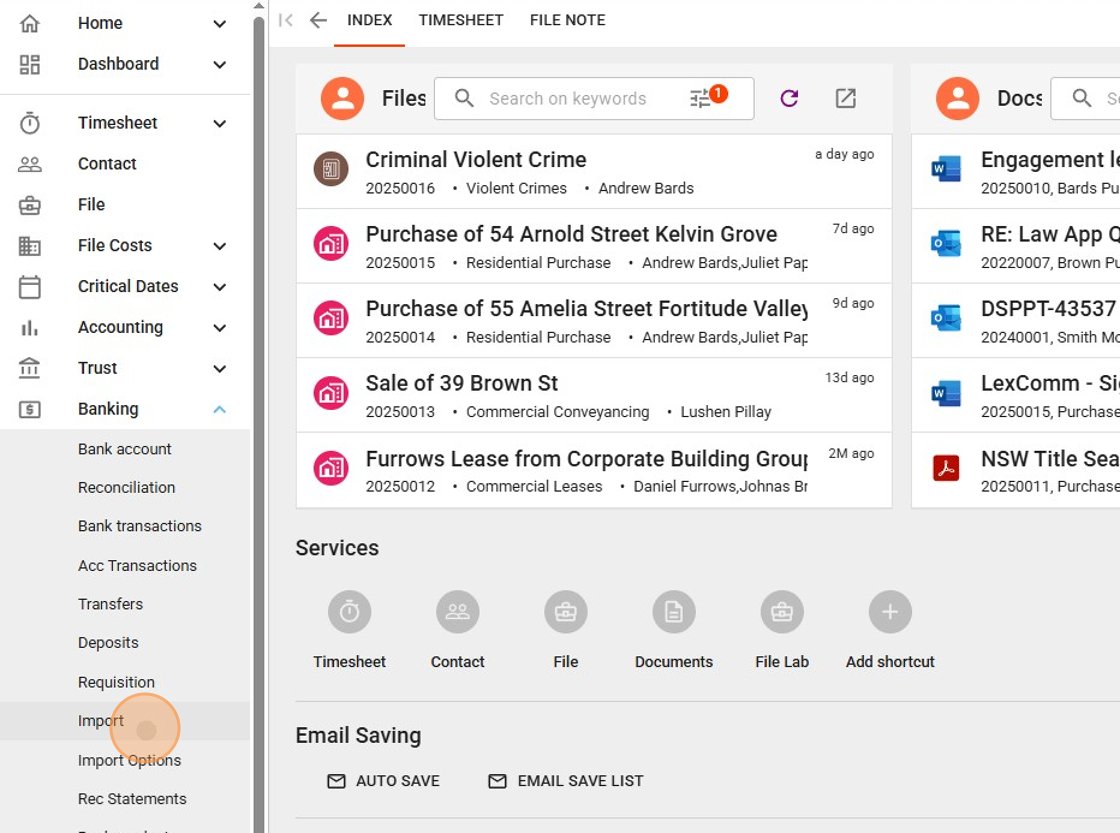
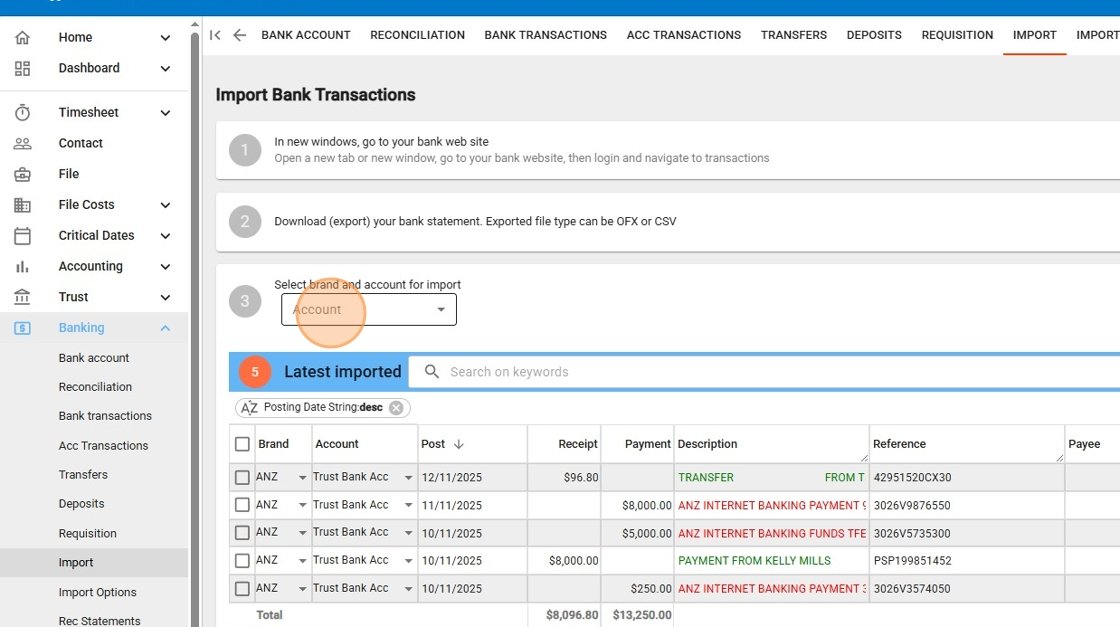
This opens the Import Bank Transactions screen, which walks you through the process as a series of numbered steps.
Download your bank statement
Log in to your internet banking in a separate tab and download a statement for the account you want to import. Choose CSV as the export format. If you have multiple accounts to import, download a separate file for each one.
Select your bank account
Back in Law App, use the Account dropdown in Step 3 to select the bank account you are importing into. Make sure this is correct before you upload — the transactions will be posted to whichever account is selected here.
Prepare your CSV file
Bank-exported CSV files rarely match what Law App expects straight away. Open your downloaded file in Excel or Google Sheets and check each of the following before uploading.
Required columns
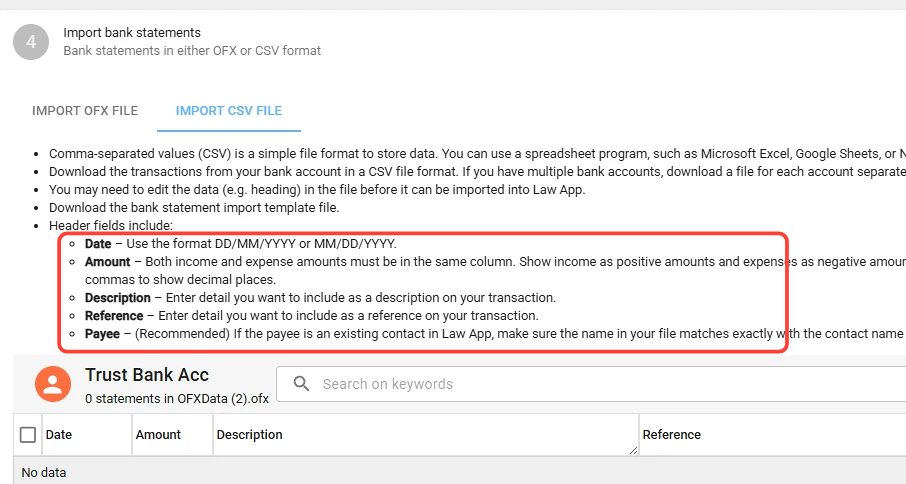
Your CSV must include these column headers exactly:
| Field | Required | Notes |
|---|---|---|
| Date | Yes | DD/MM/YYYY or MM/DD/YYYY format. |
| Amount | Yes | Income as positive, expenses as negative. One column only — see formatting rules below. |
| Description | Yes | The transaction description as you want it to appear in Law App. |
| Reference | Optional | Additional reference detail for the transaction. |
| Payee | Recommended | If the payee is an existing contact in Law App, the name must match exactly. |
Law App provides a downloadable template on the Import CSV File tab with the correct column headers already in place. You can use this as a starting point and paste your transaction data in.
Amount formatting
This is the most common cause of import errors. Before uploading, check your Amount column carefully:
- Remove dollar signs — amounts must be plain numbers. A value of $1,250.00 must become 1250.00.
- Remove comma thousand separators — commas in numbers will break the import because CSV uses commas to separate columns. 1,250.00 must become 1250.00.
- Use two decimal places — format all amounts to exactly two decimal places (e.g. 1250.00, not 1250 or 1250.5).
- One Amount column only — if your bank exports separate debit and credit columns, combine them into one. Use positive numbers for income and negative numbers for expenses.
In Excel, you can fix this by selecting the Amount column, right-clicking, choosing Format Cells, and selecting Number with 2 decimal places and no thousand separator. Then save as CSV.
Description formatting
Check your Description column for any commas within the text — for example, a payee name like Smith, Jones & Associates contains a comma which may cause the columns to shift when Law App reads the file. Either remove the comma or ensure the field is wrapped in quotes in your CSV.
Cleaning up the file
- Rename column headers to match the field names above exactly.
- Remove any columns Law App doesn’t use — such as Balance, Cheque Number, or running totals.
- Delete any summary or total rows at the bottom of the file.
- Check dates are in DD/MM/YYYY or MM/DD/YYYY format.
- Save the file as .csv.
Upload the file
In Law App, scroll to Step 4 and click the Import CSV File tab. Click the Import button, browse to your prepared CSV file, and select it.
Law App will read the file and display the transactions in the table below. If it fails to read the file, go back and check your column headers, amount formatting, and that the file is saved as CSV rather than XLSX.
Review and save
After uploading, your transactions appear in the Latest imported list. Check each of the following before saving:
- Dates fall within the expected range.
- Receipt and payment amounts are in the correct columns and look correct.
- Descriptions and references look right.
- The total row at the bottom matches your bank statement.
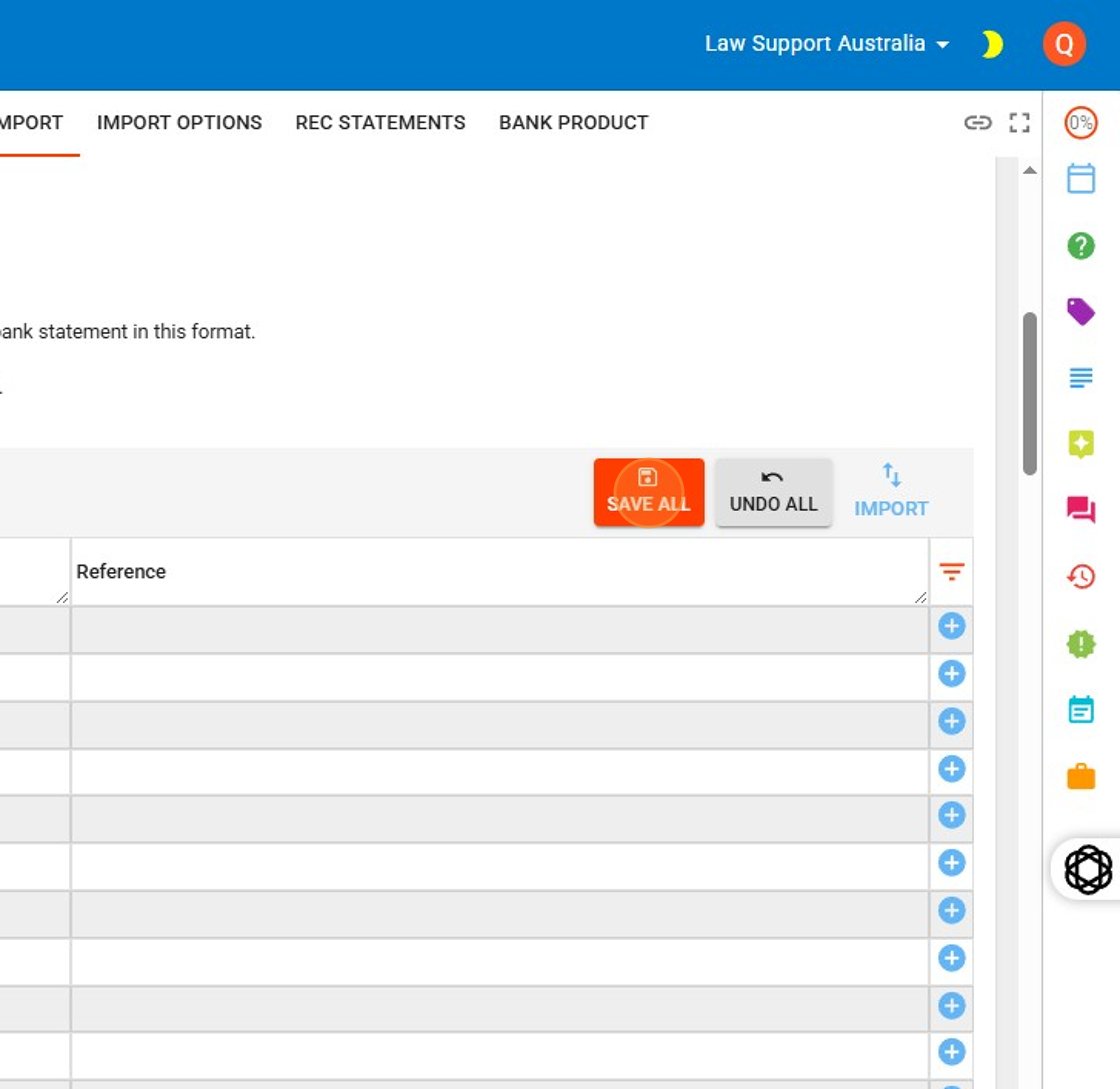
Once you’re satisfied, click Save All. If something doesn’t look right, click Undo All to discard the import and start again.
After saving
The imported transactions will appear in your Bank Transactions list. Navigate to Banking > Reconciliation to begin matching them against your records.
If your bank feed is active and you have manually imported a transaction via CSV, make sure your Sync Transactions From date on the Bank Sync screen is set to a date after the manually imported transaction. If the bank feed later pulls in the same transaction, Law App cannot detect the duplicate — it will appear twice because the CSV version has no bank ID for comparison. See Setting up bank feeds for how to adjust the sync date.
Need help preparing your file or running into issues during import? Contact us at support@lawsupport.com.au or call 07 3040 3036.
Leave a Reply