
If you’re unable to use automatic bank feeds with Law App’s Banking API integration, you can manually import bank statements using CSV files. This guide walks you through downloading your statement, preparing the CSV file, uploading it into Law App, and reviewing the imported transactions.
If your bank offers OFX file downloads, these are generally preferred because OFX uses a fixed format that requires no column adjustments. See Import Bank Statements (OFX) into Law App for that method. If OFX is not available from your bank, CSV is fully supported using the steps below.
Open the Import Screen
From the left-hand menu, click on Banking to expand the submenu, then click Import.
This opens the Import Bank Transactions screen. Law App displays the process as a series of numbered steps at the top of the page.
Download Your Bank Statement
As shown in Steps 1 and 2 on the Import screen:
- Open a new browser tab and log in to your internet banking.
- Navigate to the account you want to import and download the bank statement in CSV format.
- If you have multiple bank accounts to import, download a separate CSV file for each account.
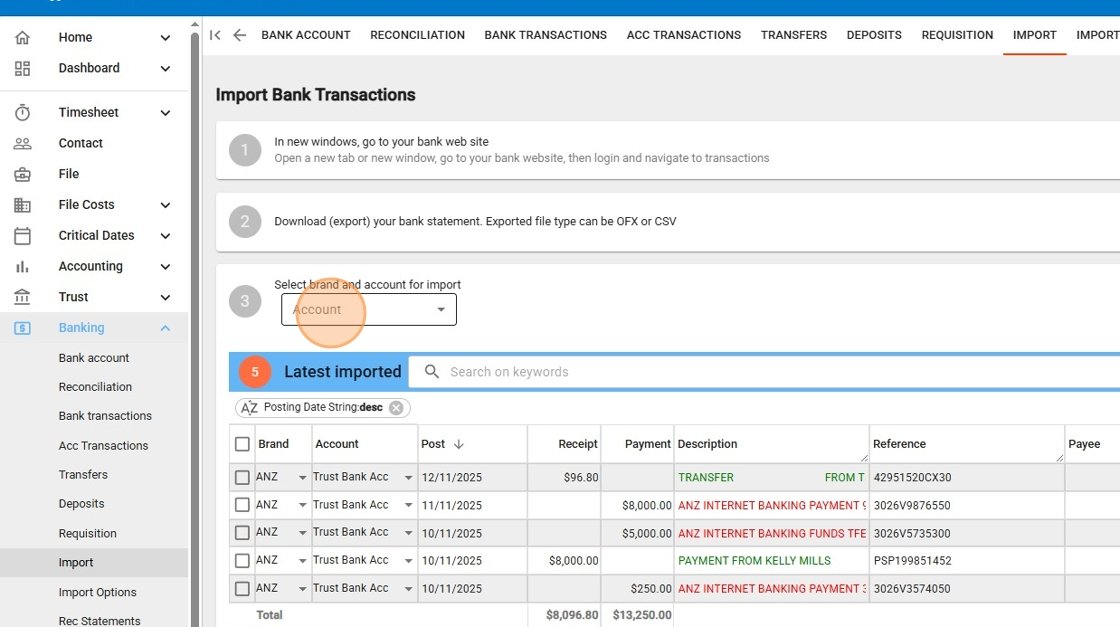
Select Your Bank Account
Back in Law App, use the Account dropdown in Step 3 to select the bank account you want to import transactions into. Make sure you select the correct account — the imported transactions will be linked to whichever account you choose here.
Import Your CSV File
Scroll down to Step 4 — Import bank statements. You’ll see two tabs: Import OFX File and Import CSV File. Click the Import CSV File tab.
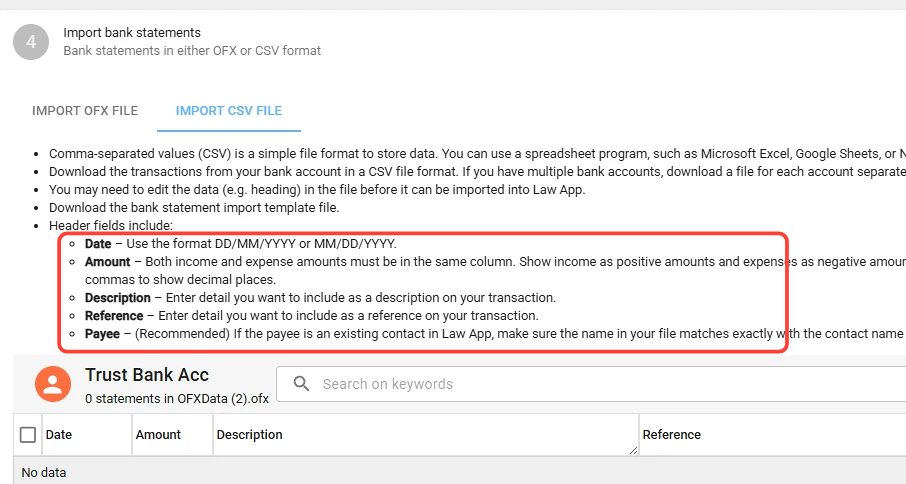
Law App displays the CSV requirements on this screen. Before uploading, make sure your CSV file meets these requirements.
CSV Header Fields
Your CSV file must include column headers. Law App recognises the following fields:
| Field | Required | Description |
|---|---|---|
| Date | Yes | Transaction date in DD/MM/YYYY or MM/DD/YYYY format. |
| Amount | Yes | Both income and expense amounts must be in the same column. Show income as positive amounts and expenses as negative amounts. Do not use commas to show decimal places. |
| Description | Yes | The detail you want to appear as the transaction description. |
| Reference | Optional | The detail you want to appear as a reference on the transaction. |
| Payee | Recommended | If the payee is an existing contact in Law App, make sure the name in your CSV file matches the contact name exactly. |
You may need to edit the data in your CSV file before importing. Bank-exported CSV files often include extra columns, different column names, or summary rows that Law App won’t recognise. Open the file in a spreadsheet program such as Microsoft Excel or Google Sheets to clean it up first.
Preparing Your CSV File
Most banks export CSV files with a different structure to what Law App expects. Follow these steps to get your file ready:
- Open the downloaded CSV file in Excel or Google Sheets.
- Check that the column headers match the field names listed above — Date, Amount, Description, Reference, and Payee. Rename them if necessary.
- If your bank splits debits and credits into separate columns, combine them into a single Amount column. Use positive values for income (receipts) and negative values for expenses (payments).
- Remove any extra columns that Law App does not use (such as Balance or Cheque Number).
- Remove any summary rows or total rows at the bottom of the file.
- Check that dates are in DD/MM/YYYY or MM/DD/YYYY format.
- Save the file as a .csv file.
Law App provides a downloadable bank statement import template file on the Import CSV File tab. You can use this as a starting point to make sure your columns and headers are correct.
Upload the File
Once your CSV file is ready:
- On the Import CSV File tab, click the Import button.
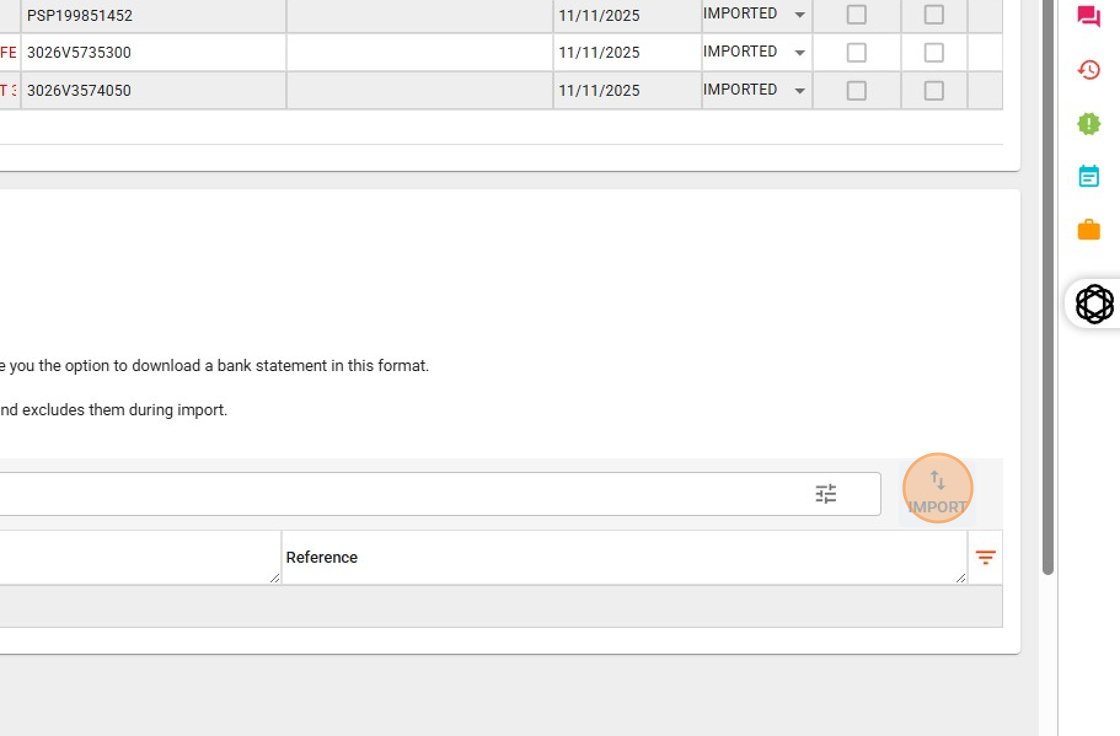
- Browse to and select your prepared CSV file.
- Law App will read the file and display the imported transactions in the table below.
Review Imported Transactions
After importing, your transactions appear in the Latest imported list at the top of the Import screen (Step 5). Each transaction shows the brand, account, posting date, receipt or payment amount, description, and reference.
Review the imported transactions carefully:
- Check that the dates are correct and fall within the expected range.
- Confirm that receipt and payment amounts are in the correct columns.
- Verify that descriptions and references look correct.
- Check the total row at the bottom matches what you expect from the bank statement.
Transactions will show a status of IMPORTED once they have been successfully brought into Law App.
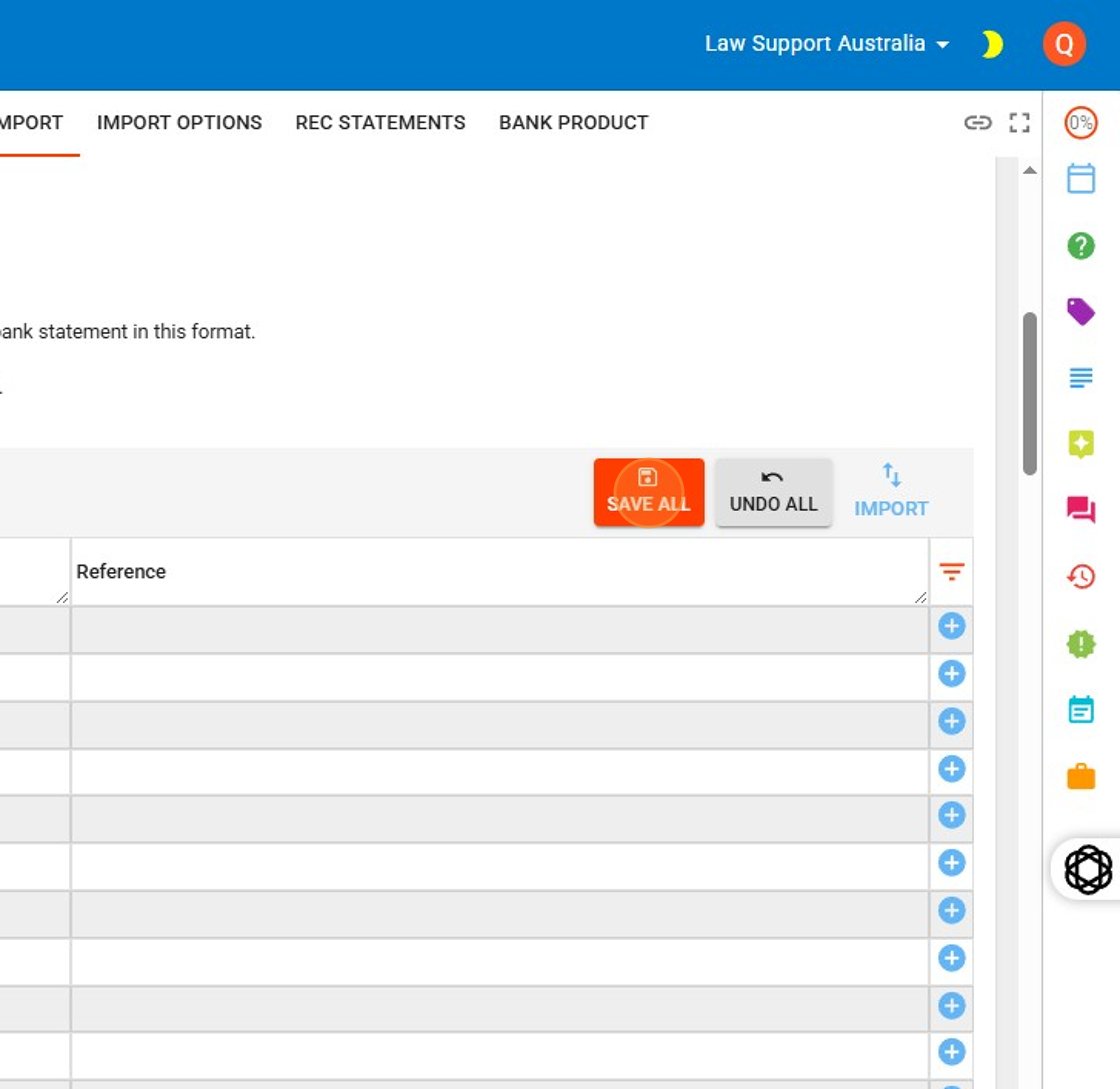
Save Imported Transactions
Once you have reviewed the transactions and are satisfied they are correct, click Save All to save the imported transactions to the selected bank account. If something doesn’t look right, click Undo All to discard the import and start again.
Next Steps
After saving, the imported transactions will appear in your Bank Transactions list. Navigate to Banking > Reconciliation to begin matching the imported transactions against your records in Law App.
If you need help preparing your CSV file or run into any issues during the import, contact our support team at support@lawsupport.com.au or call 07 3040 3036.