
When a client pays an invoice into your office account, you record it in Law App as a debtor receipt, then allocate it against the outstanding invoice so the invoice shows as paid. You can do this from inside the file, or from the Accounts menu.
This guide covers both methods — from creating the receipt through to allocating it and authorising the transaction, so your debtor balances stay accurate.
From the file
File > Financials > Receipt
Best when you’re already working in the file. The file is filled in for you on the receipt.
From Accounts
Accounts > General > Receipts
Handy for accounts staff entering receipts without opening each file. You search for and select the file on the receipt line.
How to create a debtor receipt from within the file
- In the file, go to Financials, open the Receipt tab and click Add.
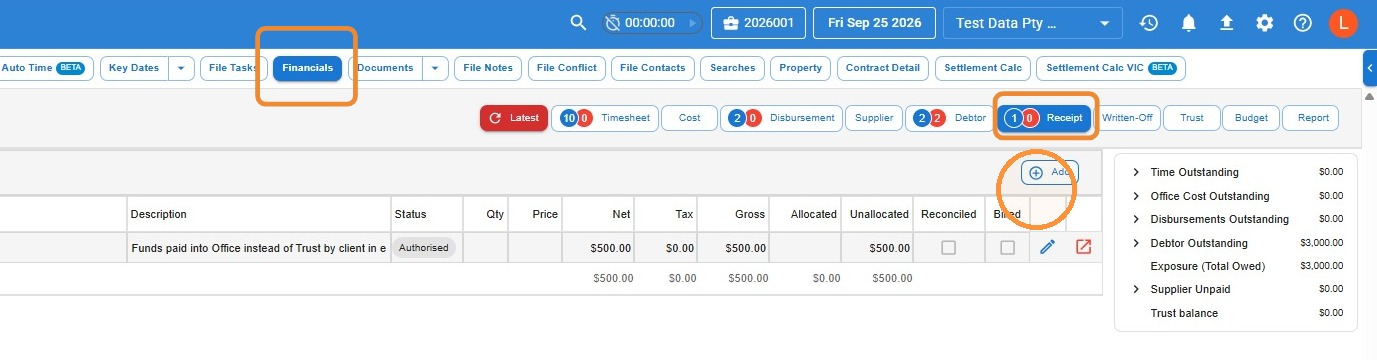
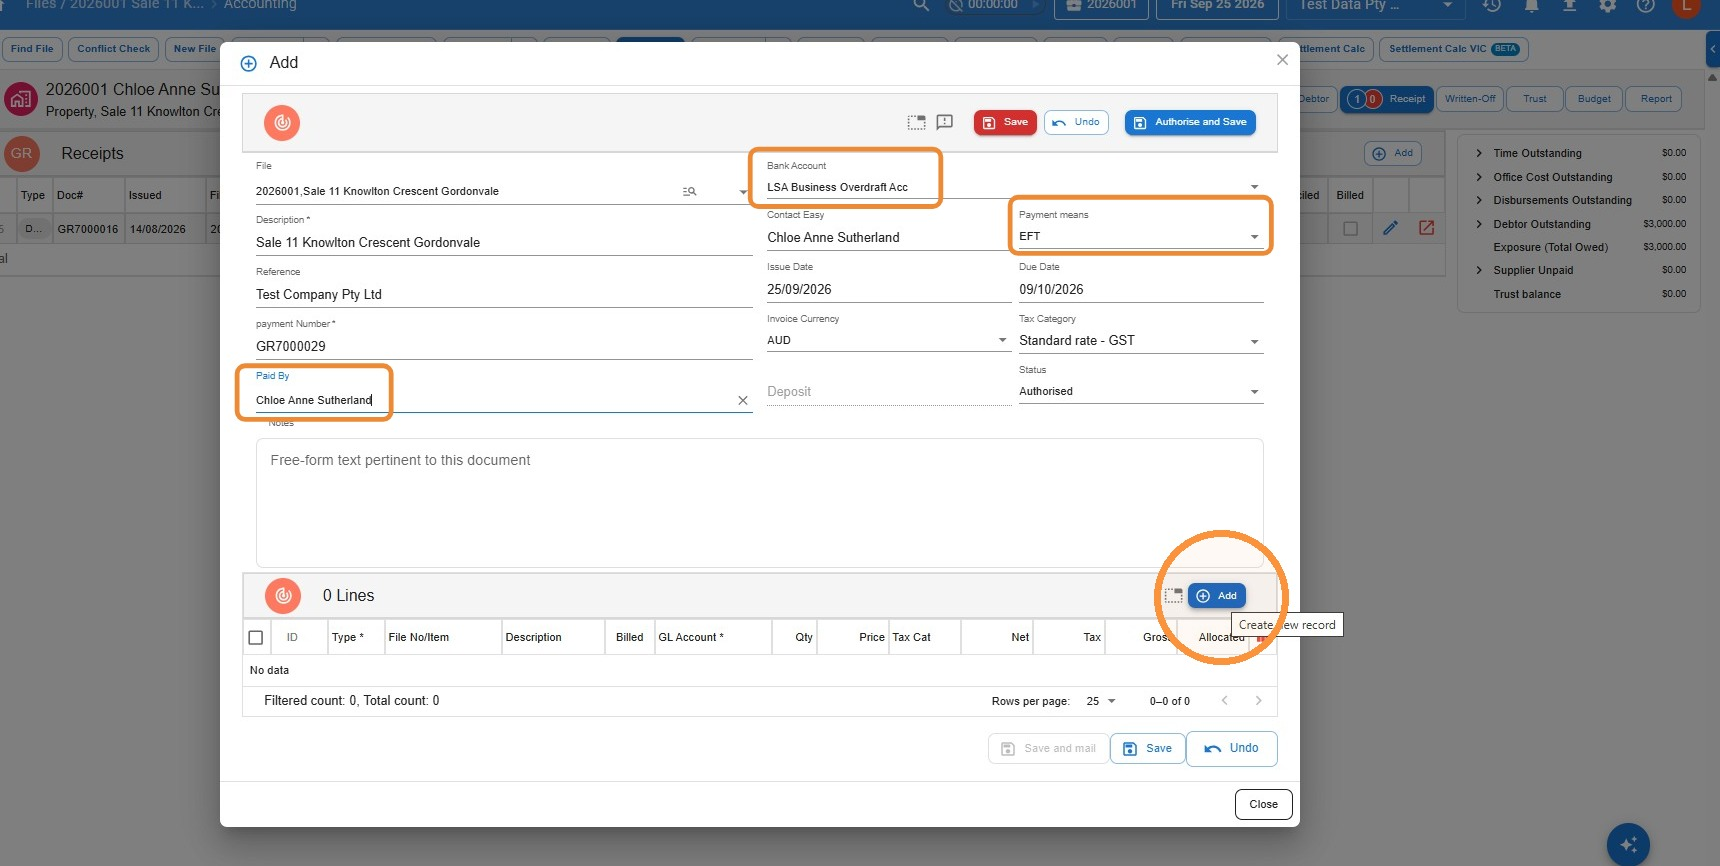
- Click in Paid By and search for and select the contact who made the payment. Check the Bank Account (select it if it isn’t already filled in) and choose the Payment means. Then click Add to add a receipt line.
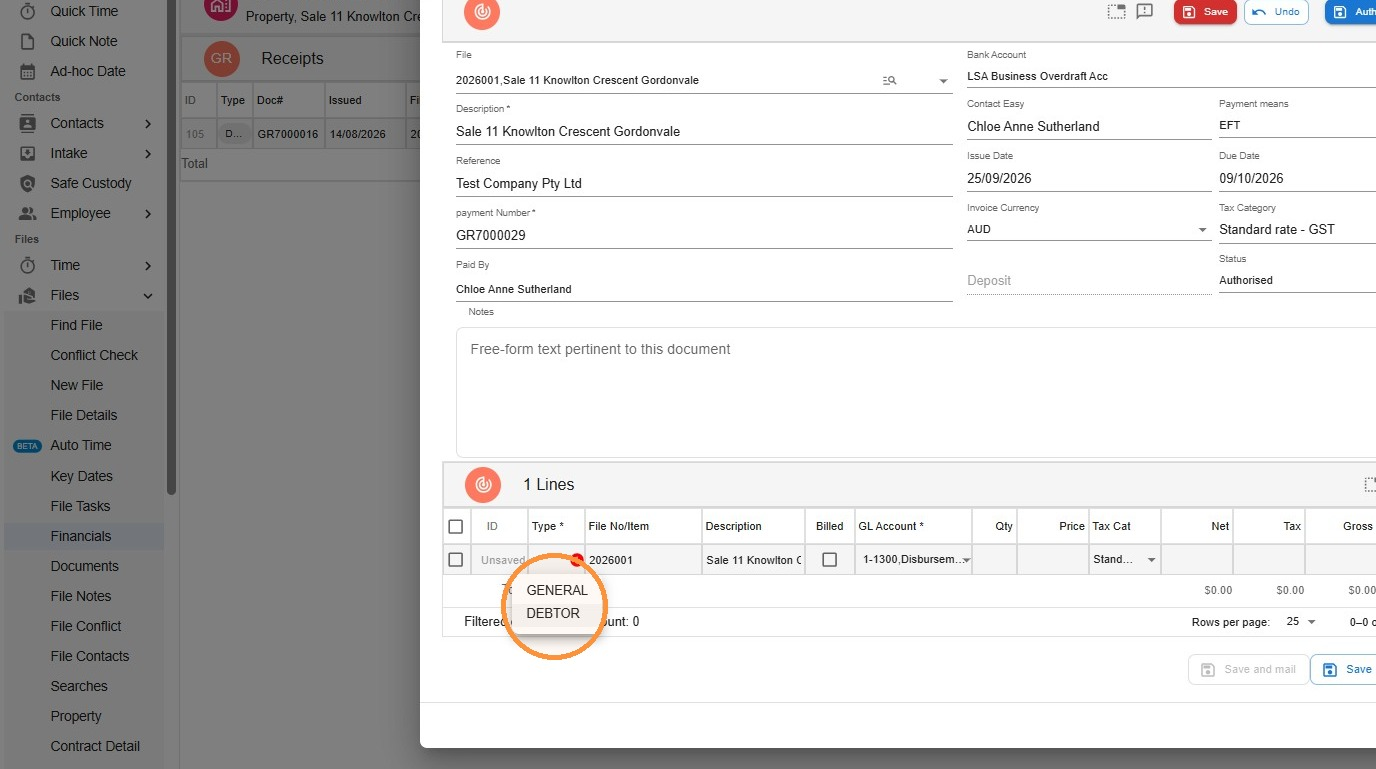
- In the new line, set the Type to Debtor.
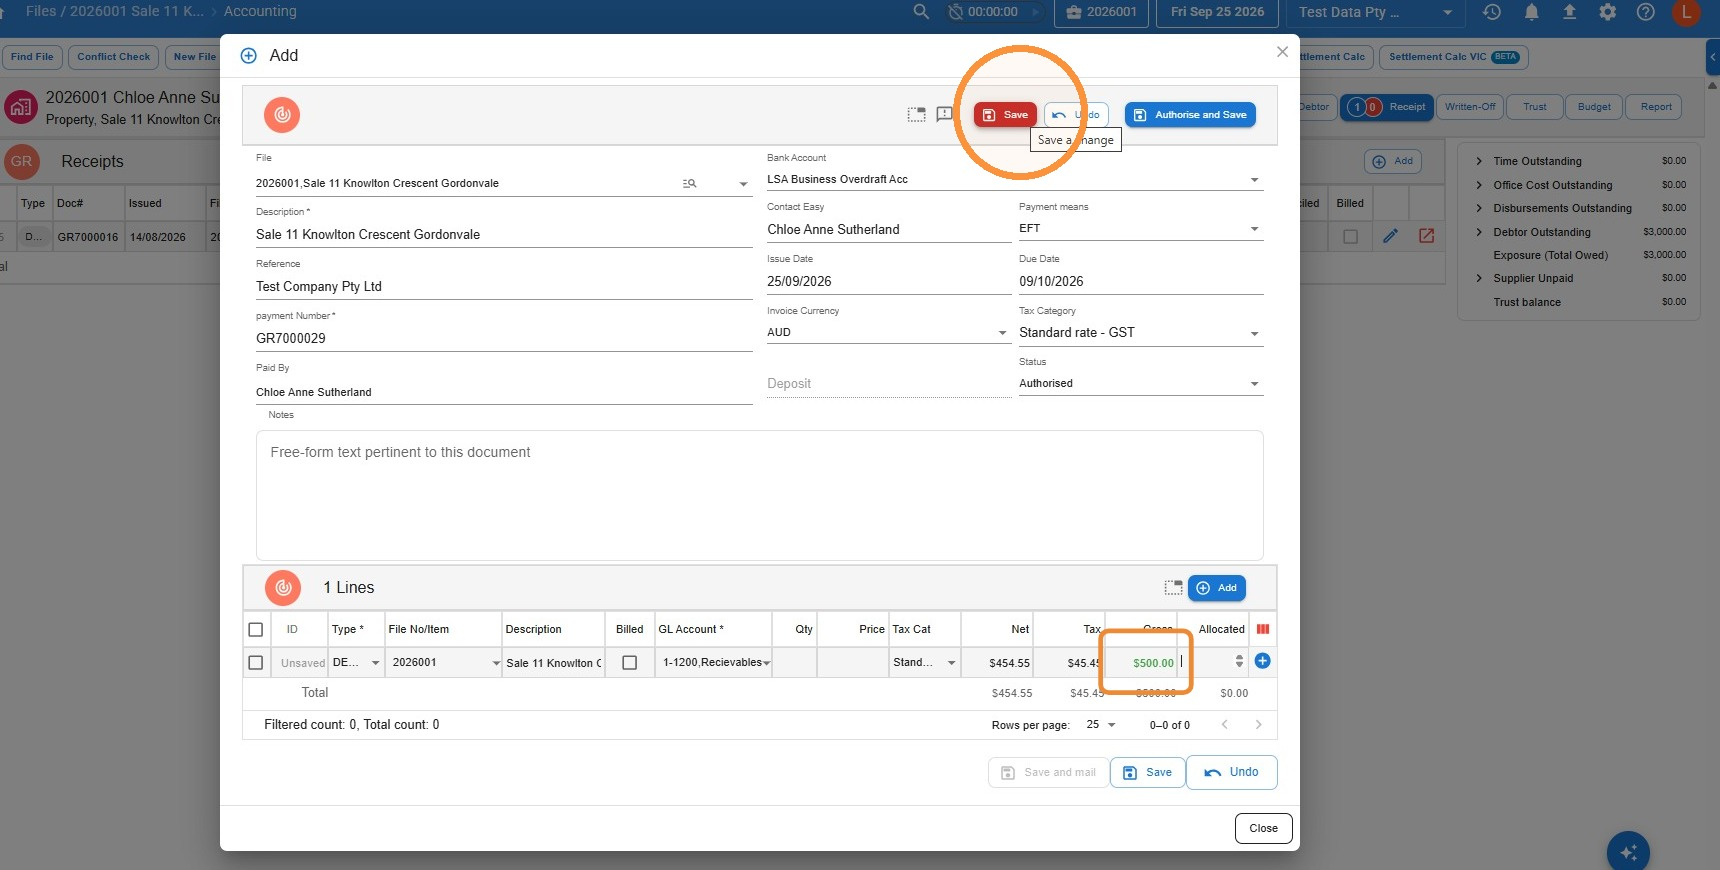
- Enter the amount paid in the Gross column. Click Save to save the receipt as a draft, or Authorise and Save to save it straight to Authorised status.
Allocate the receipt to the invoice
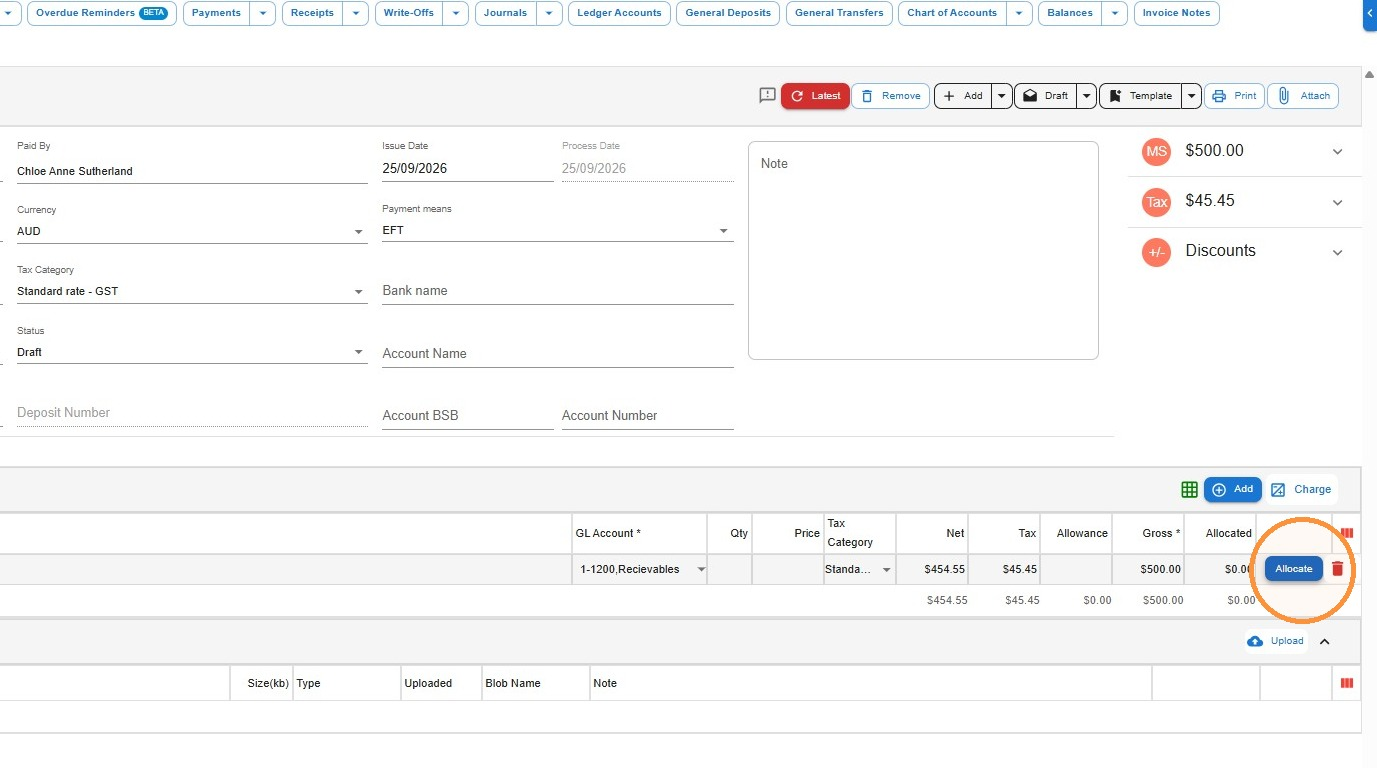
Saving the receipt records the money, but it isn’t linked to an invoice yet. The next step is to allocate it.
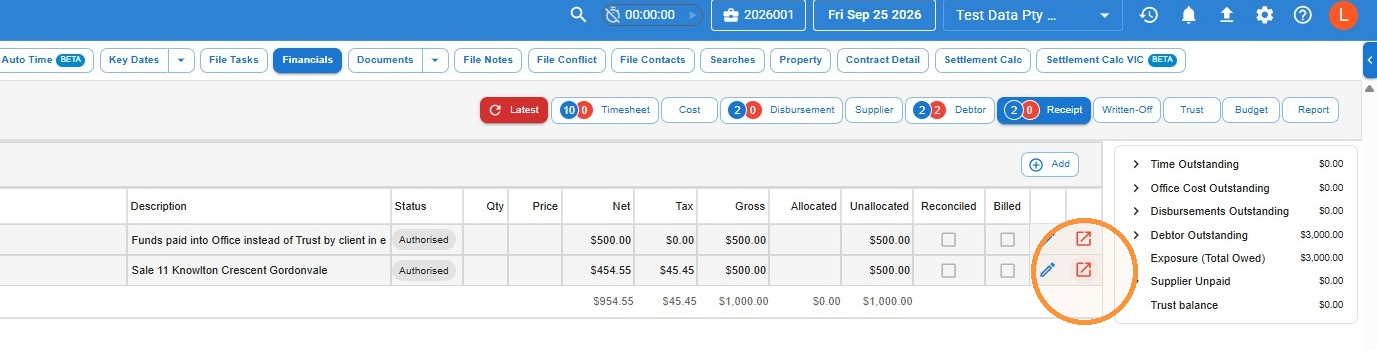
- Find your receipt in the list on the Receipt tab and click the Open in new icon at the end of its row.
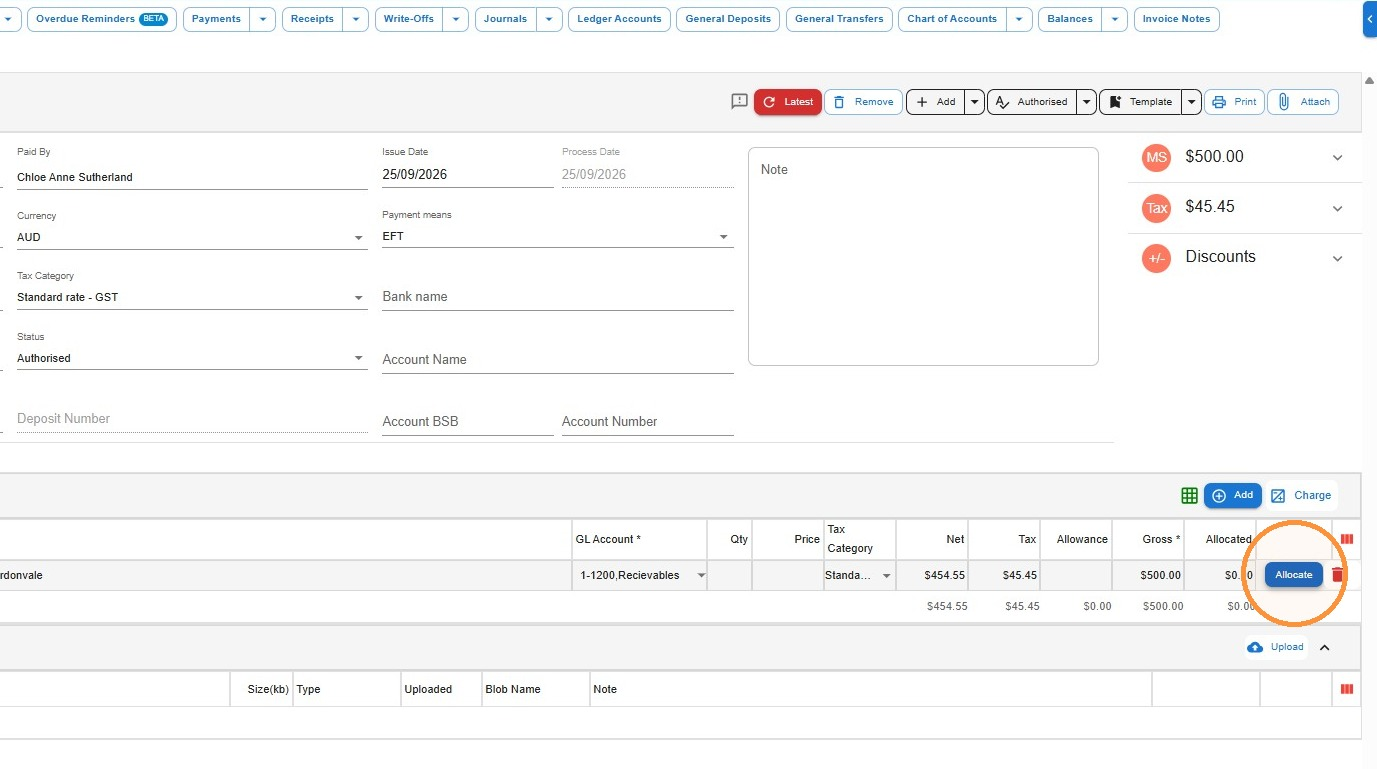
- On the receipt line, click Allocate.
- Tick the outstanding invoice you want to allocate the receipt to, then click Save.
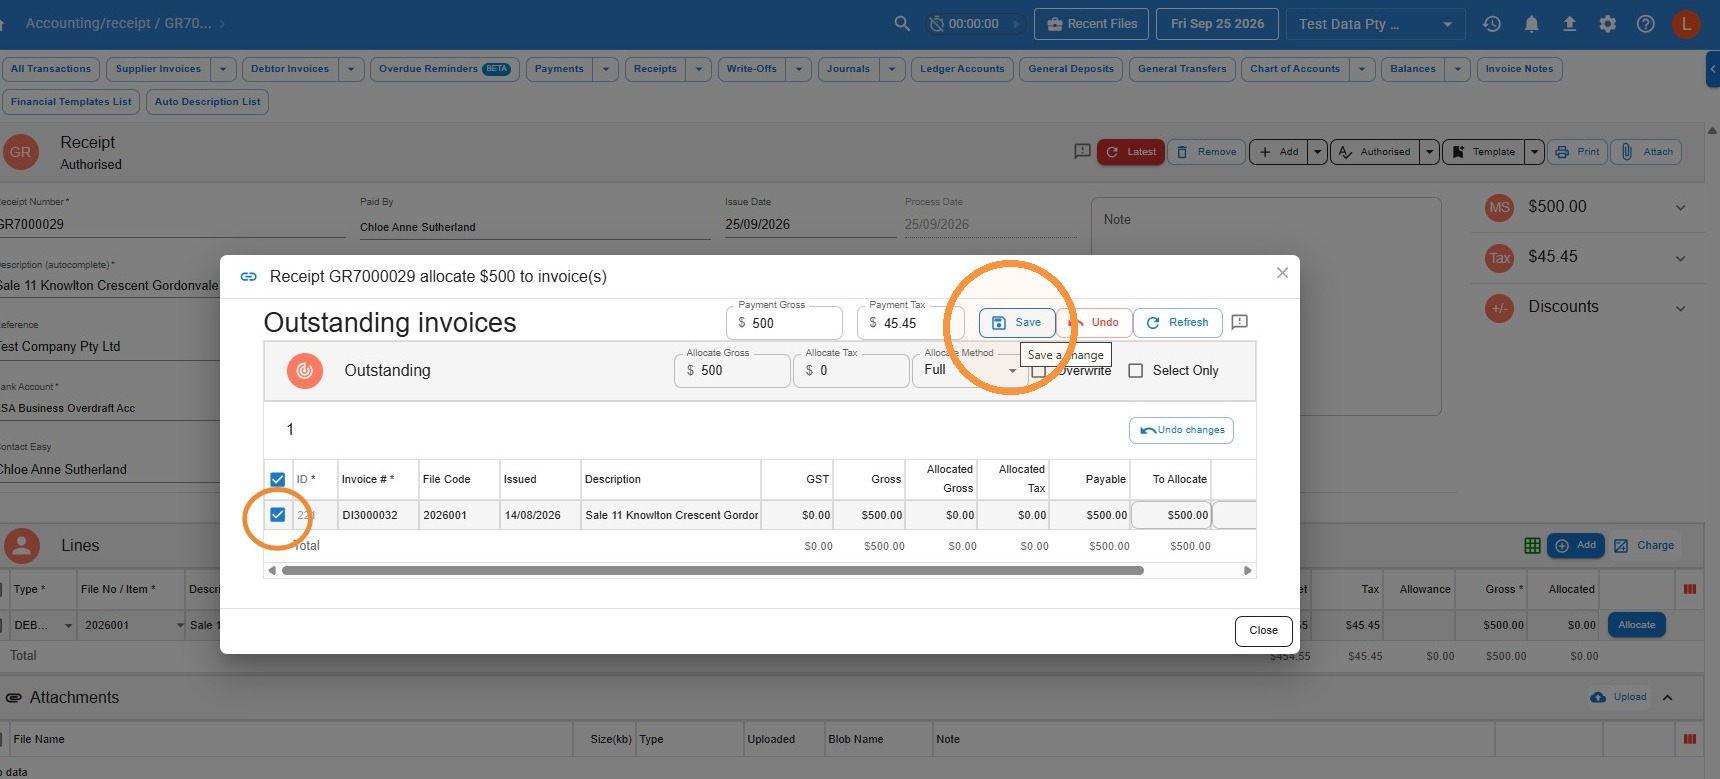
Check you’ve picked the right invoice. Some files — particularly General files — can show a long list of outstanding invoices. Take care to tick the one the client is actually paying.
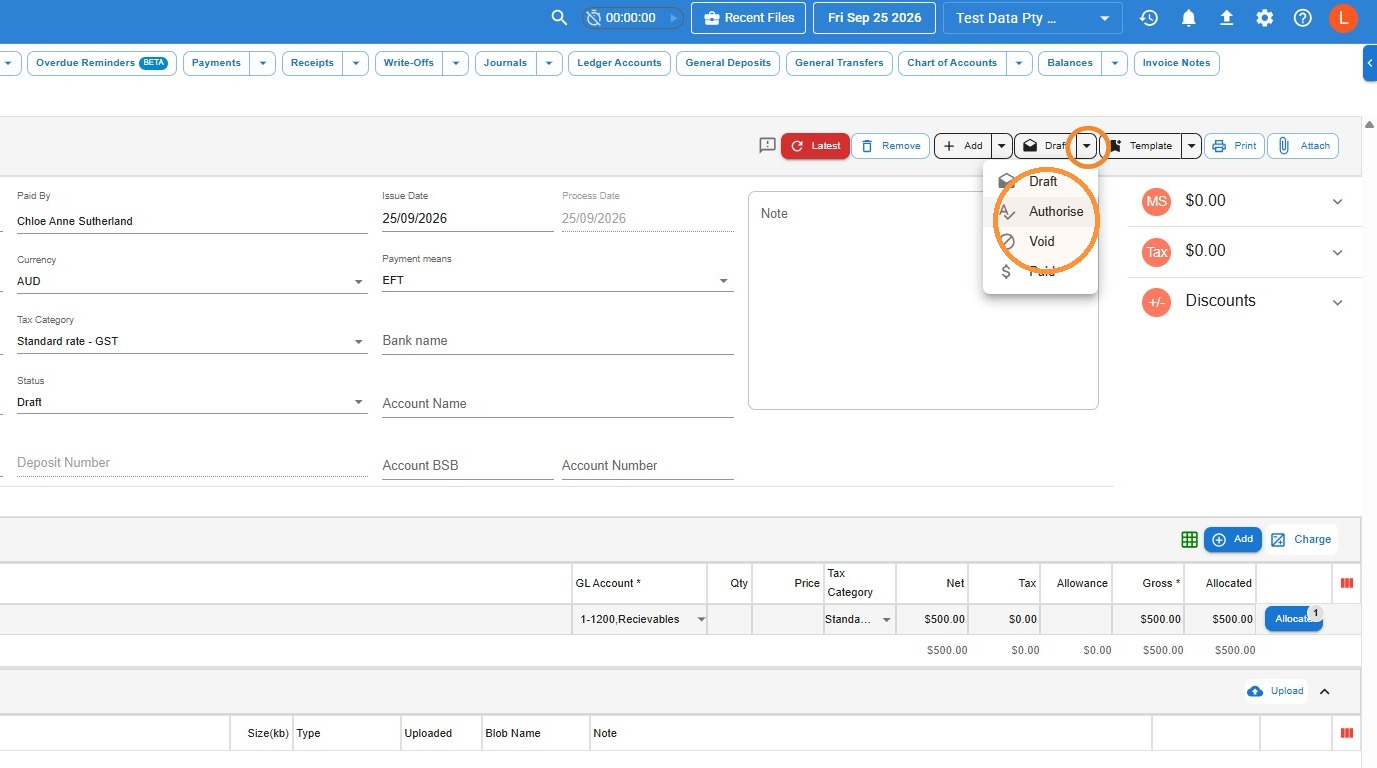
- If the receipt is still in Draft, click the dropdown arrow next to the status button at the top of the receipt and choose Authorise.
How to create a debtor receipt from the Accounts menu
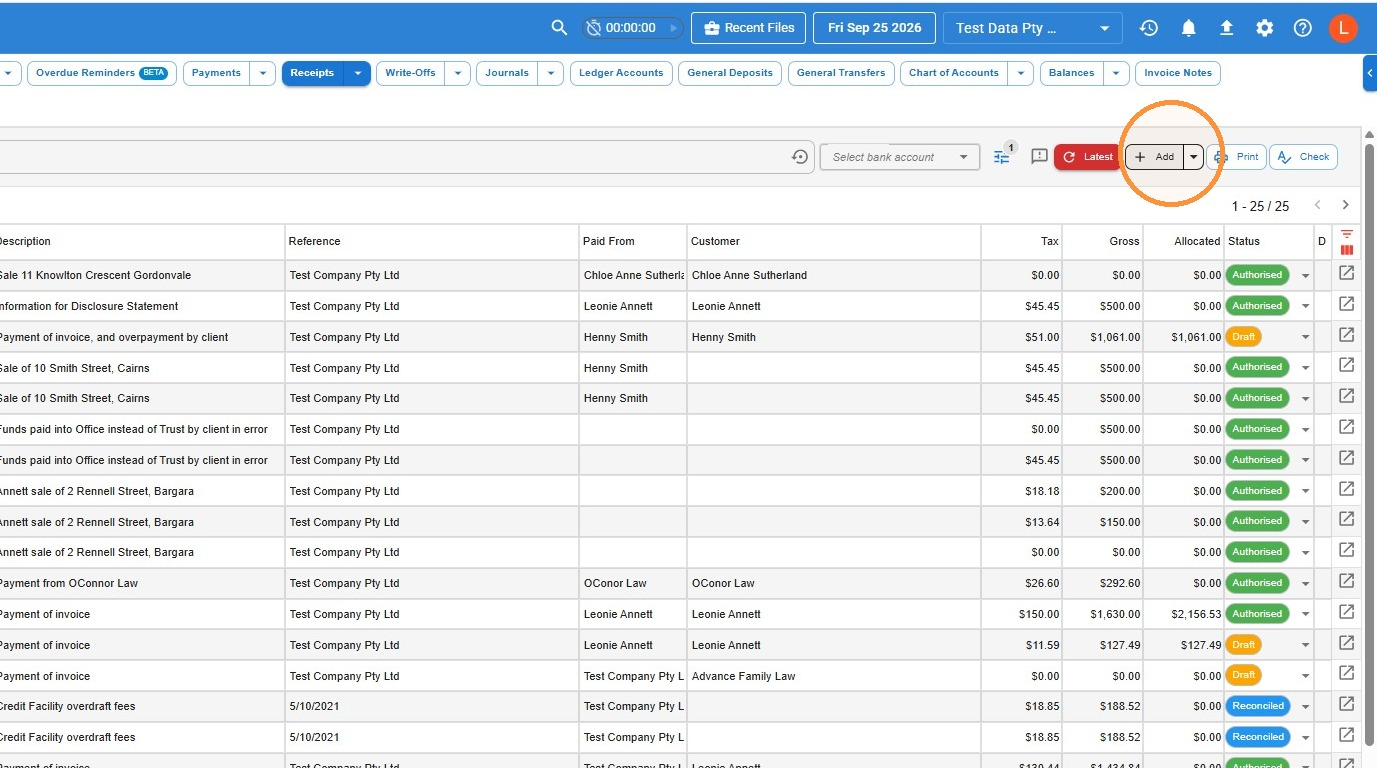
- In the Accounts menu, select General, then Receipts, then click Add.
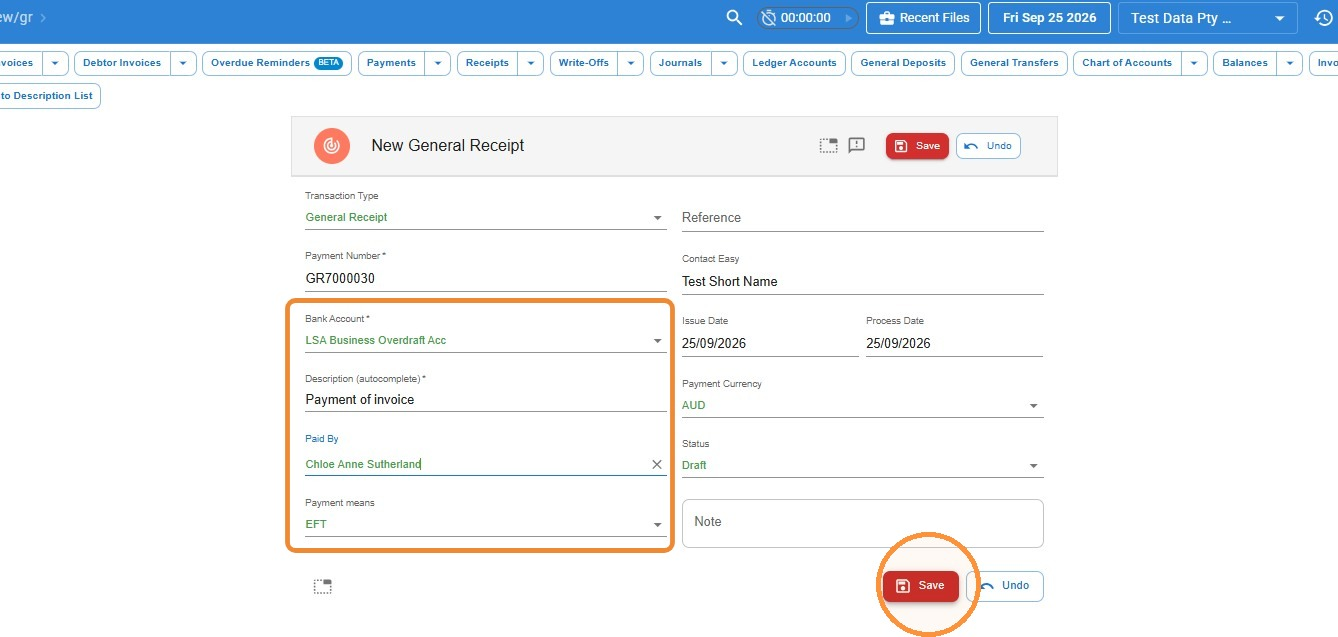
- Add a Description and select the contact who made the payment in Paid By. Check the Bank Account (select it if it isn’t already filled in) and choose the Payment means. Then click Save.
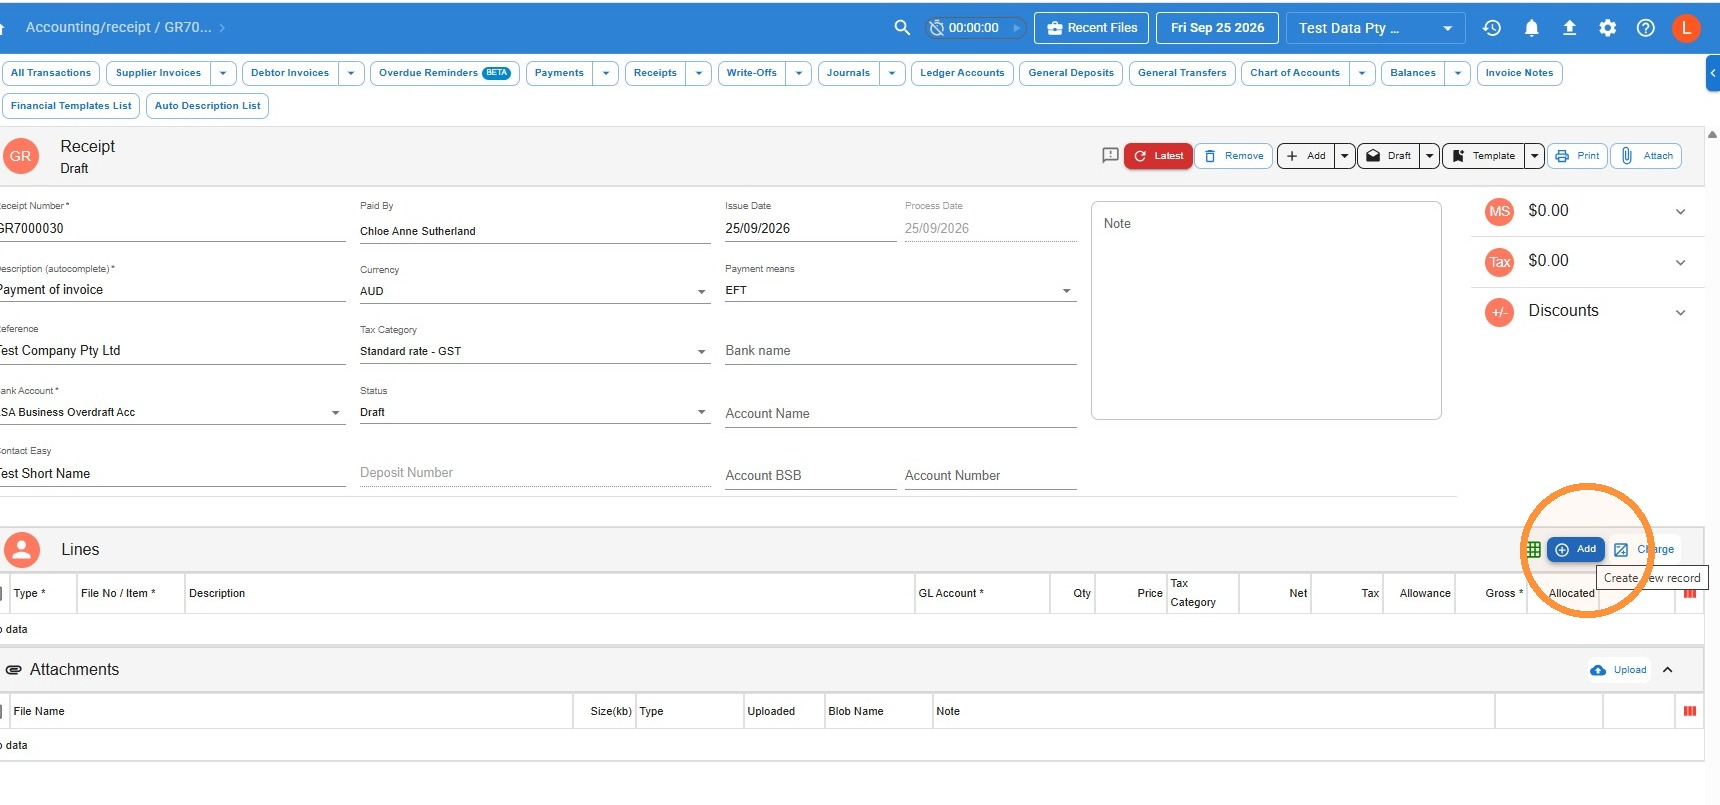
- Click Add to add a receipt line.
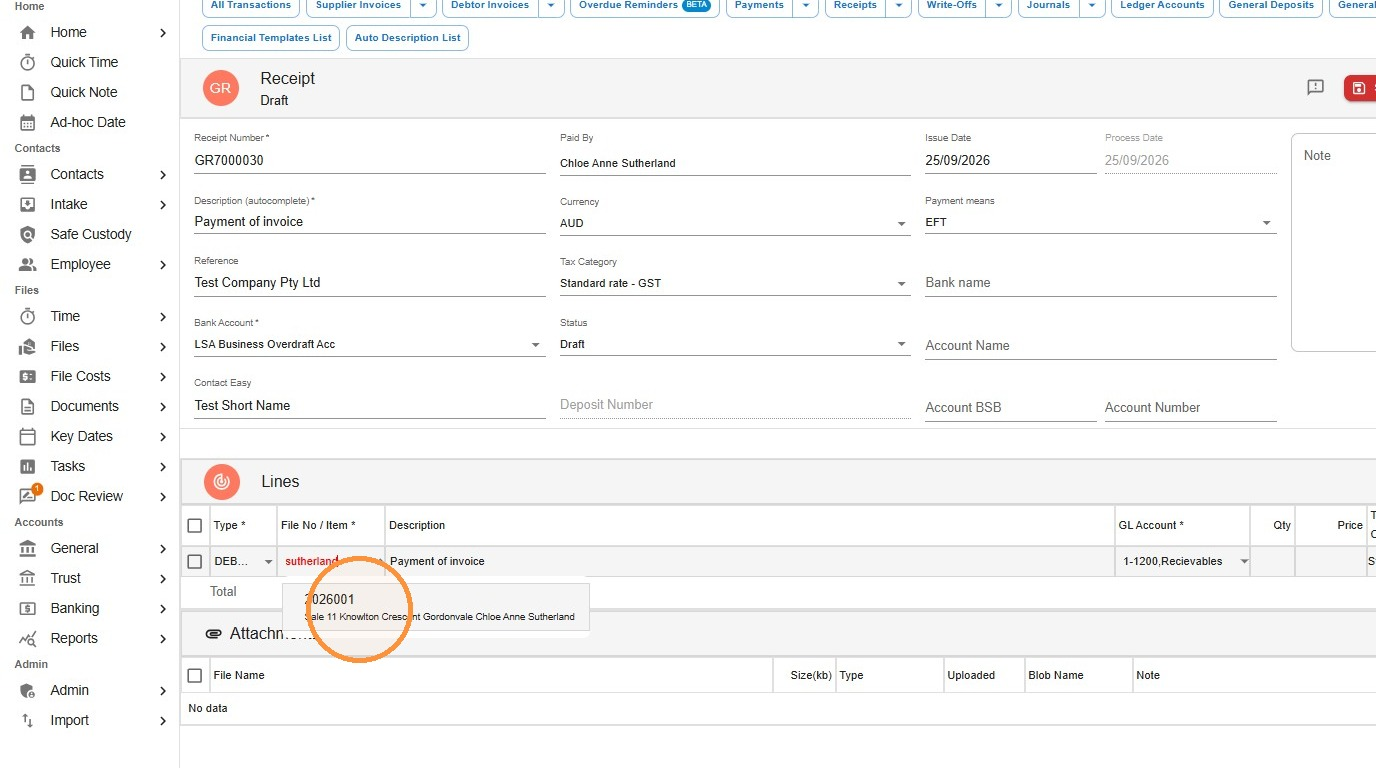
- In File No / Item, search for and select the file. Make sure the line’s Type is set to Debtor.
- Enter the amount paid in the Gross field, then click Save.
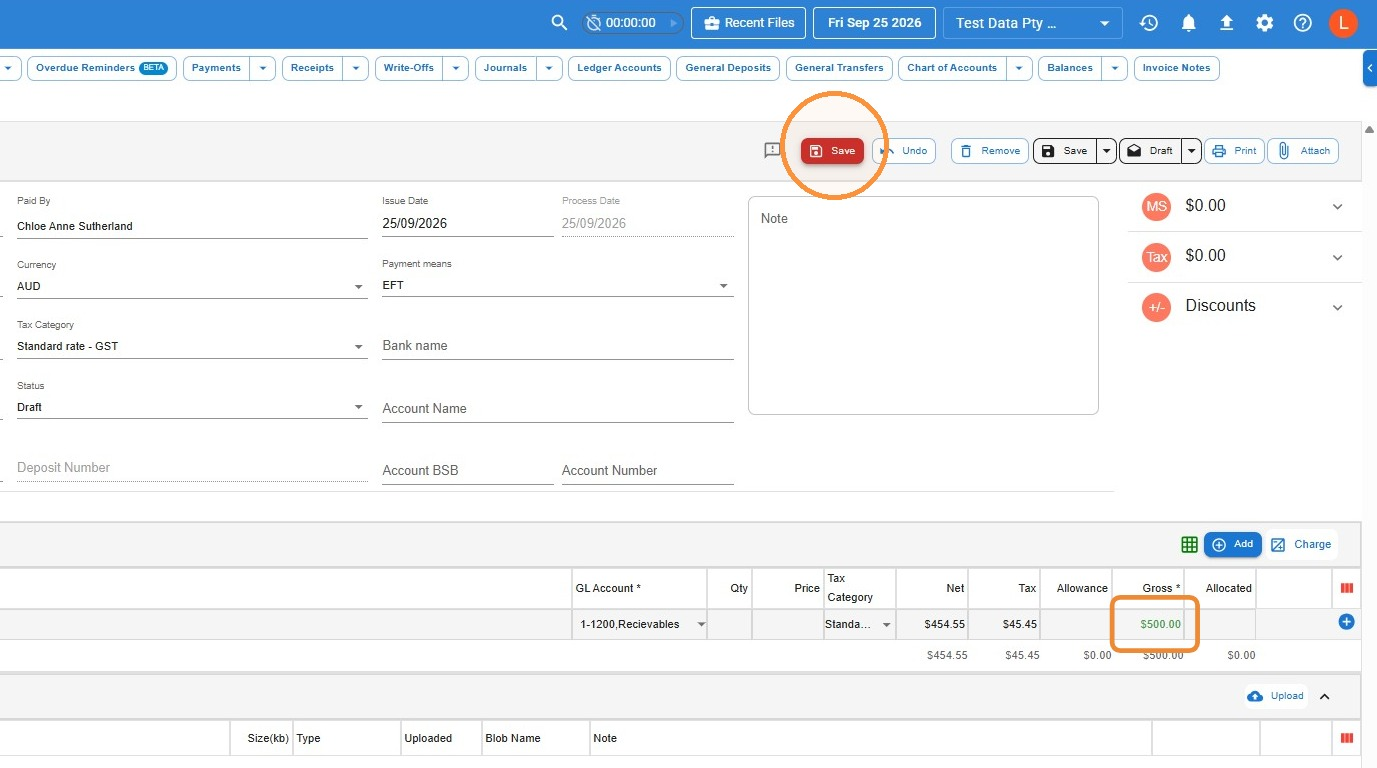
Allocate the receipt to the invoice
- On the receipt line, click Allocate.
- Tick the outstanding invoice you want to allocate the receipt to, then click Save.
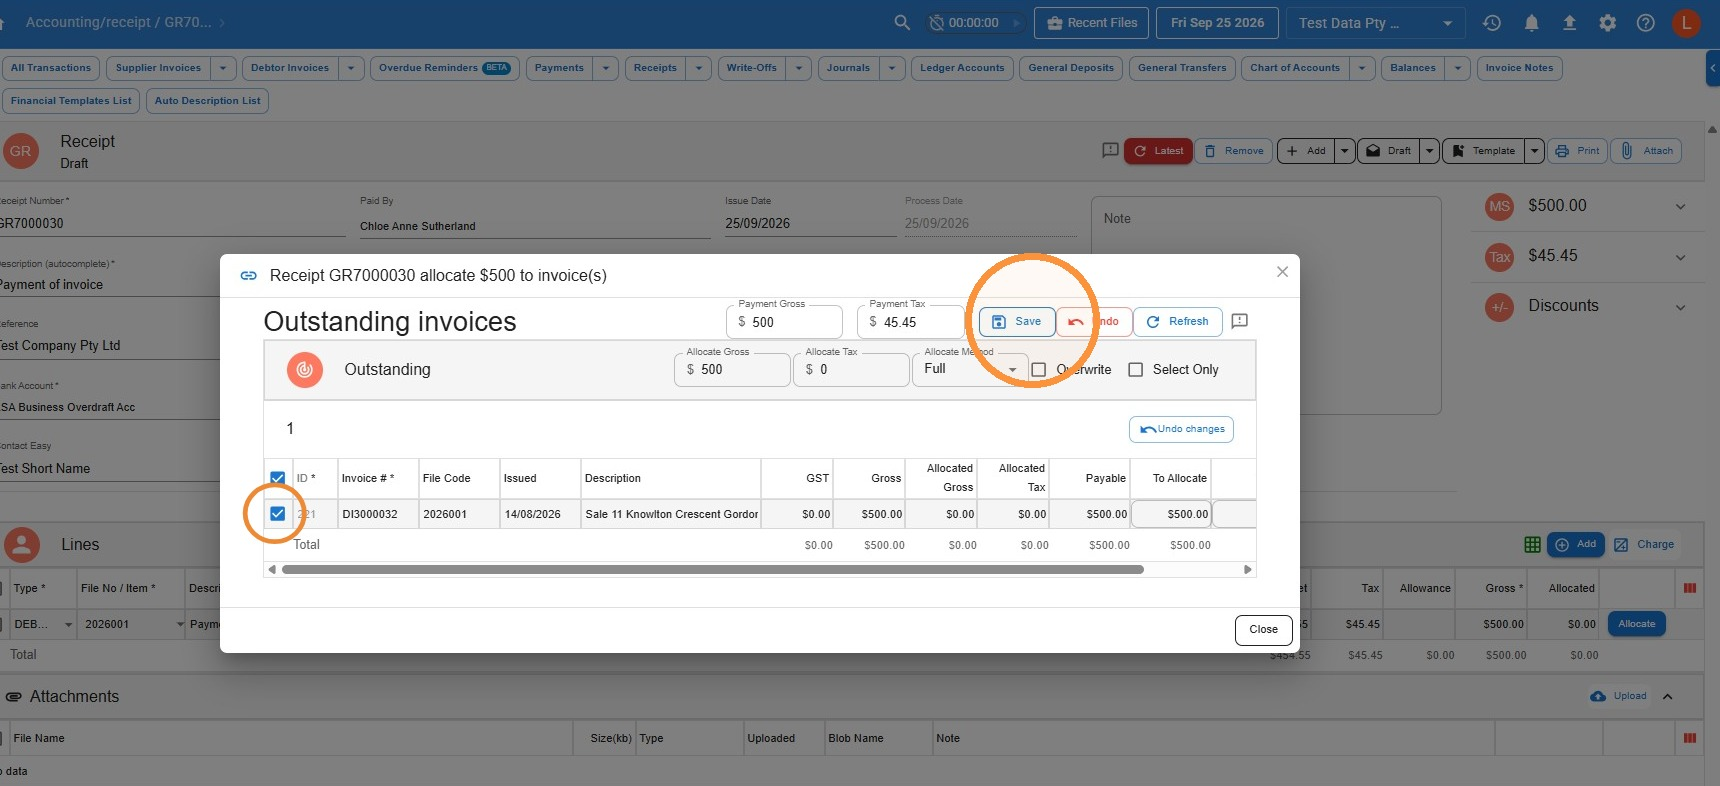
Check you’ve picked the right invoice. Some files — particularly General files — can show a long list of outstanding invoices. Take care to tick the one the client is actually paying.
- Once you’re finished, change the receipt’s status to Authorise using the dropdown arrow next to the status button at the top of the receipt.
Leave a Reply