
Adding a new GL code is straightforward, but the code only works correctly on your reports if its number and parent line up with the hierarchy already in place. This article walks through how the structure works, what each field does, and how to add a new code from scratch.
Where to find the Chart of Accounts
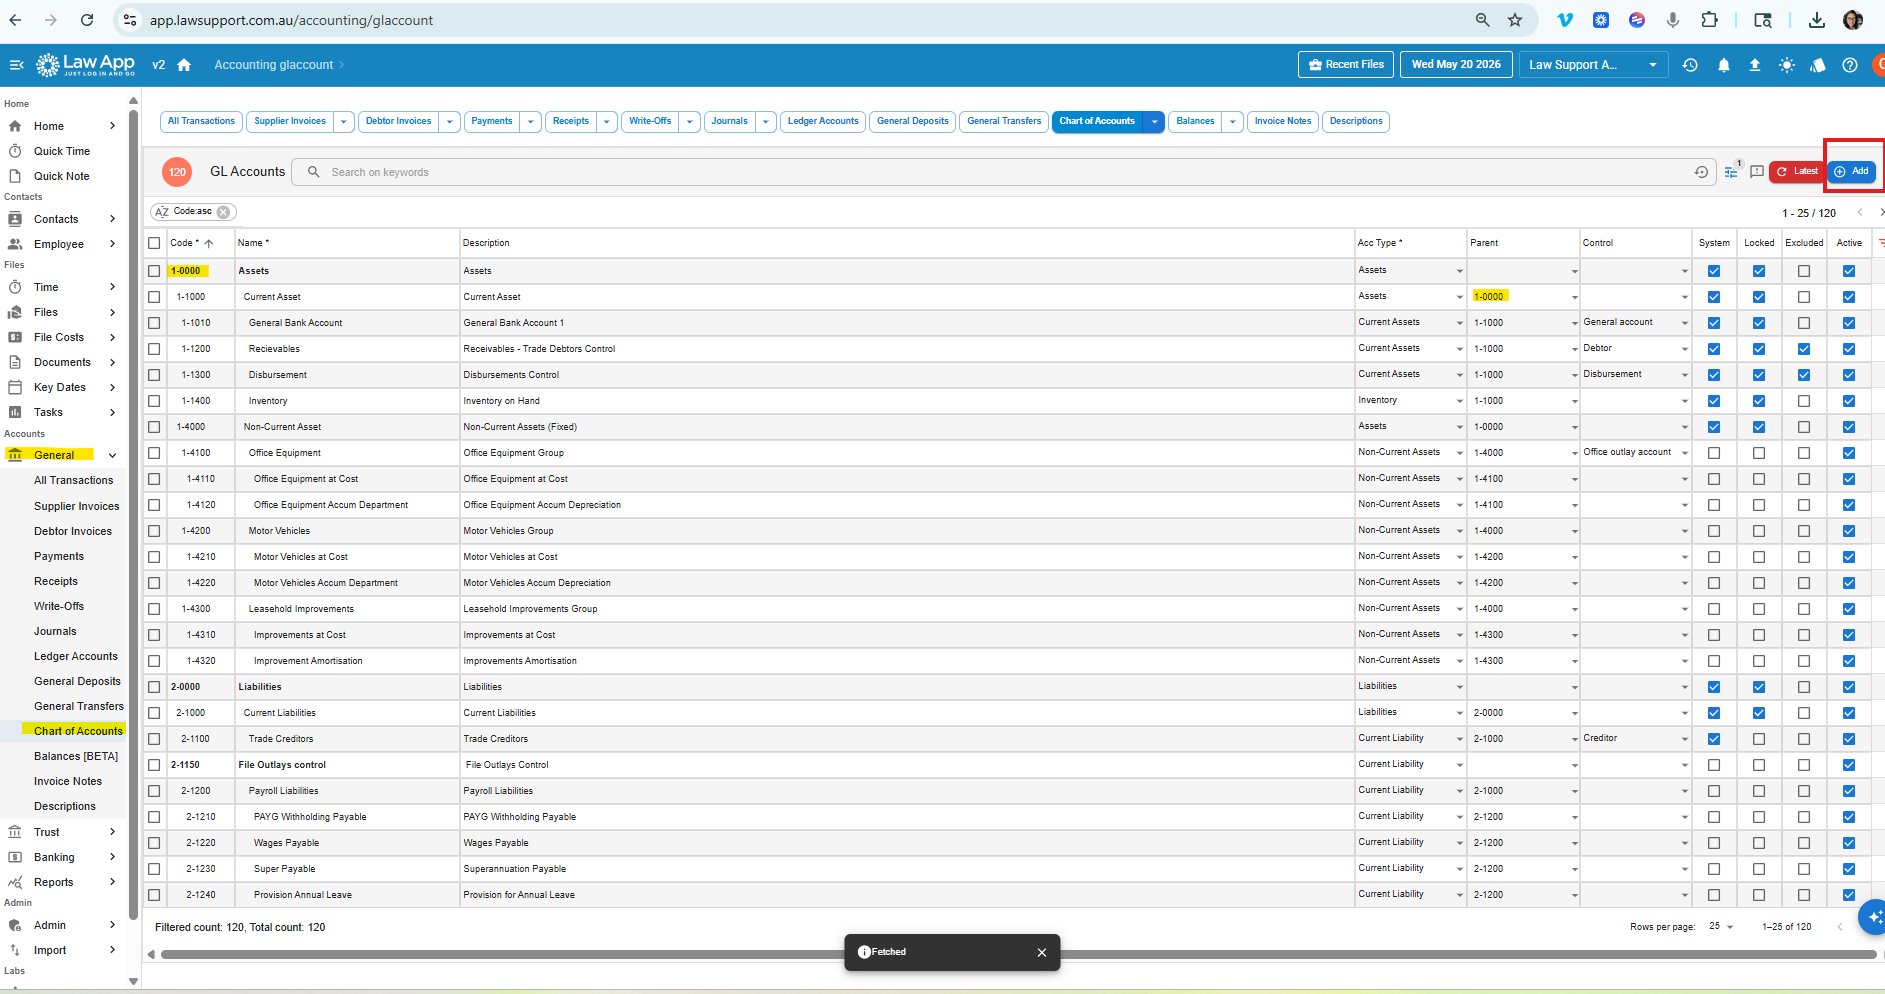
Go to Accounts > General > Chart of Accounts. You’ll see every GL code in the firm, sorted by code number. The Add button is on the top right.
How the code hierarchy works
Every GL code sits in a three-level structure: a top-level header, a sub-header, and then the detail codes you actually post transactions to. This structure is what drives your Balance Sheet and Profit & Loss reports — totals roll up from the detail codes into the sub-headers, and from the sub-headers into the headers.
The code number tells the system where it sits:
Example — Expenses hierarchy
- 6-0000 Expenses — top-level header. No parent.
- 6-5000 Premises Expenses — sub-header. Parent is 6-0000.
- 6-5080 Security — detail code. Parent is 6-5000.
The numbering convention is the visual cue: codes ending in -0000 are top-level headers, codes ending in -X000 are sub-headers, and codes ending in any other number are detail codes that you actually use day-to-day.
Ordering within each parent
Most firms keep their codes in alphabetical order within each sub-header — for example, under Premises Expenses you might see Cleaning, Electricity, Rent, Security with code numbers going up in the same order. It’s not compulsory, but it makes codes easier to find in dropdowns and easier to read on reports. When you’re slotting a new code in, decide on the position first, then pick a number that fits between the codes either side.
What each field means
When you add or edit a code, you’ll see columns for System, Locked, Excluded and Active. Here’s what they do:
Cannot be posted to
Reserved for control accounts (Debtor, Creditor, Disbursement, etc.) where the system manages the balance automatically. You can’t manually code transactions to a locked account.
Hidden from most GL pickers
The code still exists and still works in the background, but it won’t appear in most GL code dropdowns when staff are coding transactions. Useful for legacy codes you want to keep but not use.
For a normal GL code that staff will post to day-to-day, both Locked and Excluded should be unticked. Active must always be ticked, otherwise the code won’t appear anywhere at all.
Adding a new GL code
Once you’ve worked out where the new code sits in the hierarchy and what number to give it, adding it is quick.
- Go to Accounts > General > Chart of Accounts.
- Click Add in the top right.
- Enter the Code — for example 6-5080.
- Enter the Name — for example Security.
- Enter the Description — for example Door and surveillance services for office. This is what shows on reports, so write it for the people reading them.
- Select the Acc Type — match the type of the parent (Expense, Current Asset, Current Liability, etc.).
- Select the Parent — for our Security example, that’s 6-5000 Premises Expenses.
- Leave System, Locked and Excluded unticked for a normal code.
- Tick Active.
- Save.
Quick recap
Three things to get right every time you add a code:
The non-negotiables
- Parent — every code must have one, except the x-0000 top-level headers.
- Active — must be ticked, or the code won’t appear anywhere.
- Locked and Excluded — both unticked for normal codes. Locked is for control accounts only.
Leave a Reply